Day: June 10, 2025
How to Deploy a Node.js App to Azure App Service with CI/CD
Option A: Code-Based Deployment (Recommended for Most Users)
If you don’t need a custom runtime or container, Azure’s built-in code deployment option is the fastest and easiest way to host production-ready Node.js applications. Azure provides a managed environment with runtime support for Node.js, and you can automate everything using Azure DevOps.
This option is ideal for most production use cases that:
- Use standard versions of Node.js (or Python, .NET, PHP)
- Don’t require custom OS packages or NGINX proxies
- Want quick setup and managed scaling
This section covers everything you need to deploy your Node.js app using Azure’s built-in runtime and set it up for CI/CD in Azure DevOps.
Step 0: Prerequisites and Permissions
Before starting, make sure you have the following:
- Azure Subscription with Contributor access
- Azure CLI installed and authenticated (
az login) - Azure DevOps Organization & Project
- Code repository in Azure Repos or GitHub (we’ll use Azure Repos)
- A user with the following roles:
- Contributor on the Azure resource group
- Project Administrator or Build Administrator in Azure DevOps (to create pipelines and service connections)
Step 1: Create an Azure Resource Group
az group create --name prod-rg --location eastusStep 2: Choose Your Deployment Model
There are two main ways to deploy to Azure App Service:
- Code-based: Azure manages the runtime (Node.js, Python, etc.)
- Docker-based: You provide a custom Docker image
Option A: Code-Based App Service Plan
az appservice plan create \
  --name prod-app-plan \
  --resource-group prod-rg \
  --sku P1V2 \
  --is-linux
az appservice plan create: Command to create a new App Service Plan (defines compute resources)--name prod-app-plan: The name of the service plan to create--resource-group prod-rg: The name of the resource group where the plan will reside--sku P1V2: The pricing tier (Premium V2, small instance). Includes autoscaling, staging slots, etc.--is-linux: Specifies the operating system for the app as Linux (required for Node.js apps)
Create Web App with Built-In Node Runtime
az webapp create \
  --name my-prod-node-app \
  --resource-group prod-rg \
  --plan prod-app-plan \
  --runtime "NODE|18-lts"
az webapp create: Creates the actual web app that will host your code--name my-prod-node-app: The globally unique name of your app (will be part of the public URL)--resource-group prod-rg: Assigns the app to the specified resource group--plan prod-app-plan: Binds the app to the previously created compute plan--runtime "NODE|18-lts": Specifies the Node.js runtime version (Node 18, LTS channel)
Option B: Docker-Based App Service Plan
az appservice plan create \
  --name prod-docker-plan \
  --resource-group prod-rg \
  --sku P1V2 \
--is-linux- Same as Option A — this creates a Linux-based Premium plan
- You can reuse this compute plan for one or more container-based apps
Create Web App Using Custom Docker Image
az webapp create \
  --name my-docker-app \
  --resource-group prod-rg \
  --plan prod-docker-plan \
  --deployment-container-image-name myregistry.azurecr.io/myapp:latest
--name my-docker-app: A unique name for your app--resource-group prod-rg: Associates this web app with your resource group--plan prod-docker-plan: Assigns the app to your App Service Plan--deployment-container-image-name: Specifies the full path to your Docker image (from ACR or Docker Hub)
Use this if you’re building a containerized app and want full control of the runtime environment. Make sure your image is accessible in Azure Container Registry or Docker Hub.
Step 3: Prepare Your Azure DevOps Project
- Navigate to https://dev.azure.com
- Create a new Project (e.g.,
ProdWebApp) - Go to Repos and push your Node.js code:
git remote add origin https://dev.azure.com/<org>/<project>/_git/my-prod-node-app
git push -u origin main
Step 4: Create a Service Connection
- In DevOps, go to Project Settings > Service connections
- Click New service connection > Azure Resource Manager
- Choose Service principal (automatic)
- Select the correct subscription and resource group
- Name it something like
AzureProdConnection
Step 5: Create the CI/CD Pipeline
Add the following to your repository root as .azure-pipelines.yml.
Code-Based YAML Example
trigger:
  branches:
    include:
      - main

pool:
  vmImage: 'ubuntu-latest'

stages:
- stage: Build
  jobs:
  - job: BuildApp
    steps:
    - task: NodeTool@0
      inputs:
        versionSpec: '18.x'

    - script: |
        npm install
        npm run build
      displayName: 'Install and Build'

    - task: ArchiveFiles@2
      inputs:
        rootFolderOrFile: '$(System.DefaultWorkingDirectory)'
        archiveFile: '$(Build.ArtifactStagingDirectory)/app.zip'
        includeRootFolder: false

    - task: PublishBuildArtifacts@1
      inputs:
        PathtoPublish: '$(Build.ArtifactStagingDirectory)'
        ArtifactName: 'drop'

- stage: Deploy
  dependsOn: Build
  jobs:
  - deployment: DeployWebApp
    environment: 'production'
    strategy:
      runOnce:
        deploy:
          steps:
          - task: AzureWebApp@1
            inputs:
              azureSubscription: 'AzureProdConnection'
              appName: 'my-prod-node-app'
              package: '$(Pipeline.Workspace)/drop/app.zip'
Docker-Based YAML Example
trigger:
  branches:
    include:
      - main

pool:
  vmImage: 'ubuntu-latest'

stages:
- stage: Deploy
  jobs:
  - deployment: DeployContainer
    environment: 'production'
    strategy:
      runOnce:
        deploy:
          steps:
          - task: AzureWebAppContainer@1
            inputs:
              azureSubscription: 'AzureProdConnection'
              appName: 'my-docker-app'
              containers: 'myregistry.azurecr.io/myapp:latest'
Step 6: Configure Pipeline and Approvals
- Go to Pipelines > Pipelines > New
- Select Azure Repos Git, choose your repo, and point to the YAML file
- Click Run Pipeline
To add manual approvals:
- Go to Pipelines > Environments
- Create a new environment named
production - Link the deploy stage to this environment in your YAML:
environment: 'production'- Enable approval and checks for production safety
Step 7: Store Secrets (Optional but Recommended)
- Go to Pipelines > Library
- Create a new Variable Group (e.g.,
ProdSecrets) - Add variables like
DB_PASSWORD,API_KEY, and mark them as secret - Reference them in pipeline YAML:
variables:
  - group: 'ProdSecrets'
Troubleshooting Tips
| Problem | Solution |
|---|---|
| Resource group not found | Make sure you created it with az group create |
| Runtime version not supported | Run az webapp list-runtimes --os linux to see current options |
| Pipeline can’t deploy | Check if the service connection has Contributor role on the resource group |
| Build fails | Make sure you have a valid package.json and build script |
Summary
By the end of this process, you will have:
- A production-grade Node.js app running on Azure App Service
- A scalable App Service Plan using Linux and Premium V2 resources
- A secure CI/CD pipeline that automatically builds and deploys from Azure Repos
- Manual approval gates and secrets management for enhanced safety
- The option to deploy using either Azure-managed runtimes or fully custom Docker containers
This setup is ideal for fast-moving
How to Deploy a Custom Rocky Linux Image in Azure with cloud-init
Need a clean, hardened Rocky Linux image in Azure — ready to go with your tools and configs? Here’s how to use Packer to build a Rocky image and then deploy it with cloud-init using Azure CLI.
Step 0: Install Azure CLI
Before deploying anything, make sure you have Azure CLI installed.
Linux/macOS:
curl -sL https://aka.ms/InstallAzureCLIDeb | sudo bashWindows:
Download and install from https://aka.ms/installazurecli
Login:
az loginThis opens a browser window for authentication. Once done, you’re ready to deploy.
Step 1: Build a Custom Image with Packer
Create a Packer template with Azure as the target and make sure cloud-init is installed during provisioning.
Packer Template Example (rocky-azure.pkr.hcl):
source "azure-arm" "rocky" {
  client_id       = var.client_id
  client_secret   = var.client_secret
  tenant_id       = var.tenant_id
  subscription_id = var.subscription_id

  managed_image_resource_group_name = "packer-images"
  managed_image_name                = "rocky-image"
  location                          = "East US"
  os_type                           = "Linux"
  image_publisher                   = "OpenLogic"
  image_offer                       = "CentOS"
  image_sku                         = "8_2"
  vm_size                           = "Standard_B1s"
  build_resource_group_name         = "packer-temp"
}

build {
  sources = ["source.azure-arm.rocky"]

  provisioner "shell" {
    inline = [
      "dnf install -y cloud-init",
      "systemctl enable cloud-init"
    ]
  }
}
Variables File (variables.pkrvars.hcl):
client_id       = "xxxxxxxx-xxxx-xxxx-xxxx-xxxxxxxxxxxx"
client_secret   = "your-secret"
tenant_id       = "your-tenant-id"
subscription_id = "your-subscription-id"
Build the Image:
packer init .
packer build -var-file=variables.pkrvars.hcl .
Step 2: Prepare a Cloud-init Script
This will run the first time the VM boots and set things up.
cloud-init.yaml:
#cloud-config
hostname: rocky-demo
users:
  - name: devops
    sudo: ALL=(ALL) NOPASSWD:ALL
    groups: users, admin
    shell: /bin/bash
    ssh_authorized_keys:
      - ssh-rsa AAAA...your_key_here...

runcmd:
  - yum update -y
  - echo 'Cloud-init completed!' > /etc/motd
Step 3: Deploy the VM in Azure
Use the Azure CLI to deploy a VM from the managed image and inject the cloud-init file.
az vm create \
  --resource-group my-rg \
  --name rocky-vm \
  --image /subscriptions/<SUB_ID>/resourceGroups/packer-images/providers/Microsoft.Compute/images/rocky-image \
  --admin-username azureuser \
  --generate-ssh-keys \
  --custom-data cloud-init.yaml
Step 4: Verify Cloud-init Ran
ssh azureuser@<public-ip>
cat /etc/motd
You should see:
Cloud-init completed!Recap
- Install Azure CLI and authenticate with
az login - Packer creates a reusable Rocky image with
cloud-initpreinstalled - Cloud-init configures the VM at first boot using a YAML script
- Azure CLI deploys the VM and injects custom setup
By combining Packer and cloud-init, you ensure your Azure VMs are fast, consistent, and ready from the moment they boot.
Automate Rocky Linux Image Creation in Azure Using Packer
Spinning up clean, custom Rocky Linux VMs in Azure doesn’t have to involve manual configuration or portal clicks. With HashiCorp Packer, you can create, configure, and publish VM images to your Azure subscription automatically.
What You’ll Need
- Packer installed
- Azure CLI (
az login) - Azure subscription & resource group
- Azure Service Principal credentials
Step 1: Install Azure CLI
You need the Azure CLI to authenticate and manage resources.
On Linux/macOS:
curl -sL https://aka.ms/InstallAzureCLIDeb | sudo bashOn Windows:
Download and install from https://aka.ms/installazurecli
Step 2: Login to Azure
az loginThis will open a browser window for you to authenticate your account.
Step 3: Set the Default Subscription (if you have more than one)
az account set --subscription "SUBSCRIPTION_NAME_OR_ID"Step 4: Create a Resource Group for Images
az group create --name packer-images --location eastusStep 5: Create a Service Principal for Packer
az ad sp create-for-rbac \
  --role="Contributor" \
  --scopes="/subscriptions/<your-subscription-id>" \
  --name "packer-service-principal"
This will return the client_id, client_secret, tenant_id, and subscription_id needed for your variables file.
Step 6: Write the Packer Template (rocky-azure.pkr.hcl)
variable "client_id" {}
variable "client_secret" {}
variable "tenant_id" {}
variable "subscription_id" {}

source "azure-arm" "rocky" {
  client_id       = var.client_id
  client_secret   = var.client_secret
  tenant_id       = var.tenant_id
  subscription_id = var.subscription_id

  managed_image_resource_group_name = "packer-images"
  managed_image_name                = "rocky-image"

  os_type             = "Linux"
  image_publisher     = "OpenLogic"
  image_offer         = "CentOS"
  image_sku           = "8_2"
  location            = "East US"
  vm_size             = "Standard_B1s"

  capture_container_name    = "images"
  capture_name_prefix       = "rocky-linux"
  build_resource_group_name = "packer-temp"
}

build {
  sources = ["source.azure-arm.rocky"]

  provisioner "shell" {
    inline = [
      "sudo dnf update -y",
      "sudo dnf install epel-release -y"
    ]
  }
}
Step 7: Create a Variables File (variables.pkrvars.hcl)
client_id       = "xxxxxxxx-xxxx-xxxx-xxxx-xxxxxxxxxxxx"
client_secret   = "your-secret"
tenant_id       = "your-tenant-id"
subscription_id = "your-subscription-id"
Step 8: Run the Build
packer init .
packer build -var-file=variables.pkrvars.hcl .
Result
Your new custom Rocky Linux image will appear under your Azure resource group inside the Images section. From there, you can deploy it via the Azure Portal, CLI, Terraform, or ARM templates.
This process makes your infrastructure repeatable, versioned, and cloud-native. Use it to standardize dev environments or bake in security hardening from the start.
Automating Rocky Linux VM Creation with Packer + VirtualBox
If you’ve ever needed to spin up a clean, minimal Linux VM for testing or local automation — and got tired of clicking through the VirtualBox GUI — this guide is for you.
We’ll walk through how to use HashiCorp Packer and VirtualBox to automatically create a Rocky Linux 8.10 image, ready to boot and use — no Vagrant, no fluff.
What You’ll Need
- Packer installed
- VirtualBox installed
- Rocky Linux 8.10 ISO link (we use minimal)
- Basic understanding of Linux + VirtualBox
Project Structure
packer-rocky/
├── http/
│   └── ks.cfg       # Kickstart file for unattended install
├── rocky.pkr.hcl    # Main Packer config
Step 1: Create the Kickstart File (http/ks.cfg)
install
cdrom
lang en_US.UTF-8
keyboard us
network --bootproto=dhcp
rootpw packer
firewall --disabled
selinux --permissive
timezone UTC
bootloader --location=mbr
text
skipx
zerombr

# Partition disk
clearpart --all --initlabel
part /boot --fstype="xfs" --size=1024
part pv.01 --fstype="lvmpv" --grow
volgroup vg0 pv.01
logvol / --vgname=vg0 --fstype="xfs" --size=10240 --name=root
logvol swap --vgname=vg0 --size=4096 --name=swap

reboot

%packages --ignoremissing
@core
@base
%end

%post
# Post-install steps can be added here
%end
Step 2: Create the Packer HCL Template (rocky.pkr.hcl)
packer {
required_plugins {
virtualbox = {
version = ">= 1.0.5"
source = "github.com/hashicorp/virtualbox"
}
}
}
source "virtualbox-iso" "rocky" {
iso_url = "https://download.rockylinux.org/pub/rocky/8/isos/x86_64/Rocky-8.10-x86_64-minimal.iso"
iso_checksum = "2c735d3b0de921bd671a0e2d08461e3593ac84f64cdaef32e3ed56ba01f74f4b"
guest_os_type = "RedHat_64"
memory = 2048
cpus = 2
disk_size = 40000
vm_name = "rocky-8"
headless = false
guest_additions_mode = "disable"
boot_command = [" inst.text inst.ks=http://{{ .HTTPIP }}:{{ .HTTPPort }}/ks.cfg"]
http_directory = "http"
ssh_username = "root"
ssh_password = "packer"
ssh_timeout = "20m"
shutdown_command = "shutdown -P now"
vboxmanage = [
["modifyvm", "{{.Name}}", "--vram", "32"],
["modifyvm", "{{.Name}}", "--vrde", "off"],
["modifyvm", "{{.Name}}", "--ioapic", "off"],
["modifyvm", "{{.Name}}", "--pae", "off"],
["modifyvm", "{{.Name}}", "--nested-hw-virt", "on"]
]
}
build {
sources = ["source.virtualbox-iso.rocky"]
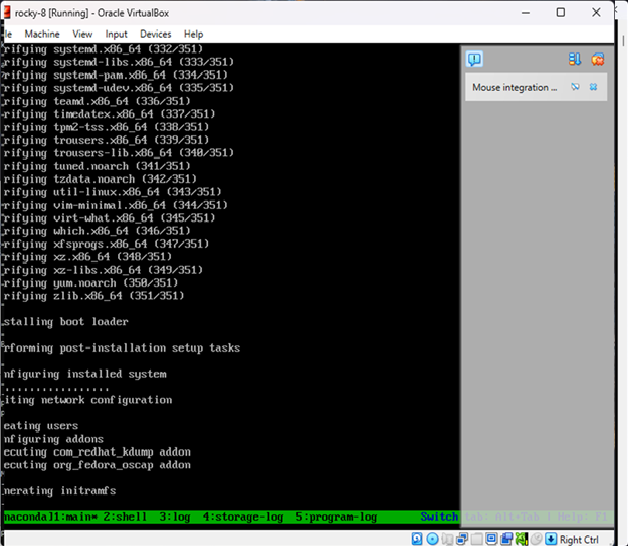
}Step 3: Run the Build
cd packer-rocky
packer init .
packer build .
Packer will:
- Download and boot the ISO in VirtualBox
- Serve the ks.cfg file over HTTP
- Automatically install Rocky Linux
- Power off the machine once complete
Result
You now have a fully installed Rocky Linux 8.10 image in VirtualBox — no manual setup required.