Author: admin
How to deploy multiple sites in IIS with Ansible
This was fun and interesting little project. Looks like nobody ever really got it working properly, so I decided to do it.
You can also upload your own custom web.config
- Ability to create multiple application pools per site.
- Set application pool identities
- Update IIS site paths to use a NAS location vs physical paths only
Note: You will likely have to add the firewall rules depending on how your network setup. I have written a windows playbook to handle the firewall stuff, but that will be in another post. You will also need to ensure winrm is configured properly on the windows machine for ansible to talk to it.
Ansible Operational Documentation:
Example file: hosts.dev, hosts.staging, hosts.prod
Note: If there is no group simply list the server outside grouping, the –limit flag will pick it
up.
Descriptions:
Operational Use:
Descriptions:
Operational Use:
Okay now here is where VSC is handy. You want to connect your visual studio code to the management server under your user.
Note: You don’t have to use VSC you can use good old nano or vim, but it’s a pain. Up to you.
Example files:
ansible/inventory/dev/host_vars/devops.nicktailor.win
Example Yaml Block :
domains:
– name: “First website”
host_header: ”
ip: ‘*’
iis_binding_port: ‘8082’
protocol: ‘http’
state: ‘absent’
certificate_hash: ”
certificate_store_name: ‘My’
iis_site_name: ‘Default Web Site’
iis_site_path: ‘C:\inetpub\wwwroot1′
iis_acl_path: ‘C:\inetpub\wwwroot1′
iis_site_state: absent
iis_site_port: ’80’
iis_site_id: ”
iis_site_ip: ‘*’
iis_site_ssl: false
iis_site_hostname: ‘*’
iis_site_parameters: ”
iis_site_state_start: stopped
iis_site_web_config: ”
iis_site_web_config_force: true
– name: “Second website”
host_header: ”
ip: ‘*’
iis_binding_port: ‘8081’
protocol: ‘http’
state: ‘present’
certificate_hash: ”
certificate_store_name: ‘My’
iis_site_name: ‘site2’
iis_acl_path: ‘C:\inetpub\wwwroot2′
iis_site_path: ‘C:\inetpub\wwwroot2′
iis_site_state: present
iis_site_port: ’80’
iis_site_id: ”
iis_site_ip: ‘*’
iis_site_ssl: false
iis_site_hostname: ‘*’
iis_site_parameters: ”
iis_site_state_start: started
iis_site_web_config: ”
iis_site_web_config_force: true
Running your playbook:
Example: of ansible/nickwiniis.yml
– hosts: all
gather_facts: yes
any_errors_fatal: true
roles:
– role: ansible-role-win-iis
Command:
ansible-playbook –i inventory/dev/hosts nickwiniis.yml -u nick –Kkb –limit=’devops.nicktailor.win‘
Successful example run of the book:
[ntailor@ansible.nicktailor.com]$ ansible–playbook –i hosts/dev nickwiniis.yml —limit=‘devops.nicktailor.win‘
PLAY [all] *****************************************************************************************************************************************************
TASK [Gathering Facts] *****************************************************************************************************************************************
ok: [devops.nicktailor.win]
TASK [ansible–role–win–iis : ensure iis is installed] **********************************************************************************************************
ok: [devops.nicktailor.win]
TASK [ansible–role–win–iis : configure app pool] ***************************************************************************************************************
ok: [devops.nicktailor.win]
TASK [ansible–role–win–iis : ensure path for site exists] ******************************************************************************************************
ok: [devops.nicktailor.win] => (item={‘name’: ‘First website’, ‘host_header‘: ”, ‘ip‘: ‘*’, ‘iis_binding_port‘: ‘8082’, ‘protocol’: ‘http’, ‘state’: ‘absent’, ‘certificate_hash‘: ”, ‘certificate_store_name‘: ‘My’, ‘iis_site_name‘: ‘Default Web Site’, ‘iis_site_path‘: ‘C:\\inetpub\\wwwroot1′, ‘iis_acl_path‘: ‘C:\\inetpub\\wwwroot1′, ‘iis_site_state‘: ‘absent’, ‘iis_site_port‘: ’80’, ‘iis_site_id‘: ”, ‘iis_site_ip‘: ‘*’, ‘iis_site_ssl‘: False, ‘iis_site_hostname‘: ‘*’, ‘iis_site_parameters‘: ”, ‘iis_site_state_start‘: ‘stopped’, ‘iis_site_web_config‘: ”, ‘iis_site_web_config_force‘: True})
ok: [devops.nicktailor.win] => (item={‘name’: ‘Second website’, ‘host_header‘: ”, ‘ip‘: ‘*’, ‘iis_binding_port‘: ‘8081’, ‘protocol’: ‘http’, ‘state’: ‘present’, ‘certificate_hash‘: ”, ‘certificate_store_name‘: ‘My’, ‘iis_site_name‘: ‘site2’, ‘iis_acl_path‘: ‘C:\\inetpub\\wwwroot2′, ‘iis_site_path‘: ‘C:\\inetpub\\wwwroot2′, ‘iis_site_state‘: ‘present’, ‘iis_site_port‘: ’80’, ‘iis_site_id‘: ”, ‘iis_site_ip‘: ‘*’, ‘iis_site_ssl‘: False, ‘iis_site_hostname‘: ‘*’, ‘iis_site_parameters‘: ”, ‘iis_site_state_start‘: ‘started’, ‘iis_site_web_config‘: ”, ‘iis_site_web_config_force‘: True})
TASK [ansible–role–win–iis : debug] ****************************************************************************************************************************
ok: [devops.nicktailor.win] => {
“path”: {
“changed”: false,
“msg“: “All items completed”,
“results”: [
{
“ansible_loop_var“: “item”,
“changed”: false,
“failed”: false,
“item”: {
“certificate_hash“: “”,
“certificate_store_name“: “My”,
“host_header“: “”,
“iis_acl_path“: “C:\\inetpub\\wwwroot1″,
“iis_binding_port“: “8082”,
“iis_site_hostname“: “*”,
“iis_site_id“: “”,
“iis_site_ip“: “*”,
“iis_site_name“: “Default Web Site”,
“iis_site_parameters“: “”,
“iis_site_path“: “C:\\inetpub\\wwwroot1″,
“iis_site_port“: “80”,
“iis_site_ssl“: false,
“iis_site_state“: “absent”,
“iis_site_state_start“: “stopped”,
“iis_site_web_config“: “”,
“iis_site_web_config_force“: true,
“ip“: “*”,
“name”: “First website”,
“protocol”: “http”,
“state”: “absent”
}
},
{
“ansible_loop_var“: “item”,
“changed”: false,
“failed”: false,
“item”: {
“certificate_hash“: “”,
“certificate_store_name“: “My”,
“host_header“: “”,
“iis_acl_path“: “C:\\inetpub\\wwwroot2″,
“iis_binding_port“: “8081”,
“iis_site_hostname“: “*”,
“iis_site_id“: “”,
“iis_site_ip“: “*”,
“iis_site_name“: “site2”,
“iis_site_parameters“: “”,
“iis_site_path“: “C:\\inetpub\\wwwroot2″,
“iis_site_port“: “80”,
“iis_site_ssl“: false,
“iis_site_state“: “present”,
“iis_site_state_start“: “started”,
“iis_site_web_config“: “”,
“iis_site_web_config_force“: true,
“ip“: “*”,
“name”: “Second website”,
“protocol”: “http”,
“state”: “present”
}
}
]
}
}
TASK [ansible–role–win–iis : allow iis group access to site path] **********************************************************************************************
ok: [devops.nicktailor.win] => (item={‘name’: ‘First website’, ‘host_header‘: ”, ‘ip‘: ‘*’, ‘iis_binding_port‘: ‘8082’, ‘protocol’: ‘http’, ‘state’: ‘absent’, ‘certificate_hash‘: ”, ‘certificate_store_name‘: ‘My’, ‘iis_site_name‘: ‘Default Web Site’, ‘iis_site_path‘: ‘C:\\inetpub\\wwwroot1′, ‘iis_acl_path‘: ‘C:\\inetpub\\wwwroot1′, ‘iis_site_state‘: ‘absent’, ‘iis_site_port‘: ’80’, ‘iis_site_id‘: ”, ‘iis_site_ip‘: ‘*’, ‘iis_site_ssl‘: False, ‘iis_site_hostname‘: ‘*’, ‘iis_site_parameters‘: ”, ‘iis_site_state_start‘: ‘stopped’, ‘iis_site_web_config‘: ”, ‘iis_site_web_config_force‘: True})
ok: [devops.nicktailor.win] => (item={‘name’: ‘Second website’, ‘host_header‘: ”, ‘ip‘: ‘*’, ‘iis_binding_port‘: ‘8081’, ‘protocol’: ‘http’, ‘state’: ‘present’, ‘certificate_hash‘: ”, ‘certificate_store_name‘: ‘My’, ‘iis_site_name‘: ‘site2’, ‘iis_acl_path‘: ‘C:\\inetpub\\wwwroot2′, ‘iis_site_path‘: ‘C:\\inetpub\\wwwroot2′, ‘iis_site_state‘: ‘present’, ‘iis_site_port‘: ’80’, ‘iis_site_id‘: ”, ‘iis_site_ip‘: ‘*’, ‘iis_site_ssl‘: False, ‘iis_site_hostname‘: ‘*’, ‘iis_site_parameters‘: ”, ‘iis_site_state_start‘: ‘started’, ‘iis_site_web_config‘: ”, ‘iis_site_web_config_force‘: True})
TASK [ansible–role–win–iis : debug] ****************************************************************************************************************************
ok: [devops.nicktailor.win] => {
“access”: {
“changed”: false,
“msg“: “All items completed”,
“results”: [
{
“ansible_loop_var“: “item”,
“changed”: false,
“failed”: false,
“item”: {
“certificate_hash“: “”,
“certificate_store_name“: “My”,
“host_header“: “”,
“iis_acl_path“: “C:\\inetpub\\wwwroot1″,
“iis_binding_port“: “8082”,
“iis_site_hostname“: “*”,
“iis_site_id“: “”,
“iis_site_ip“: “*”,
“iis_site_name“: “Default Web Site”,
“iis_site_parameters“: “”,
“iis_site_path“: “C:\\inetpub\\wwwroot1″,
“iis_site_port“: “80”,
“iis_site_ssl“: false,
“iis_site_state“: “absent”,
“iis_site_state_start“: “stopped”,
“iis_site_web_config“: “”,
“iis_site_web_config_force“: true,
“ip“: “*”,
“name”: “First website”,
“protocol”: “http”,
“state”: “absent”
}
},
{
“ansible_loop_var“: “item”,
“changed”: false,
“failed”: false,
“item”: {
“certificate_hash“: “”,
“certificate_store_name“: “My”,
“host_header“: “”,
“iis_acl_path“: “C:\\inetpub\\wwwroot2″,
“iis_binding_port“: “8081”,
“iis_site_hostname“: “*”,
“iis_site_id“: “”,
“iis_site_ip“: “*”,
“iis_site_name“: “site2”,
“iis_site_parameters“: “”,
“iis_site_path“: “C:\\inetpub\\wwwroot2″,
“iis_site_port“: “80”,
“iis_site_ssl“: false,
“iis_site_state“: “present”,
“iis_site_state_start“: “started”,
“iis_site_web_config“: “”,
“iis_site_web_config_force“: true,
“ip“: “*”,
“name”: “Second website”,
“protocol”: “http”,
“state”: “present”
}
}
]
}
}
TASK [ansible–role–win–iis : upload custom web.config from template] *******************************************************************************************
skipping: [devops.nicktailor.win] => (item={‘name’: ‘First website’, ‘host_header‘: ”, ‘ip‘: ‘*’, ‘iis_binding_port‘: ‘8082’, ‘protocol’: ‘http’, ‘state’: ‘absent’, ‘certificate_hash‘: ”, ‘certificate_store_name‘: ‘My’, ‘iis_site_name‘: ‘Default Web Site’, ‘iis_site_path‘: ‘C:\\inetpub\\wwwroot1′, ‘iis_acl_path‘: ‘C:\\inetpub\\wwwroot1′, ‘iis_site_state‘: ‘absent’, ‘iis_site_port‘: ’80’, ‘iis_site_id‘: ”, ‘iis_site_ip‘: ‘*’, ‘iis_site_ssl‘: False, ‘iis_site_hostname‘: ‘*’, ‘iis_site_parameters‘: ”, ‘iis_site_state_start‘: ‘stopped’, ‘iis_site_web_config‘: ”, ‘iis_site_web_config_force‘: True})
skipping: [devops.nicktailor.win] => (item={‘name’: ‘Second website’, ‘host_header‘: ”, ‘ip‘: ‘*’, ‘iis_binding_port‘: ‘8081’, ‘protocol’: ‘http’, ‘state’: ‘present’, ‘certificate_hash‘: ”, ‘certificate_store_name‘: ‘My’, ‘iis_site_name‘: ‘site2’, ‘iis_acl_path‘: ‘C:\\inetpub\\wwwroot2′, ‘iis_site_path‘: ‘C:\\inetpub\\wwwroot2′, ‘iis_site_state‘: ‘present’, ‘iis_site_port‘: ’80’, ‘iis_site_id‘: ”, ‘iis_site_ip‘: ‘*’, ‘iis_site_ssl‘: False, ‘iis_site_hostname‘: ‘*’, ‘iis_site_parameters‘: ”, ‘iis_site_state_start‘: ‘started’, ‘iis_site_web_config‘: ”, ‘iis_site_web_config_force‘: True})
TASK [ansible–role–win–iis : debug] ****************************************************************************************************************************
ok: [devops.nicktailor.win] => {
“startiis“: {
“changed”: false,
“msg“: “All items completed”,
“results”: [
{
“ansible_loop_var“: “item”,
“changed”: false,
“item”: {
“certificate_hash“: “”,
“certificate_store_name“: “My”,
“host_header“: “”,
“iis_acl_path“: “C:\\inetpub\\wwwroot1″,
“iis_binding_port“: “8082”,
“iis_site_hostname“: “*”,
“iis_site_id“: “”,
“iis_site_ip“: “*”,
“iis_site_name“: “Default Web Site”,
“iis_site_parameters“: “”,
“iis_site_path“: “C:\\inetpub\\wwwroot1″,
“iis_site_port“: “80”,
“iis_site_ssl“: false,
“iis_site_state“: “absent”,
“iis_site_state_start“: “stopped”,
“iis_site_web_config“: “”,
“iis_site_web_config_force“: true,
“ip“: “*”,
“name”: “First website”,
“protocol”: “http”,
“state”: “absent”
},
“skip_reason“: “Conditional result was False”,
“skipped”: true
},
{
“ansible_loop_var“: “item”,
“changed”: false,
“item”: {
“certificate_hash“: “”,
“certificate_store_name“: “My”,
“host_header“: “”,
“iis_acl_path“: “C:\\inetpub\\wwwroot2″,
“iis_binding_port“: “8081”,
“iis_site_hostname“: “*”,
“iis_site_id“: “”,
“iis_site_ip“: “*”,
“iis_site_name“: “site2”,
“iis_site_parameters“: “”,
“iis_site_path“: “C:\\inetpub\\wwwroot2″,
“iis_site_port“: “80”,
“iis_site_ssl“: false,
“iis_site_state“: “present”,
“iis_site_state_start“: “started”,
“iis_site_web_config“: “”,
“iis_site_web_config_force“: true,
“ip“: “*”,
“name”: “Second website”,
“protocol”: “http”,
“state”: “present”
},
“skip_reason“: “Conditional result was False”,
“skipped”: true
}
]
}
}
TASK [ansible–role–win–iis : configure site] *******************************************************************************************************************
changed: [devops.nicktailor.win] => (item={‘name’: ‘First website’, ‘host_header‘: ”, ‘ip‘: ‘*’, ‘iis_binding_port‘: ‘8082’, ‘protocol’: ‘http’, ‘state’: ‘absent’, ‘certificate_hash‘: ”, ‘certificate_store_name‘: ‘My’, ‘iis_site_name‘: ‘Default Web Site’, ‘iis_site_path‘: ‘C:\\inetpub\\wwwroot1′, ‘iis_acl_path‘: ‘C:\\inetpub\\wwwroot1′, ‘iis_site_state‘: ‘absent’, ‘iis_site_port‘: ’80’, ‘iis_site_id‘: ”, ‘iis_site_ip‘: ‘*’, ‘iis_site_ssl‘: False, ‘iis_site_hostname‘: ‘*’, ‘iis_site_parameters‘: ”, ‘iis_site_state_start‘: ‘stopped’, ‘iis_site_web_config‘: ”, ‘iis_site_web_config_force‘: True})
changed: [devops.nicktailor.win] => (item={‘name’: ‘Second website’, ‘host_header‘: ”, ‘ip‘: ‘*’, ‘iis_binding_port‘: ‘8081’, ‘protocol’: ‘http’, ‘state’: ‘present’, ‘certificate_hash‘: ”, ‘certificate_store_name‘: ‘My’, ‘iis_site_name‘: ‘site2’, ‘iis_acl_path‘: ‘C:\\inetpub\\wwwroot2′, ‘iis_site_path‘: ‘C:\\inetpub\\wwwroot2′, ‘iis_site_state‘: ‘present’, ‘iis_site_port‘: ’80’, ‘iis_site_id‘: ”, ‘iis_site_ip‘: ‘*’, ‘iis_site_ssl‘: False, ‘iis_site_hostname‘: ‘*’, ‘iis_site_parameters‘: ”, ‘iis_site_state_start‘: ‘started’, ‘iis_site_web_config‘: ”, ‘iis_site_web_config_force‘: True})
TASK [ansible–role–win–iis : debug] ****************************************************************************************************************************
ok: [devops.nicktailor.win] => {
“iis_site“: {
“changed”: true,
“msg“: “All items completed”,
“results”: [
{
“ansible_loop_var“: “item”,
“changed”: true,
“failed”: false,
“item”: {
“certificate_hash“: “”,
“certificate_store_name“: “My”,
“host_header“: “”,
“iis_acl_path“: “C:\\inetpub\\wwwroot1″,
“iis_binding_port“: “8082”,
“iis_site_hostname“: “*”,
“iis_site_id“: “”,
“iis_site_ip“: “*”,
“iis_site_name“: “Default Web Site”,
“iis_site_parameters“: “”,
“iis_site_path“: “C:\\inetpub\\wwwroot1″,
“iis_site_port“: “80”,
“iis_site_ssl“: false,
“iis_site_state“: “absent”,
“iis_site_state_start“: “stopped”,
“iis_site_web_config“: “”,
“iis_site_web_config_force“: true,
“ip“: “*”,
“name”: “First website”,
“protocol”: “http”,
“state”: “absent”
},
“site”: {
“ApplicationPool“: “DefaultAppPool“,
“Bindings”: [
“*:80:*“
],
“ID”: 1,
“Name”: “Default Web Site”,
“PhysicalPath“: “C:\\inetpub\\wwwroot1″,
“State”: “Stopped”
}
},
{
“ansible_loop_var“: “item”,
“changed”: true,
“failed”: false,
“item”: {
“certificate_hash“: “”,
“certificate_store_name“: “My”,
“host_header“: “”,
“iis_acl_path“: “C:\\inetpub\\wwwroot2″,
“iis_binding_port“: “8081”,
“iis_site_hostname“: “*”,
“iis_site_id“: “”,
“iis_site_ip“: “*”,
“iis_site_name“: “site2”,
“iis_site_parameters“: “”,
“iis_site_path“: “C:\\inetpub\\wwwroot2″,
“iis_site_port“: “80”,
“iis_site_ssl“: false,
“iis_site_state“: “present”,
“iis_site_state_start“: “started”,
“iis_site_web_config“: “”,
“iis_site_web_config_force“: true,
“ip“: “*”,
“name”: “Second website”,
“protocol”: “http”,
“state”: “present”
},
“site”: {
“ApplicationPool“: “DefaultAppPool“,
“Bindings”: [
“*:80:*“
],
“ID”: 2,
“Name”: “site2”,
“PhysicalPath“: “C:\\inetpub\\wwwroot2″,
“State”: “Started”
}
}
]
}
}
TASK [ansible–role–win–iis : configure site bindings] **********************************************************************************************************
ok: [devops.nicktailor.win] => (item={‘name’: ‘First website’, ‘host_header‘: ”, ‘ip‘: ‘*’, ‘iis_binding_port‘: ‘8082’, ‘protocol’: ‘http’, ‘state’: ‘absent’, ‘certificate_hash‘: ”, ‘certificate_store_name‘: ‘My’, ‘iis_site_name‘: ‘Default Web Site’, ‘iis_site_path‘: ‘C:\\inetpub\\wwwroot1′, ‘iis_acl_path‘: ‘C:\\inetpub\\wwwroot1′, ‘iis_site_state‘: ‘absent’, ‘iis_site_port‘: ’80’, ‘iis_site_id‘: ”, ‘iis_site_ip‘: ‘*’, ‘iis_site_ssl‘: False, ‘iis_site_hostname‘: ‘*’, ‘iis_site_parameters‘: ”, ‘iis_site_state_start‘: ‘stopped’, ‘iis_site_web_config‘: ”, ‘iis_site_web_config_force‘: True})
changed: [devops.nicktailor.win] => (item={‘name’: ‘Second website’, ‘host_header‘: ”, ‘ip‘: ‘*’, ‘iis_binding_port‘: ‘8081’, ‘protocol’: ‘http’, ‘state’: ‘present’, ‘certificate_hash‘: ”, ‘certificate_store_name‘: ‘My’, ‘iis_site_name‘: ‘site2’, ‘iis_acl_path‘: ‘C:\\inetpub\\wwwroot2′, ‘iis_site_path‘: ‘C:\\inetpub\\wwwroot2′, ‘iis_site_state‘: ‘present’, ‘iis_site_port‘: ’80’, ‘iis_site_id‘: ”, ‘iis_site_ip‘: ‘*’, ‘iis_site_ssl‘: False, ‘iis_site_hostname‘: ‘*’, ‘iis_site_parameters‘: ”, ‘iis_site_state_start‘: ‘started’, ‘iis_site_web_config‘: ”, ‘iis_site_web_config_force‘: True})
TASK [ansible–role–win–iis : debug] ****************************************************************************************************************************
ok: [devops.nicktailor.win] => {
“startiis2”: {
“changed”: true,
“msg“: “All items completed”,
“results”: [
{
“ansible_loop_var“: “item”,
“changed”: false,
“failed”: false,
“item”: {
“certificate_hash“: “”,
“certificate_store_name“: “My”,
“host_header“: “”,
“iis_acl_path“: “C:\\inetpub\\wwwroot1″,
“iis_binding_port“: “8082”,
“iis_site_hostname“: “*”,
“iis_site_id“: “”,
“iis_site_ip“: “*”,
“iis_site_name“: “Default Web Site”,
“iis_site_parameters“: “”,
“iis_site_path“: “C:\\inetpub\\wwwroot1″,
“iis_site_port“: “80”,
“iis_site_ssl“: false,
“iis_site_state“: “absent”,
“iis_site_state_start“: “stopped”,
“iis_site_web_config“: “”,
“iis_site_web_config_force“: true,
“ip“: “*”,
“name”: “First website”,
“protocol”: “http”,
“state”: “absent”
}
},
{
“ansible_loop_var“: “item”,
“binding_info“: {
“bindingInformation“: “*:8081:”,
“certificateHash“: “”,
“certificateStoreName“: “”,
“hostheader“: “”,
“ip“: “*”,
“port”: 8081,
“protocol”: “http”,
“sslFlags“: 0
},
“changed”: true,
“failed”: false,
“item”: {
“certificate_hash“: “”,
“certificate_store_name“: “My”,
“host_header“: “”,
“iis_acl_path“: “C:\\inetpub\\wwwroot2″,
“iis_binding_port“: “8081”,
“iis_site_hostname“: “*”,
“iis_site_id“: “”,
“iis_site_ip“: “*”,
“iis_site_name“: “site2”,
“iis_site_parameters“: “”,
“iis_site_path“: “C:\\inetpub\\wwwroot2″,
“iis_site_port“: “80”,
“iis_site_ssl“: false,
“iis_site_state“: “present”,
“iis_site_state_start“: “started”,
“iis_site_web_config“: “”,
“iis_site_web_config_force“: true,
“ip“: “*”,
“name”: “Second website”,
“protocol”: “http”,
“state”: “present”
},
“operation_type“: “added”,
“website_state“: “Started”
}
]
}
}
RUNNING HANDLER [ansible–role–win–iis : restart iis] ***********************************************************************************************************
changed: [devops.nicktailor.win]
PLAY RECAP *****************************************************************************************************************************************************
devops.nicktailor.win : ok=13 changed=3 unreachable=0 failed=0 skipped=1 rescued=0 ignored=0

Now you could write in to copy an test index.html file, but just to show it works. I manually created the index.html
Test:
[ansible.nicktailor.com]$ curl -k http://devops.nicktailor.win
YAY THis works!
How to pass an API key with Ansible
https://chronosphere.io/ – Third Party Cloud Monitoring Solution
Chronocollector: – https://github.com/Perfect10NickTailor/chronocollector
This role deploys the chronocollector management service which sends the data to domain.chronosphere.io For those of you who don’t know what it is. Its basically a cloud monitoring tool that scrapes data on your instances and then you can create dashboards or even export the data to promethus to make it look pretty and easy to read. You will likely pay for subscription, they will give you a subdomain which becomes your gateway address (domain.chronosphere.io)
Special note: You then need to deploy the node_exporter to push to the hosts you want scraped. That is a separate playbook and stupid easy.
#nowthatsjustfunny: So its debatable on how to approach passing {{ api_keys }} in a scalable and secure way. A lot of people create an “ansible vault encrypted variable”. This is so that when they push their code to their git repos. The {{ api_key }} isn’t exposed to someone simply glancing by the code. The issue with this approach is now you have to remember a vault password to pass to ansible, so it can decrypt the {{ api_key }} to pass, inorder for it to work when you run the playbook.(LAME)
#nowthatsjustcool: So just for the purposes of this post and for fun. I wrote it so that you can simply pass the {{ api_key }} during runtime. This way instead of being prompted for the vault-pass, you are prompted for the api_key to pass as a variable when you run the book. This gets rid of the need to setup a encrypted variable in your code entirely. Everyone has their own way of doing things, but I tend to think outside the box, so it always way more fun to be different in how you think.
Ansible Operational Documentation
How to use this role:
Example file: hosts.dev or hosts.staging
Running your playbook:
Example: of ansible/chronocollector.yml
– hosts: all
gather_facts: no
vars_prompt:
– name: api_key
prompt: Enter the API key
roles:
– role: chronocollector
Command:
ansible-playbook -i inventory/dev/hosts.dev chronocollector.yml -u nickadmin -Kkb –ask-become –limit=’testmachine3′
Successful run:
Notice: It asks you for the API key at runtime.
ntailor@jumphost:~/ansible2$ ansible-playbook -i ansible/inventory/dev/hosts.dev chronocollector.yml -u nicktadmin -Kkb –ask-become –limit=’testmachine3′
SSH password:
BECOME password[defaults to SSH password]:
Enter the API key:
PLAY [all] ***************************************************************************************************************************************************************************************************************
TASK [chronocollector : download node collector] *************************************************************************************************************************************************************************
ok: [testmachine3]
TASK [chronocollector : move collector to /usr/local/bin] ****************************************************************************************************************************************************************
ok: [testmachine3]
TASK [chronocollector : mkdir directory /etc/chronocollector] ************************************************************************************************************************************************************
ok: [testmachine3]
TASK [chronocollector : Copy default config.yml to /etc/chronocollector/] ************************************************************************************************************************************************
ok: [testmachine3]
TASK [chronocollector : Touch again the same file, but do not change times this makes the task idempotent] ***************************************************************************************************************
changed: [testmachine3]
TASK [chronocollector : Ensure API key is present in config file] ********************************************************************************************************************************************************
changed: [testmachine3]
TASK [chronocollector : Change file ownership, group and permissions apitoken file to secure it from prying eyes other than root] ****************************************************************************************
changed: [testmachine3]
TASK [chronocollector : Check that the service file /etc/systemd/system/collector.service exists] ************************************************************************************************************************
ok: [testmachine3]
TASK [chronocollector : Include add systemd task if service file does not exist] *****************************************************************************************************************************************
included: ansible/roles/chronocollector/tasks/systemd.yml for testmachine3
TASK [chronocollector : Create startup file for collector in systemd] ****************************************************************************************************************************************************
changed: [testmachine3]
TASK [chronocollector : Create systemd collector.service] ****************************************************************************************************************************************************************
changed: [testmachine3]
TASK [chronocollector : check whether custom line exists] ****************************************************************************************************************************************************************
changed: [testmachine3]
TASK [chronocollector : Start Collector Service via systemd] *************************************************************************************************************************************************************
changed: [testmachine3]
TASK [chronocollector : Show status of collector from systemd] ***********************************************************************************************************************************************************
changed: [testmachine3]
TASK [chronocollector : debug] *******************************************************************************************************************************************************************************************
ok: [testmachine3] => {
“status.stdout”: ” Active: failed (Result: exit-code) since Thu 2022-05-19 10:31:49 BST; 315ms ago”
}
PLAY RECAP ***************************************************************************************************************************************************************************************************************
testmachine3 : ok=15 changed=8 unreachable=0 failed=0 skipped=0 rescued=0 ignored=0
How to deploy Netplan with Ansible
Ansible-Netplan: – https://github.com/Perfect10NickTailor/ansible-netplan
Netplan.io- what is it is? Basically yaml files to deploy network configurations in a scalable manner by Ubuntu
How to use this role:
Example file: hosts.dev, hosts.staging, hosts.prod
Note: If there is no group simply list the server outside grouping, the –limit flag will pick it
up.
Descriptions:
Operational Use:
Okay now here is where VSC is handy. You want to connect your visual studio code to the management server under your user. I have provided a link which shows you how to setup your keys and get VSC working with it.
Note: You don’t have to use VSC you can use good old nano or vim, but it’s a pain. Up to you.
https://medium.com/@sujaypillai/connect-to-your-remote-servers-from-visual-studio-code-eb5a5875e348
ansible/inventory/dev/host_var$ testmachine1 (with Bonding)
—
# testmachine1 netplan config
# This is the network for testmachine1 with network bonding
netplan_configuration:
network:
bonds:
bond0:
interfaces:
– ens1f0
– ens1f1
parameters:
mode: balance-rr
ethernets:
eno1:
dhcp4: false
eno2:
dhcp4: false
ens1f0: {}
ens1f1: {}
version: 2
vlans:
vlan.180:
id: 180
link: bond0
# dhcp4: false
# dhcp6: false
vlan.3200:
id: 3200
link: bond0
# dhcp4: false
# dhcp6: false
vlan.3300:
id: 3300
link: bond0
# dhcp4: false
# dhcp6: false
bridges:
br200:
interfaces: [ vlan.200 ]
addresses: [ 192.168.50.9/24 ]
gateway4: 192.168.50.1
nameservers:
addresses: [ 8.8.8.8,8.8.4.8 ]
search: [ nicktailor.com ]
dhcp4: false
dhcp6: false
br3000:
interfaces: [ vlan.3000 ]
dhcp4: false
dhcp6: false
br3200:
interfaces: [ vlan.3200 ]
dhcp4: false
dhcp6: false
Example files:
ansible/inventory/dev/host_var$ testmachine1 (without Bonding)
Example Yaml Block :
#testmachine1
netplan_configuration:
network:
version: 2
renderer: networkd
ethernets:
eno1:
dhcp4: false
dhcp6: false
eno2:
dhcp4: false
dhcp6: false
bridges:
br0:
interfaces: [ eno1 ]
dhcp4: false
dhcp6: false
br1:
interfaces: [ eno2 ]
dhcp4: false
dhcp6: false
br1110:
interfaces: [ vlan1110 ]
dhcp4: false
dhcp6: false
addresses: [ 172.16.52.10/26 ]
gateway4: 172.17.52.1
nameservers:
addresses: [ 8.8.8.8,8.8.4.8 ]
br600:
interfaces: [ vlan600 ]
dhcp4: false
dhcp6: false
addresses: [ 192.168.0.34/24 ]
br800:
interfaces: [ vlan800 ]
dhcp4: false
dhcp6: false
br802:
interfaces: [ vlan802 ]
dhcp4: false
dhcp6: false
br801:
interfaces: [ vlan801 ]
dhcp4: false
dhcp6: false
vlans:
vlan600:
id: 600
link: br0
dhcp4: false
dhcp6: false
vlan800:
id: 800
link: br1
dhcp4: false
dhcp6: false
vlan801:
id: 801
link: br1
dhcp4: false
dhcp6: false
vlan802:
id: 802
link: br1
dhcp4: false
dhcp6: false
Example: of ansible/deploynetplan.yml
– hosts: all
gather_facts: yes
any_errors_fatal: true
roles:
– role: ansible-netplan
netplan_enabled: true
ansible-playbook -i inventory/dev/hosts deploynetplan.yml -u nickadmin -Kkb –ask-become –limit=’testmachine1′
Successful example run with bonding:
ntailor@KVM–test–box:~/ansible$ ansible–playbook –i inventory/dev/hosts deploynetplan.yml –u nickadmin –Kkb —ask–become —limit=‘testmachine1’
SSH password:
BECOME password[defaults to SSH password]:
PLAY [all] *********************************************************************************************************************************************************************************************
TASK [Gathering Facts] *********************************************************************************************************************************************************************************
ok: [testmachine1]
TASK [ansible–netplan : Install netplan] ***************************************************************************************************************************************************************
ok: [testmachine1]
TASK [ansible–netplan : Backup exitsing configurations before removing live ones] **********************************************************************************************************************
changed: [testmachine1]
TASK [ansible–netplan : copy 00–install* netplan existing file to /etc/netplan/backups] ****************************************************************************************************************
changed: [testmachine1]
TASK [ansible–netplan : keep only 7 days of backups of previous network config /etc/netplan/backups] ***************************************************************************************************
changed: [testmachine1]
TASK [ansible–netplan : Capturing Existing Configurations] *********************************************************************************************************************************************
skipping: [testmachine1]
TASK [ansible–netplan : debug] *************************************************************************************************************************************************************************
skipping: [testmachine1]
TASK [ansible–netplan : Removing Existing Configurations] **********************************************************************************************************************************************
skipping: [testmachine1]
TASK [ansible–netplan : Configuring Netplan] ***********************************************************************************************************************************************************
ok: [testmachine1]
TASK [ansible–netplan : netplan apply] *****************************************************************************************************************************************************************
changed: [testmachine1]
TASK [ansible–netplan : debug] *************************************************************************************************************************************************************************
ok: [testmachine1] => {
“netplanapply”: {
“changed”: true,
“cmd”: “netplan apply”,
“delta”: “0:00:00.601112”,
“end”: “2022-01-31 16:43:45.295708”,
“failed”: false,
“msg”: “”,
“rc”: 0,
“start”: “2022-01-31 16:43:44.694596”,
“stderr”: “”,
“stderr_lines”: [],
“stdout”: “”,
“stdout_lines”: []
}
}
TASK [ansible–netplan : Show vlans that are up or down] ************************************************************************************************************************************************
changed: [testmachine1]
TASK [ansible–netplan : debug] *************************************************************************************************************************************************************************
ok: [testmachine1] => {
“vlan.stdout_lines”: [
“14: vlan.180@bond0: <NO-CARRIER,BROADCAST,MULTICAST,UP> mtu 1500 qdisc noqueue state LOWERLAYERDOWN group default qlen 1000”,
“15: vlan.3300@bond0: <NO-CARRIER,BROADCAST,MULTICAST,UP> mtu 1500 qdisc noqueue state LOWERLAYERDOWN group default qlen 1000”
]
}
TASK [ansible–netplan : show bridge details] ***********************************************************************************************************************************************************
changed: [testmachine1]
TASK [ansible–netplan : debug] *************************************************************************************************************************************************************************
ok: [testmachine1] => {
“bridges.stdout_lines”: [
“bridge name\tbridge id\t\tSTP enabled\tinterfaces”,
“br180\t\t8000.000000000000\tyes\t\t“,
“br3200\t\t8000.000000000000\tyes\t\t“,
“br3300\t\t8000.000000000000\tyes\t\t“
]
}
PLAY RECAP *********************************************************************************************************************************************************************************************
testmachine1 : ok=12 changed=6 unreachable=0 failed=0 skipped=3 rescued=0 ignored=0
Push your inventory/dev/host_var/testmachine1 code to Git :
Once you successfully checked your deploy worked by logging on to the client host and confirming everything looks good. You now want to push your code to git repo. Since you were able to clone you repo, you should be able to push to it.
Git Add Commands.
Git Commit Commands
How to call a json rest API using Ansible
So a very useful thing to understand is rest api’s and how to call them as a lot of organisations have these and want to integrate them into automation, a popular method is the http method
They are very simple calls { GET, POST, PUT, DELETE, PATCH }
For the sake of this post. Im going to use commvault public api’s https://api.commvault.com/
You will need to two things.
- The api endpoint which is usually an http url
Example:
- The raw json body of the of the api
Example:
{

    "csFailoverConfigInfo": {

        "configStatus": 0,

        "isAutomaticFailoverEnabled": false

    }

}
Now keep in mind if you are using an api that requires a login. In order for it to work, you will need to store the auth token to pass later to the last task later for the api call to work as intended. You can look at one of my other posts under vmware, where i used a http login to handle the tasks later, as a reference.
You can call these preliminary task as includes to store the token.
It will look something like this before it gets to the api task. You can also just do it all one on book if you wanted to. But for the purposes of this post. Im just giving ya highlevel.
- name: Login task

  include_role:

    name: commvault_login

    tasks_from: login.yml

- name: Setfact for authtoke

  set_fact:

    authtoken: "{{ login_authtoken }}"

  delegate_to: localhost
Now in order for you to pass json api to ansible. You will need to convert the json raw body into yaml format. You can use visual studio code plugins or a site like https://json2yaml.com/
So if we are to use the above raw json example it would look like this
csFailoverConfigInfo:
configStatus: 0
isAutomaticFailoverEnabled: false
So now we want to pass this information to the task in the form of a variable. A really cool thing with ansible and this type of action. Is you can create a variable name and simply pass the new yaml converted body right below the varible. You can pass this as extra-vars or create a group variable with the same name and use that.
For those you who use tower passing them as extra-vars to test something can be a pain, since it doesn’t allow you to change the passed vars and rerun the previous run just used, you have to start all over. So I prefer the command line way as its easier to be agile
disable_api_body:
csFailoverConfigInfo:
configStatus: 0
isAutomaticFailoverEnabled: false
So now we ansible to use the rest api with ansible. You create a task that after the login is run and the token is stored inside as a fact. It run the following task, in our case this call will be a POST. It will post the headers to the url which will disabled commvault live_sync which is essentially commvault failover redundancy for the backup server itself.
- name: Disable Commvault livesync

  uri:

    url: http://{{ commvault_primary }}/webconsole/api/v2/CommServ/Failover

    method: POST

    body_format: json

    body: "{{ disable_api_body }}"

    return_content: true

    headers:

      Accept: application/json

      Content-Type: application/json

      Authtoken: "{{ login_authtoken }}"

    status_code: 200

    validate_certs: false

  register: disable_livesync

  retries: "4"

  delay: "10"

  delegate_to: localhost

- debug:
    var: disable_livesync
When you run the book and your have an active failover setup correctly with commvault. In the command center under the control panel you should see livesync. If you click on this you should see either it is checked or unchecked.
How to Deploy LVM’s with Ansible
Provisioning-LVM-Filesystems:
This role is designed to use ansible-merge-vars module. An Ansible plugin to merge all variables in context with a certain suffix (lists or dicts only) and create a new variable that contains the result of this merge. This is an Ansible action plugin, which is basically an Ansible module that runs on the machine running Ansible rather than on the host that Ansible is provisioning.
Benefits: Configuring disks into LVM
Note: This post assumes you have already ansible installed and running.
Install ansible-merge-vars module:
1. root@KVM-test-box:~# pip install ansible_merge_vars
Requirement already satisfied: ansible_merge_vars in
/usr/local/lib/python3.8/dist-packages (5.0.0)
By default, Ansible will look for action plugins in an action_plugins folder adjacent to the running playbook. For more information on this, or to change the location where ansible looks for action plugin.
from ansible_merge_vars import ActionModule
Role Setup:
Once the plugin has been setup, you now you will want to setup a role.
Now we will create a task that will merge variable names associated with a list and then itemise the list for variables we will pass to provision the filesystem via the inventory/host_var or group_var
– name: Merge VG variables
merge_vars:
suffix_to_merge: vgs__to_merge
merged_var_name: merged_vgs
expected_type: ‘list’
– name: Merge LV variables
merge_vars:
suffix_to_merge: lvs__to_merge
merged_var_name: merged_lvs
expected_type: ‘list’
– name: Merge FS variables
merge_vars:
suffix_to_merge: fs__to_merge
merged_var_name: merged_fs
expected_type: ‘list’
– name: Merge MOUNT variables
merge_vars:
suffix_to_merge: mnt__to_merge
merged_var_name: merged_mnt
expected_type: ‘list’
– name: Create VGs
lvg:
vg: “{{ item.vg }}”
pvs: “{{ item.pvs }}”
with_items: “{{ merged_vgs }}”
– name: Create LVs
lvol:
vg: “{{ item.vg }}”
lv: “{{ item.lv }}”
size: “{{ item.size }}”
pvs: “{{ item.pvs | default(omit) }}”
shrink: no
with_items: “{{ merged_lvs }}”
– name: Create FSs
filesystem:
dev: “{{ item.dev }}”
fstype: “{{ item.fstype }}”
with_items: “{{ merged_fs }}”
– name: Mount FSs
mount:
path: “{{ item.path }}”
src: “{{ item.src }}”
state: mounted
fstype: “{{ item.fstype }}”
opts: “{{ item.opts | default(‘defaults’) }}”
dump: “{{ item.dump | default(‘1’) }}”
passno: “{{ item.passno | default(‘2’) }}”
with_items: “{{ merged_mnt }}”
Note: Now this currently task has no safe guards for /dev/sda or checks to ensure the disk is wiped properly in order for the disks to be added to the volume group. I have created such safe guards for others. But for the purposes of this blog post this is basics. If you want to my help you can contact me via email or the ticketing system.
Now what we are going to do is define our inventory file with what file lvm we want to crave out.
Setup inventory:
1.Go inside your inventory/host_var or group_var file and create a file for testserver1
- .nano inventory/host_var/testserver1
2. save the file.
Definitions of the variables above:
vgs__to_merge: This section is the creation volume/physical groups
– vg: vg_vmguest (this is the volume group name)
pvs: /dev/sdb (this is the physical assigned to the above volume group
– vg: vg_sl_storage (This the second volume name)
pvs: /dev/sdc (This is the second physical disk assigned to the above
volume
*You can add as many as you like*
lvs__to_merge: This section is the logical Volume creations
– vg: vg_vmguest (this is the volume group created)
lv: lv_vg_vmguest (this is the logical volume that is attached to above vg
size: 100%FREE (this says please use the whole disk)
shrink: no (this is needed to so the disk space is used correctly)
– vg: vg_sl_storage (this is the second volume created)
lv: lv_vg_sl_storage (this is the second lvm created attached to above vg)
size: 100%FREE (this is use the whole disk)
shrink: no (this is needed so the disk space is properly used)
fs__to_merge: This section formats the lvm
– dev: /dev/vg_vmguest/lv_vg_vmguest (lvm name)
fstype: ext4 (file system you want to format with)
– dev: /dev/vg_sl_storage/lv_vg_sl_storage (2nd lvm name)
fstype: ext4 (file system you want to format with)
mnt__to_merge: This section will create the path,mount, and add to fstab
– path: /vmguests (path you want created for mount)
src: /dev/vg_vmguest/lv_vg_vmguest (lvm you want to mount)
fstype: ext4 (this is for fstab adding)
– path: /sl_storage (this is second path to create)
src: /dev/vg_sl_storage/lv_vg_sl_storage (second lvm you want to mount)
fstype: ext4 (to add to fstab)
Running your playbook:
cd ansible/
Example: of justdofs.yml
– hosts: all
gather_facts: yes
any_errors_fatal: true
roles:
– role: provision-fs
Command:
ansible/$ ansible-playbook -i inventory/hosts justdofs.yml -u root -k –limit=’testservernick1′
Example of successful play:
ntailor@test-box:~/ansible/computelab$ ansible-playbook –i inventory/hosts justdofs.yml -u root -k –limit=’testservernick1‘
SSH password:
PLAY [all] *******************************************************************************************************************************************************************************************************
TASK [provision-fs : Merge VG variables] *************************************************************************************************************************************************************************
ok: [testservernick1]
TASK [provision-fs : Merge LV variables] *************************************************************************************************************************************************************************
ok: [testservernick1]
TASK [provision-fs : Merge FS variables] *************************************************************************************************************************************************************************
ok: [testservernick1]
TASK [provision-fs : Merge MOUNT variables] **********************************************************************************************************************************************************************
ok: [testservernick1]
TASK [provision-fs : Create VGs] *********************************************************************************************************************************************************************************
ok: [testservernick1] => (item={‘vg’: ‘vg_vmguest‘, ‘pvs‘: ‘/dev/sdb‘})
ok: [testservernick1] => (item={‘vg’: ‘vg_sl_storage‘, ‘pvs‘: ‘/dev/sdc‘})
TASK [provision-fs : Create LVs] *********************************************************************************************************************************************************************************
ok: [testservernick1] => (item={‘vg’: ‘vg_vmguest‘, ‘lv’: ‘lv_vg_vmguest‘, ‘size’: ‘100%FREE’, ‘shrink’: False})
ok: [testservernick1] => (item={‘vg’: ‘vg_sl_storage‘, ‘lv’: ‘lv_vg_sl_storage‘, ‘size’: ‘100%FREE’, ‘shrink’: False})
TASK [provision-fs : Create FSs] *********************************************************************************************************************************************************************************
ok: [testservernick1] => (item={‘dev’: ‘/dev/vg_vmguest/lv_vg_vmguest‘, ‘fstype‘: ‘ext4’})
ok: [testservernick1] => (item={‘dev’: ‘/dev/vg_sl_storage/lv_vg_sl_storage‘, ‘fstype‘: ‘ext4’})
TASK [provision-fs : Mount FSs] **********************************************************************************************************************************************************************************
ok: [testservernick1] => (item={‘path’: ‘/vmguests‘, ‘src‘: ‘/dev/vg_vmguest/lv_vg_vmguest‘, ‘fstype‘: ‘ext4’})
ok: [testservernick1] => (item={‘path’: ‘/sl_storage‘, ‘src‘: ‘/dev/vg_sl_storage/lv_vg_sl_storage‘, ‘fstype‘: ‘ext4’})
PLAY RECAP *******************************************************************************************************************************************************************************************************
testservernick1 : ok=8 changed=0 unreachable=0 failed=0 skipped=0 rescued=0 ignored=0
Docker Cheat Sheet
This Docker cheat sheet provides a complete reference for working with containers, images, volumes, networks, Dockerfiles, Docker Compose, and orchestration.
1. Running Containers
# Run a container with limited CPU
docker run --cpus=.5 ubuntu

# Run a container with limited memory
docker run --memory=100m ubuntu

# Run interactively with a shell
docker run -it ubuntu /bin/bash

# Detached mode (background)
docker run -d ubuntu

# Run a web container and publish host port 8080 to container port 80
docker run -d -p 8080:80 httpd

# View running processes inside the container
docker exec <container-id> ps -eaf

# Open an interactive shell
docker exec -it <container-id> /bin/bash
2. Docker Storage Location
Docker stores local container data in:
/var/lib/docker
- aufs / overlay2 – storage layers
- containers – container metadata
- images – image layers
- volumes – named volume data
3. Docker Volumes
Create a volume
docker volume create volume_name
docker volume ls
docker volume inspect volume_name
Mount a named volume
docker run -v volume_name:/var/lib/mysql mysql
Note: If the volume does not exist, Docker will create it automatically.
Bind mount (preferred)
docker run --mount type=bind,source=/data/mysql,target=/var/lib/mysql mysql
4. Networking Basics
# Map host port 8080 to container port 80
docker run -d -p 8080:80 httpd

# Get a container IP on the bridge network
docker inspect -f "{{ .NetworkSettings.Networks.bridge.IPAddress }}" <container-id>
5. Storage Drivers
| Storage Driver | Supported Filesystems |
|---|---|
| overlay2 / overlay | ext4, xfs (ftype=1) |
| aufs | ext4, xfs |
| devicemapper | direct-lvm |
| btrfs | btrfs |
| zfs | zfs |
| vfs | any |
docker info
6. Inspect Containers, Images & Networks
# Full metadata
docker inspect <id>

# Image layer history
docker history <image>
7. Image Management & Disk Usage
# List images
docker images

# Remove image
docker rmi <id>

# Remove unused images
docker image prune -a

# Disk usage summary
docker system df
8. Building Docker Images
Example Dockerfile
FROM ubuntu
RUN apt-get update && apt-get -y install python3 python3-pip
RUN pip3 install flask flask-mysql
COPY app.py /opt/source-code
ENTRYPOINT flask_app=/opt/source-code/app.py flask run --host=0.0.0.0
Build commands
# Build using Dockerfile in current dir
docker build . -t simple-webapp

# Using a custom Dockerfile
docker build -f Dockerfile2 -t myorg/app2 .
9. Docker Compose
docker-compose.yml example
version: '3'
services:
  web:
    image: "simple-webapp"
    ports:
      - "5000:5000"

  redis:
    image: "redis:alpine"
Start everything:
docker-compose up
Python app Dockerfile for Compose
FROM python:3.4-alpine
ADD . /code
WORKDIR /code
RUN pip install -r requirements.txt
CMD ["python", "app.py"]
10. Multi-Container Stack Example
# Redis
docker run -d --name=redis redis

# PostgreSQL
docker run -d --name=db postgres:9.4

# Voting app
docker run -d --name=vote -p 5000:80 voting-app

# Result app
docker run -d --name=result -p 5001:80 result-app

# Worker
docker run -d --name=worker worker
Legacy container linking (not used anymore)
docker run -d --name=vote --link redis:redis -p 5000:80 voting-app
docker run -d --name=result --link db:db -p 5001:80 result-app
docker run -d --name=worker --link db:db --link redis:redis worker
11. Cleanup Commands
# Remove all containers
docker rm -f $(docker ps -a -q)

# Remove selected containers
docker container rm <id1> <id2>

# Remove unused images
docker image prune -a
12. Docker Swarm (Legacy — Rarely Used Today)
Docker Swarm was Docker’s native orchestrator. While simple and fast to set up, it is now considered a legacy technology. Today, nearly all container orchestration is performed using Kubernetes, including lightweight versions like K3s, MicroK8s, and K3d.
Why Docker Swarm Is No Longer Common
- Minimal development in recent years with few updates.
- Lacks modern orchestration features such as CRDs, Operators, service mesh, and advanced autoscaling.
- No ecosystem compared to Kubernetes (no Helm, no Ingress controllers, no admission controllers).
- Poor scalability vs Kubernetes; struggles beyond moderate cluster sizes.
- Nearly zero enterprise adoption as all major clouds support Kubernetes instead.
Swarm still works for very small clusters, but it is not recommended for new deployments.
Legacy Swarm Commands (For Reference Only)
# Initialize a swarm
docker swarm init

# Rebuild a failed manager
docker swarm init --force-new-cluster

# Promote worker to manager
docker node promote <node>

# Drain node
docker node update --availability drain <node>

# Create replicated service
docker service create --replicas=3 -p 8080:80 my-web-server

# Global service (one per node)
docker service create --mode global my-agent

# Update service replicas
docker service update --replicas=4 web-server
13. Overlay Networking (Swarm or Legacy Use)
# No network
docker run ubuntu --network=none

# Host networking
docker run ubuntu --network=host

# Create overlay network
docker network create --driver overlay --subnet 10.0.9.0/24 my-overlay-network

# Attach service to overlay
docker service create --replicas 2 --network my-overlay-network nginx
How to add VM-Tags and Custom attributes with Anisble(VMware)
So whether your using cloud or doing in house deploys. Tagging is a used a lot especially in cloud type environments. Which we will cover in later posts.
So a common reason to tag your vm is wanting to have the creation date and the type of server or environment its using, handy for backup solutions & other auditables.
Pre-requisites: Assumed.
Step by Step:
1.Create a roles directory inside /etc/ansible/roles
b.mkdir -p /etc/ansible/roles/ custom-tags-attributes-vmware/defaults
2.Now you want to create a task for the snapshots.
d.Create a file called main.yml
Note: Okay for the custom attributes to work you need to get the MOID, UUID & Folder of the vm by using the vm name. So we need to gather facts about the vm and the set those facts as variables that we can pass to the next tasks.
– name: get list of facts
vmware_guest_facts:
hostname: “{{ vcenter_host }}”
username: “{{ vcenter_username }}”
password: “{{ vcenter_password }}”
name: “{{ inventory_hostname }}”
datacenter: “{{ vcenter_dc }}”
validate_certs: False
delegate_to: localhost
ignore_errors: true
register: vm_facts
Note: So when we use the vmware_guest_facts module to gather the facts about the vm by register the facts to a variable “vm_facts”, which when you run the playbook with –vvvv will spit out the facst you can pass as indicated below.
“hw_folder“: “/SysUnix/Testing“,
“hw_guest_full_name“: “Red Hat Enterprise Linux 7 (64-bit)”,
“hw_guest_ha_state“: true,
“hw_guest_id“: “rhel7_64Guest”,
“hw_interfaces“: [
“eth0”
],
“hw_is_template“: false,
“hw_memtotal_mb“: 2048,
“hw_name“: “v-sits-test4”,
“hw_power_status“: “poweredOn“,
“hw_processor_count“: 2,
“hw_product_uuid“: “4226d4e1-6be8-9447-5ced-b037075e2ffd”,
“hw_version“: “vmx-11”,
“instance_uuid“: “50263518-c95b-c3be-5c77-4e1ea69ec295”,
“ipv4”: “192.168.1.29“,
“ipv6”: null,
“module_hw“: true,
“moid“: “vm-296678”,
“snapshots”: [],
“vimref“: “vim.VirtualMachine:vm-296678”,
“vnc“: {}
Note: Now that we have the UUID, MOID, & Folder. We now want to create static variables for UUID, MOID, & folder by using the previous variable we registered as “vm_facts”, and we want to set them as static variables by setting them as facts we can past to the tasks after. As indicated below. Again setting facts is the same as defining variables in bash. Just ansible way to do it.
– set_fact:
vm_uuid: “{{ vm_facts.instance.instance_uuid }}”
– set_fact:
moid: “{{ vm_facts.instance.moid }}”
– set_fact:
vm_folder: “{{ vm_facts.instance.hw_folder }}”
Note: Now want to use the ansible server date and pass that as a variable so you don’t have to input the date as manual value each time you deploy a new host. So we want to grab the date and setup a static fact and then pass it as its own variable. Like we did above…
– name: Get Date
shell: date +%Y-%m-%d
register: date
delegate_to: localhost
Note: We use shell module to get the date in the format we want, then register the result as the variable {{ date }}. We then set a static fact of the result and create another variable called date with using the result from the above.
– set_fact:
date: “{{ date.stdout }}”
Note: We now want to pass all the fact to the “vmware_guest_custom_attributes” module UUID, MOID, DATE, and Folder indicated as below.
– name: Add multiple virtual machine custom attributes
vmware_guest_custom_attributes:
hostname: “{{ vcenter_host }}”
username: “{{ vcenter_username }}”
password: “{{ vcenter_password }}”
name: “{{ inventory_hostname }}”
datacenter: “{{ vcenter_dc }}”
folder: “{{ vm_folder }}”
uuid: “{{ vm_facts.instance.instance_uuid }}”
moid: “{{ vm_facts.instance.moid }}”
state: present
validate_certs: False
use_instance_uuid: True
attributes:
– name: Creation Date
value: “{{ date }}”
# – name: MyAttribute2 – Note: You can add additional attributes if you wish
# value: test2 – Note: You can add additional attributes if you wish
delegate_to: localhost
register: attributes
Note: Okay so depending on which module you use, some require you to gather facts about the vmware categories. This is just incase you need the cateogory_id which is usually derived from using a REST API in json or other method. The “community.vmware.vmware_category_facts”will be able to pull the info and then you can pass it as a variable or a static value. IF YOU NEED, however this is NOT needed. If you use the “vmware_tag_manager” module”
– name: Gather facts about tag categories
community.vmware.vmware_category_facts:
hostname: “{{ vcenter_host }}”
username: “{{ vcenter_username }}”
password: “{{ vcenter_password }}”
validate_certs: no
delegate_to: localhost
register: all_tag_category_facts
ok: [v-sits-test4] => {
“changed”: false,
“invocation”: {
“module_args“: {
“hostname”: “vmware.nicktailor.com“,
“password”: “VALUE_SPECIFIED_IN_NO_LOG_PARAMETER”,
“port”: 443,
“protocol”: “https”,
“username”: “admin“,
“validate_certs“: false
}
},
“tag_category_facts“: [
{
“category_associable_types“: [
“VirtualMachine“
],
“category_cardinality“: “SINGLE”,
“category_description“: “VM Type – Clone, Decomm, Dev, Prod, SRM, SLM, Template or Test”,
“category_id“: “urn:vmomi:InventoryServiceCategory:f1024eb4-d7d4-49fe-9725-4dcba39fbe3b:GLOBAL”,
“category_name“: “VMType“,
“category_used_by“: []
},
{
“category_associable_types“: [
“VirtualMachine“
],
“category_cardinality“: “SINGLE”,
“category_description“: “Team or Department”,
“category_id“: “urn:vmomi:InventoryServiceCategory:888a0877-5335-4477-9347-6d8de5b3e60e:GLOBAL”,
“category_name“: “Team/Dept”,
“category_used_by“: []
}
]
}
Note: Now that we want to create the tag for the vm using the ““vmware_tag_manager” module. The only variable that is passed from outside the defaults at the inventory_hostname level “host_var/nicktest1” is the {{ vm_tag }} Make sure you have this defined for the role to work properly.
– name: Add tags to a virtual machine
vmware_tag_manager:
hostname: ‘{{ vcenter_host }}’
username: ‘{{ vcenter_username }}’
password: ‘{{ vcenter_password }}’
validate_certs: no
tag_names:
– “{{ vm_tag }}” – passed at the host_var/nicktest1
object_name: “{{ inventory_hostname }}”
object_type: VirtualMachine
state: present
delegate_to: localhost
Note: You will likely have a group_var from you vmdeploy role that you can use for here.
vcenter_username: admin
vcenter_password: should be vault encrypted variable
vcenter_host: vmware.nicktailor.com
vcenter_dc: London
/etc/ansible/inventory/TEST/hosts
Run your playbook: from /etc/ansible
Playbook log:
[root@ansible-server]# ansible-playbook –i inventory/TEST/hosts justcustomattrib.yml –ask-vault-pass –limit=’v-sits-test4′
Vault password:
PLAY [all] **********************************************************************************************************************************
TASK [custom-tags-attributes-vmware : get list of facts] ************************************************************************************
[DEPRECATION WARNING]: The ‘vmware_guest_facts‘ module has been renamed to ‘vmware_guest_info‘. This feature will be removed in version
2.13. Deprecation warnings can be disabled by setting deprecation_warnings=False in ansible.cfg.
ok: [v-sits-test4]
TASK [custom-tags-attributes-vmware : set_fact] *********************************************************************************************
ok: [v-sits-test4]
TASK [custom-tags-attributes-vmware : set_fact] *********************************************************************************************
ok: [v-sits-test4]
TASK [custom-tags-attributes-vmware : set_fact] *********************************************************************************************
ok: [v-sits-test4]
TASK [custom-tags-attributes-vmware : Get Date] *********************************************************************************************
changed: [v-sits-test4]
TASK [custom-tags-attributes-vmware : set_fact] *********************************************************************************************
ok: [v-sits-test4]
TASK [custom-tags-attributes-vmware : Add multiple virtual machine custom attributes] *******************************************************
ok: [v-sits-test4]
TASK [custom-tags-attributes-vmware : Gather facts about tag categories] ********************************************************************
ok: [v-sits-test4]
TASK [custom-tags-attributes-vmware : Add tags to a virtual machine] ************************************************************************
ok: [v-sits-test4]
PLAY RECAP **********************************************************************************************************************************
v-sits-test4 : ok=9 changed=1 unreachable=0 failed=0 skipped=0 rescued=0 ignored=0
How to remove snapshots with Ansible(VMware)
Okay, so lots of folks ask me about this, and there are a number of ways you can do this.
But if you’re using vmware and redhat satellite for central patch management for your redhat environment.
Then depending on how you patch your systems. If you snapshot every group prior to patching. Then this post will be perfect for you.
Process:
Pre-requisites: Assumed.
Step by Step:
1.Create a roles directory inside /etc/ansible/roles
b.mkdir -p /etc/ansible/roles/remove-snapshot/defaults
2.Now you want to create a task for the snapshots.
d.Create a file called main.yml
– name: Login into vCenter and get cookies
delegate_to: localhost
uri:
url: https://{{ vcenter_host }}/rest/com/vmware/cis/session
force_basic_auth: yes
validate_certs: no
method: POST
user: ‘{{ vcenter_username }}’
password: ‘{{ vcenter_password }}’
register: login
Note: Okay so what we want to do is find the virtual machine in vsphere by name and then grab its folder value and pass it as a variable so you don’t need to define it statically in your host_var. The main reason is, say you deployed a vm and months later moved it to another folder, your code will likely have the origin folder which would be annoying, and the ansible documentation doesn’t really cover this approach, you basically figure it out as you do it. So im going to save you all time. Here is how you do it. The below will gather vm_facts based on the inventory_hostname
– name: Find Guest’s Folder using name
vmware_guest_find:
hostname: “{{ vcenter_host }}”
username: “{{ vcenter_username }}”
password: “{{ vcenter_password }}”
validate_certs: no
name: “{{ inventory_hostname }}”
delegate_to: localhost
ignore_errors: true
register: vm_facts
Note: It will than gather those facts and find the folder value. You then register the facts to a variable “vm_facts” Now it will spit out what it finds when you do –vvvv when you do your play. From there you can see the folder setting. You now want to set that that folder setting as its own variable that you can pass to another task as indicated below.
ok: [ansible-server] => {
“changed”: false,
“folders”: [
“/SysUnix/Teststuff“
],
“invocation”: {
“module_args“: {
“datacenter“: null,
“hostname”: “vmware.nicktailor.com“,
“name”: ” ansible-server“,
“password”: “VALUE_SPECIFIED_IN_NO_LOG_PARAMETER”,
“port”: 443,
“proxy_host“: null,
“proxy_port“: null,
“use_instance_uuid“: false,
“username”: “svc_ans“,
“uuid“: null,
“validate_certs“: false
}
}
}
– name: “vm_folder – setting folder value”
set_fact:
folder : “{{ vm_facts.folders }}”
Note: So you can see that the facts has a sub fact called “folders”. We want to pass that by setting that value as its own variable by making it a fact. Ansible way to set variables is setting facts. So we make that value above into a variable “vm_facts.folders” and then pass that into the next task where it asks for folders. This will get around the having to provide the exact folder the vm_resides to create snapshotting for an array of hosts. This section is basically identical to create except the “state” is set to absent
– name: Remove Snapshot
vmware_guest_snapshot:
hostname: “{{ vcenter_host }}”
username: “{{ vcenter_username }}”
password: “{{ vcenter_password }}”
datacenter: “{{ vcenter_dc }}”
validate_certs: no
name: “{{ inventory_hostname }}”
state: absent
snapshot_name: “Ansible Managed Snapshot”
folder: “‘{{ vm_facts.folders }}'”
description: “This snapshot is created by Ansible Playbook”
delegate_to: localhost
Note: You will likely have a group_var from you vmdeploy role that you can use for here.
vcenter_username: admin
vcenter_password: should be vault encrypted variable
vcenter_host: vmware.nicktailor.com
vcenter_dc: London
/etc/ansible/inventory/TEST/hosts
Run your playbook: from /etc/ansible
Playbook log:
[root@ansible-server]# ansible-playbook –i inventory/TEST/hosts justremovevmsnap.yml –ask-vault-pass –limit=’nicktest1‘
Vault password:
PLAY [all] **********************************************************************************************************************************
TASK [remove_snapshot : Login into vCenter and get cookies] *********************************************************************************
ok: [nicktest1]
TASK [remove_snapshot : Find Guest’s Folder using name] *************************************************************************************
ok: [nicktest1]
TASK [remove_snapshot : vm_folder – setting folder value] ***********************************************************************************
ok: [nicktest1]
TASK [remove_snapshot : remove Snapshot] ****************************************************************************************************
ok: [nicktest1]
PLAY RECAP **********************************************************************************************************************************
nicktest1 : ok=4 changed=0 unreachable=0 failed=0 skipped=0 rescued=0 ignored=0
Note: This uses the snapshot name to remove as the one you used to create. If another snapshot exists with a different name it will ignore it entirely. If you pass snapshot variable with another name and run the book again, it will remove another snapshot. The same applies to removing snapshots, it will remove based on the name.
How to create snapshots with Ansible (VMware)
Okay, so lots of folks ask me about this, and there are a number of ways you can do this.
But if you’re using vmware and redhat satellite for central patch management for your redhat environment.
Then depending on how you patch your systems. If you snapshot every group prior to patching. Then this post will be perfect for you.
Patching Processes:
– (these are not in this post) part 2
Note: There is a step to change the content view of all your hosts and cleaning your yum repos on all the hosts. I have not written a post on this step yet, but you should obviously automate that. I will eventually get around to including it, when I have some time.
Pre-requisites: Assumed.
Step by Step:
b.mkdir -p /etc/ansible/roles/create-snapshot/defaults
2.Now you want to create a task for the snapshots.
d.Create a file called main.yml
3.Add the following code and save the file
– name: Login into vCenter and get cookies
delegate_to: localhost
uri:
url: https://{{ vcenter_host }}/rest/com/vmware/cis/session
force_basic_auth: yes
validate_certs: no
method: POST
user: ‘{{ vcenter_username }}’
password: ‘{{ vcenter_password }}’
register: login
Note: Okay so what we want to do is find the virtual machine in vsphere by name and then grab its folder value and pass it as a variable so you don’t need to define it statically in your host_var. The main reason is, say you deployed a vm and months later moved it to another folder, your code will likely have the origin folder which would be annoying, and the ansible documentation doesn’t really cover this approach, you basically figure it out as you do it. So im going to save you all time. Here is how you do it. The below will gather vm_facts based on the inventory_hostname
– name: Find Guest’s Folder using name
vmware_guest_find:
hostname: “{{ vcenter_host }}”
username: “{{ vcenter_username }}”
password: “{{ vcenter_password }}”
validate_certs: no
name: “{{ inventory_hostname }}”
delegate_to: localhost
ignore_errors: true
register: vm_facts
Note: It will than gather those facts and find the folder value. You then register the facts to a variable “vm_facts” Now it will spit out what it finds when you do –vvvv when you do your play. From there you can see the folder setting. You now want to set that that folder setting as its own variable that you can pass to another task as indicated below.
ok: [ansible-server] => {
“changed”: false,
“folders”: [
“/SysUnix/Teststuff“
],
“invocation”: {
“module_args“: {
“datacenter“: null,
“hostname”: “vmware.nicktailor.com“,
“name”: “ ansible-server“,
“password”: “VALUE_SPECIFIED_IN_NO_LOG_PARAMETER”,
“port”: 443,
“proxy_host“: null,
“proxy_port“: null,
“use_instance_uuid“: false,
“username”: “admin“,
“uuid“: null,
“validate_certs“: false
}
}
}
– name: “vm_folder – setting folder value”
set_fact:
folder : “{{ vm_facts.folders }}”
Note: So you can see that the facts has a sub fact called “folders”. We want to pass that by setting that value as its own variable by making it a fact. Ansible way to set variables is setting facts. So we make that value above into a variable “vm_facts.folders” and then pass that into the next task where it asks for folders. This will get around the having to provide the exact folder the vm_resides to create snapshotting for an array of hosts.
– name: Create Snapshot
vmware_guest_snapshot:
hostname: “{{ vcenter_host }}”
username: “{{ vcenter_username }}”
password: “{{ vcenter_password }}”
datacenter: “{{ vcenter_dc }}”
validate_certs: no
name: “{{ inventory_hostname }}”
state: present
snapshot_name: “Ansible Managed Snapshot”
folder: “‘{{ vm_facts.folders }}'”
description: “This snapshot is created by Ansible Playbook”
delegate_to: localhost
Note: You will likely have a group_var from you vmdeploy role that you can use for here.
vcenter_username: admin
vcenter_password: should be vault encrypted variable
vcenter_host: vmware.nicktailor.com
vcenter_dc: London
/etc/ansible/inventory/TEST/hosts
Run your playbook: from /etc/ansible
Playbook log:
[root@ansible–server]# ansible-playbook –i inventory/TEST/hosts justcreatevmsnap.yml –ask-vault-pass –limit=’nicktest1‘
Vault password:
PLAY [all] **********************************************************************************************************************************
TASK [create_snapshot : Login into vCenter and get cookies] *********************************************************************************
ok: [nicktest1]
TASK [create_snapshot : Find Guest’s Folder using name] *************************************************************************************
ok: [nicktest1]
TASK [create_snapshot : vm_folder – setting folder value] ***********************************************************************************
ok: [nicktest1]
TASK [create_snapshot : Create Snapshot] ****************************************************************************************************
ok: [nicktest1]
PLAY RECAP **********************************************************************************************************************************
nicktest1 : ok=4 changed=0 unreachable=0 failed=0 skipped=0 rescued=0 ignored=0
Note: This uses the snapshot name to create. If another snapshot exists with a different name it will ignore it entirely. If you pass snapshot variable with another name and run the book again, it will create another snapshot. The same applies to removing snapshots, it will remove based on the name. We will cover that in my post to remove snapshots.
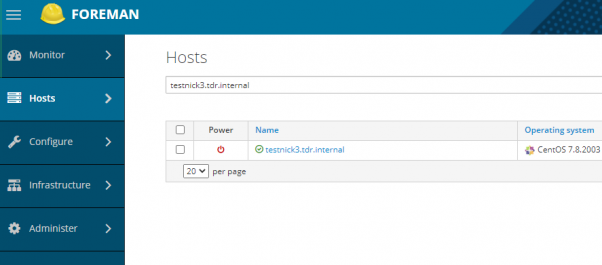
How to Create a New Host in Foreman with Ansible
Okay…this one was quite difficult to find online. Seems like the ansible documentation for the foreman module was seriously lacking or not kept up to date by anyone. I searched for awhile to see if anyone had an actual working model of it.
Not even in the ansible chat rooms did anyone know….which was weak.
So I spent some time getting this to work smoothly, and you will probably not find anywhere else on the web on how to do this. If you do show me….so I can kick myself.
Lets get dangerous then. 😊
Step by step:
Foreman – Already setup and your “computer resource” is hooked in (VMware)
Note: The compute profile(vmware) when hooked in, will also trigger a new vm creation in vsphere prepped to do DHCP. You can combine variables from vmware_guest module and this module as they require similar variables to be passed. To setup a one stop shop to deploy in foreman and vmware with just using ansible. Iv done this already…..
Special notes: The foreman I had setup did not have organisation or location configured. This caused the module to not function properly and I had to contact one of the developers who helped me patch the code so I didn’t require them to be configured or defined. Which I will show you all how to do.
Ansible – Assuming you have it setup and working with python 2.7 not sure this module will work with python 3. Havent tried that yet…..
Module – TheForeman Collection
Note: You can find the locations of these certs on foreman server. You will to copy them over to ansible for the callback to work properly. However, it is not needed to complete the host creation, you likely just see an error at the end of the play.
[callback_foreman]
url = ‘http://foreman-1.tdr.corp-apps.com’
ssl_cert = /etc/foreman-proxy/ssl-cert.pem
ssl_key = /etc/foreman-proxy/ssl-pvt.pem
verify_certs = /etc/foreman-proxy/ssl-ca
Okay once installed you. If you look at the ansible documentation on how to manage hosts using this module…from redhat.
It utterly useless…and will not work if you try to use the examples below.
https://people.redhat.com/evgeni/fam-antsibull/plugins/host_module.html
– name: “Create a host”
host:
username: “admin”
password: “changeme“
server_url: “https://foreman.example.com”
name: “new_host“
hostgroup: my_hostgroup
state: present
The fix was to avoid trying to touch a specific resource that is only available when you have Org/Loc enabled.
diff –git plugins/module_utils/foreman_helper.py plugins/module_utils/foreman_helper.py
index 432c76df..c9a3abda 100644
— plugins/module_utils/foreman_helper.py
+++ plugins/module_utils/foreman_helper.py
@@ -396,8 +396,9 @@ class ForemanAnsibleModule(AnsibleModule):
_host_update = next(x for x in _host_methods if x[‘name’] == ‘update’)
for param in [‘location_id‘, ‘organization_id‘]:
– _host_update_taxonomy_param = next(x for x in _host_update[‘params’] if x[‘name’] == param)
– _host_update[‘params’].remove(_host_update_taxonomy_param)
+ _host_update_taxonomy_param = next((x for x in _host_update[‘params’] if x[‘name’] == param), None)
+ if _host_update_taxonomy_param is not None:
+ _host_update[‘params’].remove(_host_update_taxonomy_param)
@_check_patch_needed(fixed_version=’2.0.0′)
def _patch_templates_resource_name(self):
Trick: with ansible you can write some of the code and run the playbook and if there are missing variables it will tell you what they are.
fatal: [testnick1]: FAILED! => {
“changed”: false,
“invocation”: {
“module_args“: {
“activation_keys“: null,
“architecture”: null,
“build”: null,
“comment”: null,
“compute_attributes“: null,
“compute_profile“: null,
“compute_resource“: null,
“config_groups“: null,
“content_source“: null,
“content_view“: null,
“domain”: null,
“enabled”: null,
“environment”: null,
“hostgroup“: “my_hostgroup“,
“image”: null,
“interfaces_attributes“: null,
“ip“: null,
“kickstart_repository“: null,
“lifecycle_environment“: null,
“location”: null,
“mac”: null,
“managed”: null,
“medium”: null,
“name”: “testnick1”,
“openscap_proxy“: null,
“operatingsystem“: null,
“organization”: null,
“owner”: null,
“owner_group“: null,
“parameters”: null,
“password”: “VALUE_SPECIFIED_IN_NO_LOG_PARAMETER”,
“provision_method“: null,
“ptable“: null,
“puppet_ca_proxy“: null,
“puppet_proxy“: null,
“puppetclasses“: null,
“pxe_loader“: null,
“realm”: null,
“root_pass“: null,
“server_url“: “http://foreman-1.nictailor.com/”,
“state”: “present”,
“subnet”: null,
“subnet6”: null,
“username”: “ntailor“,
“validate_certs“: true
}
},
“msg“: “The hostname must be FQDN”
}
PLAY RECAP ************************************************************************************************************************************************************************
testnick1 : ok=0 changed=0 unreachable=0 failed=1 skipped=0 rescued=0 ignored=0
Create a Host: This code is what you need for this module to work.
– name: “Create a host”
theforeman.foreman.host:
username: “{{ foreman_user }}”
password: “{{ vcenter_password }}”
server_url: “{{ server_url }}”
name: “{{ inventory_hostname }}”
hostgroup: “{{ host_group }}”
managed: no
build: no
compute_profile: “{{ compute_profile }}”
compute_resource: “{{ computer_resource }}”
compute_attributes:
cpus: “{{ vm_cpu_count }}”
memory_mb: “{{ vm_memory }}”
interfaces_attributes:
– type: “interface”
primary: true
compute_attributes:
name: nic1
network: “{{ vm_vlan_name }}”
interface: “{{ vm_interface }}”
subnet: “{{ vm_subnet }}”
ip: “{{ vm_ip }}”
domain: “{{ domain }}”
provision: yes
operatingsystem: “{{ operating_system }}”
medium: “{{ medium }}”
architecture: x86_64
pxe_loader: PXELinux BIOS
puppet_ca_proxy: “{{ puppet_ca_proxy }}”
puppet_proxy: “{{ puppet_proxy }}”
root_pass: “{{ root_pass }}”
environment: tdr
# ptable: Centos – LVM – / , swap
ptable: “{{ ptable }}”
# owner: unix
state: present
validate_certs: false
delegate_to: localhost
– name: “Switch host on”
theforeman.foreman.host_power:
username: “{{ foreman_user }}”
password: “{{ foreman_password }}”
server_url: “{{ server_url }}”
hostname: “{{ inventory_hostname }}”
state: on
validate_certs: false
delegate_to: localhost
Note: You can find all these variables inside foreman GUI with a bit of digging.
foreman_user: Reptilianfilth
foreman_password: { generally want a ansible vault password }
compute_profile: vmware
computer_resource: vcenter.nic.internal
domain: nic.internal
medium: 7.8-CentOS
puppet_ca_proxy: puppet-2.nic.internal
puppet_proxy: puppet-2.nic.internal
#VM creation variables
vm_network: niccorp-192.168.65_corp
vm_interface: VMXNET3
vm_subnet: 192.168.65.0
vm_ip: 192.168.65.103
domain: nic.internal
managed: no
host_group: Base-Server/Centos-7.8.2003
operating_system: Centos 7.8.2003
ptable: Centos – LVM – / , swap
root_pass: changemetwiceaday
medium: 7.8-CentOS
Special Note: Now if you wanted to have it so you can use foreman module or vmware_guest module combining the variables names between the modules.
You can do as below. You will need to ensure the variables match but it works. You can get around having to rely on DHCP with this.
#VM creation variables foreman and vmware together
vm_vlan_name: nic_192.168.44_db_stor2
vm_datastore: esx_nicrcorp
vm_dvswitch: VDS-nic-Corporate
vm_interface: VMXNET3
vm_subnet: 192.1268.44.0
vm_ip: 192.168.44.14
vm_netmask: 255.255.255.0
vm_gateway: 192.168.44.254
vm_dns_servers: [192.168.1.1]
vm_dns_suffix: nic.internal
vm_cpu_count: 4
vm_memory: 16384
vm_state: poweredon
vm_connected: true
domain: tdr.internal
managed: no
host_group: Base-Server/Centos-7.8.2003
operating_system: Centos 7.8.2003
ptable: Centos – LVM – / , swap
root_pass: changemetwiceaday
medium: 7.8-CentOS
Before you to start one last thing. If you remember in the defaults we outlined
compute_profile: vmware
(this is the foreman profile it will use, so whatever defaults you have set for network and disksize here is what will be used to trigger foreman to create a host in vcenter, so it good to go check this in foreman first.)
Run playbook: from /etc/ansible
[root@nick ansible]# ansible-playbook –i inventory/TDR/hosts foremancreatehost.yml –ask-vault-pass –limit ‘testnick3.tdr.internal’
Vault password:
PLAY [all] **********************************************************************************************************************************************
TASK [ansible-provision-foreman : Create a host] ********************************************************************************************************
changed: [testnick3.tdr.internal]
PLAY RECAP *******************************************************************************************************************************************************************************
testnick3.tdr.internal : ok=1 changed=1 unreachable=0 failed=0 skipped=0 rescued=0 ignored=0
403 Client Error: Forbidden for url: http://foreman-1.nic.corp.com/api/v2/reports (if you see this, just ignore it) Its just callback report.