Category: Azure
Microsoft 365 Security in Azure/Entra – Step‑by‑Step Deployment Playbook
A practical, production‑ready guide to ship a secure Microsoft 365 tenant using Entra ID (Azure AD), Conditional Access, Intune, Defender, and Purview — with rollback safety and validation checklists.
Table of Contents
- 0) Pre‑reqs & Planning
- 1) Create Tenant & Verify Domain
- 2) Identity Foundations (Entra)
- 3) Conditional Access — Secure Baseline
- 4) Endpoint & Device Management (Intune)
- 5) Threat Protection — Defender for Office 365
- 6) Data Protection — Purview (Labels, DLP, Retention)
- 7) Collaboration Controls — SharePoint/OneDrive/Teams
- 8) Logging, Monitoring, and SIEM
- 9) Admin Hardening & Operations
- 10) Rollout & Testing Plan
- 11) PowerShell Quick‑Starts
- 12) Common Pitfalls
- 13) Reusable Templates
- 14) Ops Runbook
- 15) Portal Shortcuts
0) Pre‑reqs & Planning
- Licensing:
- Lean: Microsoft 365 Business Premium
- Enterprise baseline: M365 E3 + Defender for Office 365 P2 + Intune
- Advanced/XDR+Data: M365 E5
- Inputs: primary domain, registrar access, two break‑glass mailboxes, trusted IPs/regions, device platforms, retention/DLP requirements.
1) Create Tenant & Verify Domain
- Sign up for Microsoft 365 (creates an Entra ID tenant).
- Admin Center → Settings > Domains → Add domain → verify via TXT.
- Complete MX/CNAME/Autodiscover as prompted.
- Email auth trio:
- SPF (root TXT):
v=spf1 include:spf.protection.outlook.com -all - DKIM: Exchange Admin → Mail flow → DKIM → enable per domain
- DMARC (TXT at
_dmarc.domain):v=DMARC1; p=none; rua=mailto:dmarc@domain; adkim=s; aspf=s; pct=100(tighten later)
- SPF (root TXT):
2) Identity Foundations (Entra)
2.1 Break‑Glass Accounts
- Create two cloud‑only Global Admins (no MFA) with strong secrets and exclude from CA.
- Alert if these accounts sign in.
2.2 Least Privilege & PIM
- Use role‑based admin (Exchange/SharePoint/Intune Admin, etc.).
- (E5) Enable PIM for JIT elevation, approvals, and MFA on activation.
2.3 Prereqs & Auth Methods
- Disable Security Defaults if deploying custom CA.
- Add Named Locations (trusted IPs; optional geofencing).
- Enable Microsoft Authenticator, FIDO2/passkeys; define a Strong MFA authentication strength.
3) Conditional Access — Secure Baseline
Deploy in Report‑only mode, validate sign‑ins, then switch to On.
- Require MFA (All Users): exclude break‑glass/service accounts.
- Block Legacy Auth: block “Other clients” (POP/IMAP/SMTP basic).
- Protect Admins: require MFA + compliant device; add sign‑in risk ≥ Medium (E5).
- Require Compliant Device for M365 core apps (SharePoint/Exchange/Teams).
- Emergency Bypass policy for break‑glass accounts.
4) Endpoint & Device Management (Intune)
- Confirm MDM authority = Intune.
- Enrollment: Windows auto‑enroll; Apple Push cert for macOS/iOS; Android Enterprise.
- Compliance: BitLocker/FileVault, Secure Boot/TPM, passcode/biometric, minimum OS, Defender for Endpoint onboarding.
- Configuration: Windows Security Baselines; firewall; SmartScreen; ASR rules.
- MAM (BYOD): restrict copy/paste, block personal saves, require app PIN, selective wipe.
5) Threat Protection — Defender for Office 365
- Enable Preset security policies (Standard/Strict).
- Turn on Safe Links (time‑of‑click) and Safe Attachments (Dynamic Delivery).
- Tune anti‑spam and anti‑phishing; add VIP/user impersonation protection.
- Configure alert policies; route notifications to SecOps/Teams.
6) Data Protection — Purview
Sensitivity Labels
- Define taxonomy: Public / Internal / Confidential / Secret.
- Encrypt for higher tiers; set a default label; publish to groups.
- Enable mandatory labeling in Office apps.
Auto‑Labeling & DLP
- Auto‑label by sensitive info types (PCI, PII, healthcare, custom).
- DLP for Exchange/SharePoint/OneDrive/Teams: block or allow with justification; user tips; incident reports.
Retention
- Create retention policies per location; enable Litigation Hold when required.
7) Collaboration Controls — SharePoint/OneDrive/Teams
- External sharing: start with Existing guests only or New & existing guests per site.
- OneDrive default link type: Specific people.
- Apply CA “Require compliant device” for SPO/OD to block unmanaged downloads (or use session controls via Defender for Cloud Apps).
8) Logging, Monitoring, and SIEM
- Ensure Unified Audit is On (Audit Standard/Premium).
- Use Defender incidents and Advanced Hunting for investigations.
- Connect Entra/M365/Defender to Microsoft Sentinel; enable analytics rules (impossible travel, MFA fatigue, OAuth abuse).
9) Admin Hardening & Operations
- Use PIM for privileged roles; do monthly access reviews for guests/roles.
- Require compliant device for admins (PAW or CA).
- Grant least‑privilege Graph scopes to app registrations; store secrets in Key Vault.
10) Rollout & Testing Plan
- Pilot: IT users → CA in report‑only → validate → turn on; Defender presets; labels/DLP in audit mode.
- Wave 1: IT + power users → verify device compliance, mail flow, labeling prompts.
- Wave 2: All staff → tighten DMARC (quarantine → reject) and DLP blocking.
Validation Checklist
- MFA prompts; legacy auth blocked in Sign‑in logs.
- Devices compliant; non‑compliant blocked.
- Safe Links rewriting; malicious attachments quarantined.
- Labels visible; DLP warns/blocks exfil.
- External sharing limited and audited.
- Audit flowing to Sentinel; test incidents fire.
11) PowerShell Quick‑Starts
# Graph
Install-Module Microsoft.Graph -Scope CurrentUser
Connect-MgGraph -Scopes "Directory.ReadWrite.All, Policy.Read.All, Policy.ReadWrite.ConditionalAccess, RoleManagement.ReadWrite.Directory"

# Exchange Online
Install-Module ExchangeOnlineManagement -Scope CurrentUser
Connect-ExchangeOnline

# Purview (Security & Compliance)
Install-Module ExchangeOnlineManagement
Connect-IPPSSession

# Examples
Get-MgIdentityConditionalAccessPolicy | Select-Object displayName,state
Set-Mailbox user@contoso.com -LitigationHoldEnabled $true
Start-DkimSigningConfig -Identity contoso.com
12) Common Pitfalls
- CA Lockout: Always exclude break‑glass until you validate.
- MFA fatigue: Use number matching / strong auth strengths.
- Unmanaged devices: Require compliant device or use session controls.
- Over‑sharing: Default to “Specific people” links; review guests quarterly.
- Excessive admin rights: PIM + recurring access reviews.
13) Reusable Templates
CA Baseline
- Require MFA (exclude break‑glass/service)
- Block legacy auth
- Require compliant device for admins
- Require compliant device for M365 core apps
- Emergency bypass for break‑glass
Intune Compliance (Windows)
- BitLocker required; TPM; Secure Boot; Defender AV on; OS ≥ Win10 22H2; Firewall on
DLP Starter
- Block outbound email with PCI/SSN (allow override with justification for managers)
- Block sharing items labeled Confidential to external
Purview Labels
- Public (no controls)
- Internal (watermark)
- Confidential (encrypt; org‑wide)
- Secret (encrypt; specific groups only)
14) Ops Runbook
- Daily: Review Defender incidents; quarantine releases.
- Weekly: Triage risky sign‑ins; device compliance drifts.
- Monthly: Access reviews (guests/roles); external sharing & DMARC reports.
- Quarterly: Test break‑glass; simulate phish; tabletop exercise.
15) Portal Shortcuts
| Portal | URL |
|---|---|
| Entra (Azure AD) | entra.microsoft.com |
| M365 Admin | admin.microsoft.com |
| Exchange Admin | admin.exchange.microsoft.com |
| Intune | intune.microsoft.com |
| Defender (XDR) | security.microsoft.com |
| Purview/Compliance | compliance.microsoft.com |
| Teams Admin | admin.teams.microsoft.com |
Building Production-Ready Release Pipelines in Azure: A Step-by-Step Guide using Arm Templates
Creating enterprise-grade release pipelines in Azure requires a comprehensive understanding of Azure DevOps services, proper configuration, and adherence to production best practices. This detailed guide will walk you through building a robust CI/CD pipeline that deploys applications to Azure App Services with slot-based deployments for zero-downtime releases.
Architecture Overview
Our production pipeline will deploy a .NET web application to Azure App Service using deployment slots for blue/green deployments. The pipeline includes multiple environments (development, staging, production) with automated testing, security scanning, and manual approval gates.
Azure Repos → Build Pipeline (Azure Pipelines) → Dev Deployment → Automated Tests → Staging Deployment → Security Scan → Manual Approval → Production Deployment (Slot Swap) → Post-Deployment Monitoring
Prerequisites
Before starting, ensure you have:
- Azure subscription with sufficient permissions
- Azure DevOps organization and project
- .NET application in Azure Repos (or GitHub)
- Understanding of Azure Resource Manager (ARM) templates
- Azure CLI installed locally
Understanding Azure Deployment Slots
Before diving into infrastructure setup, it’s crucial to understand Azure deployment slots – a key feature that enables zero-downtime deployments and advanced deployment strategies.
What Are Deployment Slots?
Azure App Service deployment slots are live instances of your web application with their own hostnames. Think of them as separate environments that share the same App Service plan but can run different versions of your application.
- Production slot: Your main application (e.g.,
myapp.azurewebsites.net) - Staging slot: A separate instance (e.g.,
myapp-staging.azurewebsites.net) - Additional slots: Canary, testing, or feature-specific environments
Why Use Deployment Slots?
1. Deploy new version to staging slot
2. Test the staging slot thoroughly
3. Swap staging and production slots instantly
4. If issues arise, swap back immediately (rollback)
Key Benefits:
- Zero-downtime deployments: Instant traffic switching
- Blue/green deployments: Run two versions simultaneously
- A/B testing: Route percentage of traffic to different versions
- Warm-up validation: Test in production environment before going live
- Quick rollbacks: Instant revert if problems occur
Step 1: Infrastructure Setup – Choose Your Approach
Azure offers two primary Infrastructure as Code (IaC) approaches for managing resources including deployment slots:
- ARM Templates/Bicep: Azure’s native IaC solution
- Terraform: Multi-cloud infrastructure management tool
Option A: ARM Templates/Bicep (Recommended for Azure-only environments)
Create an ARM template (infrastructure/main.bicep) for your infrastructure:
param location string = resourceGroup().location
param environmentName string
param appServicePlanSku string = 'S1'

resource appServicePlan 'Microsoft.Web/serverfarms@2022-03-01' = {
  name: 'asp-myapp-${environmentName}'
  location: location
  sku: {
    name: appServicePlanSku
    tier: 'Standard'
  }
  properties: {
    reserved: false
  }
}

resource webApp 'Microsoft.Web/sites@2022-03-01' = {
  name: 'app-myapp-${environmentName}'
  location: location
  properties: {
    serverFarmId: appServicePlan.id
    httpsOnly: true
    siteConfig: {
      netFrameworkVersion: 'v6.0'
      defaultDocuments: [
        'Default.htm'
        'Default.html'
        'index.html'
      ]
      httpLoggingEnabled: true
      logsDirectorySizeLimit: 35
      detailedErrorLoggingEnabled: true
      appSettings: [
        {
          name: 'ASPNETCORE_ENVIRONMENT'
          value: environmentName
        }
        {
          name: 'ApplicationInsights__ConnectionString'
          value: applicationInsights.properties.ConnectionString
        }
      ]
    }
  }
}

// Create staging slot for production environment
resource stagingSlot 'Microsoft.Web/sites/slots@2022-03-01' = if (environmentName == 'prod') {
  parent: webApp
  name: 'staging'
  location: location
  properties: {
    serverFarmId: appServicePlan.id
    httpsOnly: true
    siteConfig: {
      netFrameworkVersion: 'v6.0'
      appSettings: [
        {
          name: 'ASPNETCORE_ENVIRONMENT'
          value: 'Staging'
        }
        {
          name: 'ApplicationInsights__ConnectionString'
          value: applicationInsights.properties.ConnectionString
        }
      ]
    }
  }
}

resource applicationInsights 'Microsoft.Insights/components@2020-02-02' = {
  name: 'ai-myapp-${environmentName}'
  location: location
  kind: 'web'
  properties: {
    Application_Type: 'web'
    Request_Source: 'rest'
    RetentionInDays: 90
    WorkspaceResourceId: logAnalyticsWorkspace.id
  }
}

resource logAnalyticsWorkspace 'Microsoft.OperationalInsights/workspaces@2022-10-01' = {
  name: 'log-myapp-${environmentName}'
  location: location
  properties: {
    sku: {
      name: 'PerGB2018'
    }
    retentionInDays: 30
  }
}

resource keyVault 'Microsoft.KeyVault/vaults@2022-07-01' = {
  name: 'kv-myapp-${environmentName}-${uniqueString(resourceGroup().id)}'
  location: location
  properties: {
    sku: {
      family: 'A'
      name: 'standard'
    }
    tenantId: subscription().tenantId
    accessPolicies: [
      {
        tenantId: subscription().tenantId
        objectId: webApp.identity.principalId
        permissions: {
          secrets: [
            'get'
            'list'
          ]
        }
      }
    ]
    enableRbacAuthorization: false
    enableSoftDelete: true
    softDeleteRetentionInDays: 7
  }
}

output webAppName string = webApp.name
output webAppUrl string = 'https://${webApp.properties.defaultHostName}'
output keyVaultName string = keyVault.name
output applicationInsightsKey string = applicationInsights.properties.InstrumentationKey
Deploy Infrastructure
Create infrastructure deployment pipeline (infrastructure/azure-pipelines.yml):
trigger: none

variables:
  azureSubscription: 'MyAzureSubscription'
  resourceGroupPrefix: 'rg-myapp'
  location: 'East US'

stages:
- stage: DeployInfrastructure
  displayName: 'Deploy Infrastructure'
  jobs:
  - job: DeployDev
    displayName: 'Deploy Development Infrastructure'
    pool:
      vmImage: 'ubuntu-latest'
    steps:
    - task: AzureResourceManagerTemplateDeployment@3
      displayName: 'Deploy Development Resources'
      inputs:
        deploymentScope: 'Resource Group'
        azureResourceManagerConnection: '$(azureSubscription)'
        subscriptionId: '$(subscriptionId)'
        action: 'Create Or Update Resource Group'
        resourceGroupName: '$(resourceGroupPrefix)-dev'
        location: '$(location)'
        templateLocation: 'Linked artifact'
        csmFile: 'infrastructure/main.bicep'
        overrideParameters: |
          -environmentName "dev"
          -appServicePlanSku "F1"
        deploymentMode: 'Incremental'

  - job: DeployStaging
    displayName: 'Deploy Staging Infrastructure'
    pool:
      vmImage: 'ubuntu-latest'
    steps:
    - task: AzureResourceManagerTemplateDeployment@3
      displayName: 'Deploy Staging Resources'
      inputs:
        deploymentScope: 'Resource Group'
        azureResourceManagerConnection: '$(azureSubscription)'
        subscriptionId: '$(subscriptionId)'
        action: 'Create Or Update Resource Group'
        resourceGroupName: '$(resourceGroupPrefix)-staging'
        location: '$(location)'
        templateLocation: 'Linked artifact'
        csmFile: 'infrastructure/main.bicep'
        overrideParameters: |
          -environmentName "staging"
          -appServicePlanSku "S1"
        deploymentMode: 'Incremental'

  - job: DeployProduction
    displayName: 'Deploy Production Infrastructure'
    pool:
      vmImage: 'ubuntu-latest'
    steps:
    - task: AzureResourceManagerTemplateDeployment@3
      displayName: 'Deploy Production Resources'
      inputs:
        deploymentScope: 'Resource Group'
        azureResourceManagerConnection: '$(azureSubscription)'
        subscriptionId: '$(subscriptionId)'
        action: 'Create Or Update Resource Group'
        resourceGroupName: '$(resourceGroupPrefix)-prod'
        location: '$(location)'
        templateLocation: 'Linked artifact'
        csmFile: 'infrastructure/main.bicep'
        overrideParameters: |
          -environmentName "prod"
          -appServicePlanSku "P1V2"
        deploymentMode: 'Incremental'
Option B: Terraform (Recommended for multi-cloud or Terraform-experienced teams)
Alternatively, you can use Terraform to manage the same infrastructure. Here’s the equivalent Terraform configuration:
main.tf:
terraform {
  required_providers {
    azurerm = {
      source  = "hashicorp/azurerm"
      version = "~>3.0"
    }
  }
}

provider "azurerm" {
  features {}
}

# Resource Group
resource "azurerm_resource_group" "main" {
  name     = "rg-myapp-${var.environment_name}"
  location = var.location
}

# App Service Plan
resource "azurerm_service_plan" "main" {
  name                = "asp-myapp-${var.environment_name}"
  resource_group_name = azurerm_resource_group.main.name
  location           = azurerm_resource_group.main.location
  os_type            = "Windows"
  sku_name           = var.app_service_plan_sku
}

# Main Web App (Production Slot)
resource "azurerm_windows_web_app" "main" {
  name                = "app-myapp-${var.environment_name}"
  resource_group_name = azurerm_resource_group.main.name
  location           = azurerm_service_plan.main.location
  service_plan_id    = azurerm_service_plan.main.id

  site_config {
    always_on = true

    application_stack {
      dotnet_framework_version = "v6.0"
    }
  }

  app_settings = {
    "ASPNETCORE_ENVIRONMENT" = title(var.environment_name)
    "ApplicationInsights__ConnectionString" = azurerm_application_insights.main.connection_string
  }

  identity {
    type = "SystemAssigned"
  }

  https_only = true
}

# Staging Deployment Slot (only for production environment)
resource "azurerm_windows_web_app_slot" "staging" {
  count           = var.environment_name == "prod" ? 1 : 0
  name            = "staging"
  app_service_id  = azurerm_windows_web_app.main.id

  site_config {
    always_on = true

    application_stack {
      dotnet_framework_version = "v6.0"
    }
  }

  app_settings = {
    "ASPNETCORE_ENVIRONMENT" = "Staging"
    "ApplicationInsights__ConnectionString" = azurerm_application_insights.main.connection_string
  }

  identity {
    type = "SystemAssigned"
  }

  https_only = true
}

# Application Insights
resource "azurerm_application_insights" "main" {
  name                = "ai-myapp-${var.environment_name}"
  location           = azurerm_resource_group.main.location
  resource_group_name = azurerm_resource_group.main.name
  application_type   = "web"
  retention_in_days  = 90
  workspace_id       = azurerm_log_analytics_workspace.main.id
}

# Log Analytics Workspace
resource "azurerm_log_analytics_workspace" "main" {
  name                = "log-myapp-${var.environment_name}"
  location           = azurerm_resource_group.main.location
  resource_group_name = azurerm_resource_group.main.name
  sku                = "PerGB2018"
  retention_in_days  = 30
}

# Key Vault for secrets
resource "azurerm_key_vault" "main" {
  name                = "kv-myapp-${var.environment_name}-${random_string.suffix.result}"
  location           = azurerm_resource_group.main.location
  resource_group_name = azurerm_resource_group.main.name
  tenant_id          = data.azurerm_client_config.current.tenant_id
  sku_name           = "standard"

  # Grant access to the web app's managed identity
  access_policy {
    tenant_id = data.azurerm_client_config.current.tenant_id
    object_id = azurerm_windows_web_app.main.identity[0].principal_id

    secret_permissions = [
      "Get",
      "List",
    ]
  }

  # Grant access to staging slot if it exists
  dynamic "access_policy" {
    for_each = var.environment_name == "prod" ? [1] : []
    content {
      tenant_id = data.azurerm_client_config.current.tenant_id
      object_id = azurerm_windows_web_app_slot.staging[0].identity[0].principal_id

      secret_permissions = [
        "Get",
        "List",
      ]
    }
  }
}

resource "random_string" "suffix" {
  length  = 8
  special = false
  upper   = false
}

data "azurerm_client_config" "current" {}
variables.tf:
variable "environment_name" {
  description = "Environment name"
  type        = string
  validation {
    condition     = contains(["dev", "staging", "prod"], var.environment_name)
    error_message = "Environment must be dev, staging, or prod."
  }
}

variable "location" {
  description = "Azure region"
  type        = string
  default     = "East US"
}

variable "app_service_plan_sku" {
  description = "App Service Plan SKU"
  type        = string
  default     = "S1"
}
terraform.tfvars (for different environments):
# terraform.tfvars.prod
environment_name = "prod"
location = "East US"
app_service_plan_sku = "P1V2"  # Production tier supports deployment slots

# terraform.tfvars.staging
environment_name = "staging"
location = "East US"
app_service_plan_sku = "S1"  # No slots needed for staging environment

# terraform.tfvars.dev
environment_name = "dev"
location = "East US"
app_service_plan_sku = "F1"  # Free tier, no slots available
Deploy with Terraform:
# Initialize Terraform
terraform init

# Plan deployment
terraform plan -var-file="terraform.tfvars.prod"

# Apply infrastructure
terraform apply -var-file="terraform.tfvars.prod" -auto-approve
ARM vs Terraform: Which Should You Choose?
Choose ARM Templates/Bicep if:
- You’re working in a pure Azure environment
- Your team is Azure-focused
- You want native Azure tooling integration
- You need immediate access to new Azure features
Choose Terraform if:
- You have multi-cloud infrastructure
- Your team has Terraform expertise
- You want vendor-neutral infrastructure code
- You need to manage non-Azure resources (DNS, monitoring tools, etc.)
Deploy Infrastructure
If using ARM/Bicep, create infrastructure deployment pipeline (infrastructure/azure-pipelines.yml):
trigger: none

variables:
  azureSubscription: 'MyAzureSubscription'
  resourceGroupPrefix: 'rg-myapp'
  location: 'East US'

stages:
- stage: DeployInfrastructure
  displayName: 'Deploy Infrastructure'
  jobs:
  - job: DeployDev
    displayName: 'Deploy Development Infrastructure'
    pool:
      vmImage: 'ubuntu-latest'
    steps:
    - task: AzureResourceManagerTemplateDeployment@3
      displayName: 'Deploy Development Resources'
      inputs:
        deploymentScope: 'Resource Group'
        azureResourceManagerConnection: '$(azureSubscription)'
        subscriptionId: '$(subscriptionId)'
        action: 'Create Or Update Resource Group'
        resourceGroupName: '$(resourceGroupPrefix)-dev'
        location: '$(location)'
        templateLocation: 'Linked artifact'
        csmFile: 'infrastructure/main.bicep'
        overrideParameters: |
          -environmentName "dev"
          -appServicePlanSku "F1"
        deploymentMode: 'Incremental'

  - job: DeployStaging
    displayName: 'Deploy Staging Infrastructure'
    pool:
      vmImage: 'ubuntu-latest'
    steps:
    - task: AzureResourceManagerTemplateDeployment@3
      displayName: 'Deploy Staging Resources'
      inputs:
        deploymentScope: 'Resource Group'
        azureResourceManagerConnection: '$(azureSubscription)'
        subscriptionId: '$(subscriptionId)'
        action: 'Create Or Update Resource Group'
        resourceGroupName: '$(resourceGroupPrefix)-staging'
        location: '$(location)'
        templateLocation: 'Linked artifact'
        csmFile: 'infrastructure/main.bicep'
        overrideParameters: |
          -environmentName "staging"
          -appServicePlanSku "S1"
        deploymentMode: 'Incremental'

  - job: DeployProduction
    displayName: 'Deploy Production Infrastructure'
    pool:
      vmImage: 'ubuntu-latest'
    steps:
    - task: AzureResourceManagerTemplateDeployment@3
      displayName: 'Deploy Production Resources'
      inputs:
        deploymentScope: 'Resource Group'
        azureResourceManagerConnection: '$(azureSubscription)'
        subscriptionId: '$(subscriptionId)'
        action: 'Create Or Update Resource Group'
        resourceGroupName: '$(resourceGroupPrefix)-prod'
        location: '$(location)'
        templateLocation: 'Linked artifact'
        csmFile: 'infrastructure/main.bicep'
        overrideParameters: |
          -environmentName "prod"
          -appServicePlanSku "P1V2"
Application Settings
Create environment-specific configuration files:


appsettings.Development.json:
{
  "Logging": {
    "LogLevel": {
      "Default": "Information",
      "Microsoft.AspNetCore": "Warning"
    }
  },
  "ConnectionStrings": {
    "DefaultConnection": "@Microsoft.KeyVault(SecretUri=https://kv-myapp-dev.vault.azure.net/secrets/DatabaseConnectionString/)"
  },
  "ApplicationInsights": {
    "ConnectionString": ""
  }
}
appsettings.Staging.json:
{
  "Logging": {
    "LogLevel": {
      "Default": "Information",
      "Microsoft.AspNetCore": "Warning"
    }
  },
  "ConnectionStrings": {
    "DefaultConnection": "@Microsoft.KeyVault(SecretUri=https://kv-myapp-staging.vault.azure.net/secrets/DatabaseConnectionString/)"
  },
  "ApplicationInsights": {
    "ConnectionString": ""
  }
}
appsettings.Production.json:
{
  "Logging": {
    "LogLevel": {
      "Default": "Warning",
      "Microsoft.AspNetCore": "Warning"
    }
  },
  "ConnectionStrings": {
    "DefaultConnection": "@Microsoft.KeyVault(SecretUri=https://kv-myapp-prod.vault.azure.net/secrets/DatabaseConnectionString/)"
  },
  "ApplicationInsights": {
    "ConnectionString": ""
  }
}
Health Check Configuration
Add health checks to your application (Program.cs):
var builder = WebApplication.CreateBuilder(args);

// Add services
builder.Services.AddControllers();
builder.Services.AddApplicationInsightsTelemetry();
builder.Services.AddHealthChecks()
    .AddCheck("self", () => HealthCheckResult.Healthy())
    .AddSqlServer(
        builder.Configuration.GetConnectionString("DefaultConnection"),
        name: "database",
        tags: new[] { "db", "sql", "sqlserver" });

var app = builder.Build();

// Configure pipeline
if (!app.Environment.IsDevelopment())
{
    app.UseExceptionHandler("/Error");
    app.UseHsts();
}

app.UseHttpsRedirection();
app.UseStaticFiles();
app.UseRouting();
app.UseAuthorization();

app.MapControllers();
app.MapHealthChecks("/health", new HealthCheckOptions
{
    ResponseWriter = UIResponseWriter.WriteHealthCheckUIResponse
});

app.MapHealthChecks("/health/ready", new HealthCheckOptions
{
    Predicate = check => check.Tags.Contains("ready"),
    ResponseWriter = UIResponseWriter.WriteHealthCheckUIResponse
});

app.MapHealthChecks("/health/live", new HealthCheckOptions
{
    Predicate = _ => false,
    ResponseWriter = UIResponseWriter.WriteHealthCheckUIResponse
});

app.Run();
Step 3: Build Pipeline Configuration
Create the main build pipeline (azure-pipelines.yml):
trigger:
  branches:
    include:
    - main
    - develop
  paths:
    exclude:
    - infrastructure/*
    - docs/*
    - README.md

variables:
  buildConfiguration: 'Release'
  dotNetFramework: 'net6.0'
  dotNetVersion: '6.0.x'
  buildPlatform: 'Any CPU'

pool:
  vmImage: 'windows-latest'

stages:
- stage: Build
  displayName: 'Build and Test'
  jobs:
  - job: BuildJob
    displayName: 'Build Job'
    steps:
    - task: UseDotNet@2
      displayName: 'Use .NET Core SDK $(dotNetVersion)'
      inputs:
        packageType: 'sdk'
        version: '$(dotNetVersion)'

    - task: DotNetCoreCLI@2
      displayName: 'Restore NuGet packages'
      inputs:
        command: 'restore'
        projects: '**/*.csproj'
        feedsToUse: 'select'

    - task: DotNetCoreCLI@2
      displayName: 'Build application'
      inputs:
        command: 'build'
        projects: '**/*.csproj'
        arguments: '--configuration $(buildConfiguration) --no-restore'

    - task: DotNetCoreCLI@2
      displayName: 'Run unit tests'
      inputs:
        command: 'test'
        projects: '**/*Tests.csproj'
        arguments: '--configuration $(buildConfiguration) --no-build --collect:"XPlat Code Coverage" --logger trx --results-directory $(Common.TestResultsDirectory)'
        publishTestResults: true

    - task: PublishCodeCoverageResults@1
      displayName: 'Publish code coverage'
      inputs:
        codeCoverageTool: 'Cobertura'
        summaryFileLocation: '$(Common.TestResultsDirectory)/**/*.cobertura.xml'

    - task: DotNetCoreCLI@2
      displayName: 'Publish application'
      inputs:
        command: 'publish'
        projects: '**/*.csproj'
        arguments: '--configuration $(buildConfiguration) --output $(Build.ArtifactStagingDirectory)/app --no-build'
        publishWebProjects: true
        zipAfterPublish: true

    - task: PublishBuildArtifacts@1
      displayName: 'Publish build artifacts'
      inputs:
        pathToPublish: '$(Build.ArtifactStagingDirectory)'
        artifactName: 'drop'
        publishLocation: 'Container'

- stage: DeployDev
  displayName: 'Deploy to Development'
  dependsOn: Build
  condition: and(succeeded(), eq(variables['Build.SourceBranch'], 'refs/heads/develop'))
  variables:
    environment: 'dev'
    resourceGroup: 'rg-myapp-dev'
    webAppName: 'app-myapp-dev'
  jobs:
  - deployment: DeployDev
    displayName: 'Deploy to Development'
    environment: 'Development'
    strategy:
      runOnce:
        deploy:
          steps:
          - template: templates/deploy-steps.yml
            parameters:
              environment: '$(environment)'
              resourceGroup: '$(resourceGroup)'
              webAppName: '$(webAppName)'
              useSlots: false

- stage: DeployStaging
  displayName: 'Deploy to Staging'
  dependsOn: Build
  condition: and(succeeded(), eq(variables['Build.SourceBranch'], 'refs/heads/main'))
  variables:
    environment: 'staging'
    resourceGroup: 'rg-myapp-staging'
    webAppName: 'app-myapp-staging'
  jobs:
  - deployment: DeployStaging
    displayName: 'Deploy to Staging'
    environment: 'Staging'
    strategy:
      runOnce:
        deploy:
          steps:
          - template: templates/deploy-steps.yml
            parameters:
              environment: '$(environment)'
              resourceGroup: '$(resourceGroup)'
              webAppName: '$(webAppName)'
              useSlots: false

  - job: StagingTests
    displayName: 'Run Staging Tests'
    dependsOn: DeployStaging
    pool:
      vmImage: 'windows-latest'
    steps:
    - task: DotNetCoreCLI@2
      displayName: 'Run integration tests'
      inputs:
        command: 'test'
        projects: '**/*IntegrationTests.csproj'
        arguments: '--configuration $(buildConfiguration) --logger trx --results-directory $(Common.TestResultsDirectory)'
        publishTestResults: true
      env:
        TEST_BASE_URL: 'https://app-myapp-staging.azurewebsites.net'

- stage: SecurityScan
  displayName: 'Security Scanning'
  dependsOn: DeployStaging
  condition: and(succeeded(), eq(variables['Build.SourceBranch'], 'refs/heads/main'))
  jobs:
  - job: SecurityScan
    displayName: 'Security Scan'
    pool:
      vmImage: 'windows-latest'
    steps:
    - task: whitesource.ws-bolt.bolt.wss.WhiteSource Bolt@20
      displayName: 'WhiteSource Bolt'
      inputs:
        cwd: '$(System.DefaultWorkingDirectory)'

    - task: SonarCloudPrepare@1
      displayName: 'Prepare SonarCloud analysis'
      inputs:
        SonarCloud: 'SonarCloud'
        organization: 'your-organization'
        scannerMode: 'MSBuild'
        projectKey: 'myapp'
        projectName: 'MyApp'
        projectVersion: '$(Build.BuildNumber)'

    - task: DotNetCoreCLI@2
      displayName: 'Build for SonarCloud'
      inputs:
        command: 'build'
        projects: '**/*.csproj'
        arguments: '--configuration $(buildConfiguration)'

    - task: SonarCloudAnalyze@1
      displayName: 'Run SonarCloud analysis'

    - task: SonarCloudPublish@1
      displayName: 'Publish SonarCloud results'
      inputs:
        pollingTimeoutSec: '300'

- stage: ProductionApproval
  displayName: 'Production Approval'
  dependsOn:
  - DeployStaging
  - SecurityScan
  condition: and(succeeded(), eq(variables['Build.SourceBranch'], 'refs/heads/main'))
  jobs:
  - job: waitForValidation
    displayName: 'Wait for external validation'
    pool: server
    timeoutInMinutes: 4320 # 3 days
    steps:
    - task: ManualValidation@0
      displayName: 'Manual validation'
      inputs:
        notifyUsers: |
          admin@company.com
          devops@company.com
        instructions: 'Please validate the staging deployment and approve for production'
        onTimeout: 'reject'

- stage: DeployProduction
  displayName: 'Deploy to Production'
  dependsOn: ProductionApproval
  condition: and(succeeded(), eq(variables['Build.SourceBranch'], 'refs/heads/main'))
  variables:
    environment: 'prod'
    resourceGroup: 'rg-myapp-prod'
    webAppName: 'app-myapp-prod'
  jobs:
  - deployment: DeployProduction
    displayName: 'Deploy to Production'
    environment: 'Production'
    strategy:
      runOnce:
        deploy:
          steps:
          - template: templates/deploy-steps.yml
            parameters:
              environment: '$(environment)'
              resourceGroup: '$(resourceGroup)'
              webAppName: '$(webAppName)'
              useSlots: true
Step 4: Deployment Templates
Create reusable deployment templates (templates/deploy-steps.yml):
parameters:
- name: environment
  type: string
- name: resourceGroup
  type: string
- name: webAppName
  type: string
- name: useSlots
  type: boolean
  default: false

steps:
- download: current
  artifact: drop
  displayName: 'Download build artifacts'

- task: AzureKeyVault@2
  displayName: 'Get secrets from Key Vault'
  inputs:
    azureSubscription: 'MyAzureSubscription'
    KeyVaultName: 'kv-myapp-${{ parameters.environment }}'
    SecretsFilter: '*'
    RunAsPreJob: false

- ${{ if eq(parameters.useSlots, true) }}:
  - task: AzureRmWebAppDeployment@4
    displayName: 'Deploy to staging slot'
    inputs:
      ConnectionType: 'AzureRM'
      azureSubscription: 'MyAzureSubscription'
      appType: 'webApp'
      WebAppName: '${{ parameters.webAppName }}'
      deployToSlotOrASE: true
      ResourceGroupName: '${{ parameters.resourceGroup }}'
      SlotName: 'staging'
      packageForLinux: '$(Pipeline.Workspace)/drop/app/*.zip'
      AppSettings: |
        -ASPNETCORE_ENVIRONMENT "${{ parameters.environment }}"
        -ApplicationInsights__ConnectionString "$(ApplicationInsights--ConnectionString)"
        -ConnectionStrings__DefaultConnection "$(DatabaseConnectionString)"

  - task: AzureAppServiceManage@0
    displayName: 'Start staging slot'
    inputs:
      azureSubscription: 'MyAzureSubscription'
      Action: 'Start Azure App Service'
      WebAppName: '${{ parameters.webAppName }}'
      SpecifySlotOrASE: true
      ResourceGroupName: '${{ parameters.resourceGroup }}'
      Slot: 'staging'

  - task: PowerShell@2
    displayName: 'Validate staging slot'
    inputs:
      targetType: 'inline'
      script: |
        $url = "https://${{ parameters.webAppName }}-staging.azurewebsites.net/health"
        Write-Host "Testing health endpoint: $url"

        $maxAttempts = 10
        $attempt = 0
        $success = $false

        while ($attempt -lt $maxAttempts -and -not $success) {
            try {
                $response = Invoke-RestMethod -Uri $url -Method Get -TimeoutSec 30
                if ($response) {
                    Write-Host "Health check passed!"
                    $success = $true
                } else {
                    Write-Host "Health check failed. Attempt $($attempt + 1) of $maxAttempts"
                }
            } catch {
                Write-Host "Error calling health endpoint: $($_.Exception.Message)"
            }

            if (-not $success) {
                Start-Sleep -Seconds 30
                $attempt++
            }
        }

        if (-not $success) {
            Write-Error "Health check failed after $maxAttempts attempts"
            exit 1
        }

  - task: AzureAppServiceManage@0
    displayName: 'Swap staging to production'
    inputs:
      azureSubscription: 'MyAzureSubscription'
      Action: 'Swap Slots'
      WebAppName: '${{ parameters.webAppName }}'
      ResourceGroupName: '${{ parameters.resourceGroup }}'
      SourceSlot: 'staging'
      SwapWithProduction: true

- ${{ if eq(parameters.useSlots, false) }}:
  - task: AzureRmWebAppDeployment@4
    displayName: 'Deploy to App Service'
    inputs:
      ConnectionType: 'AzureRM'
      azureSubscription: 'MyAzureSubscription'
      appType: 'webApp'
      WebAppName: '${{ parameters.webAppName }}'
      ResourceGroupName: '${{ parameters.resourceGroup }}'
      packageForLinux: '$(Pipeline.Workspace)/drop/app/*.zip'
      AppSettings: |
        -ASPNETCORE_ENVIRONMENT "${{ parameters.environment }}"
        -ApplicationInsights__ConnectionString "$(ApplicationInsights--ConnectionString)"
        -ConnectionStrings__DefaultConnection "$(DatabaseConnectionString)"

- task: PowerShell@2
  displayName: 'Post-deployment validation'
  inputs:
    targetType: 'inline'
    script: |
      $url = "https://${{ parameters.webAppName }}.azurewebsites.net/health"
      Write-Host "Testing production health endpoint: $url"

      $maxAttempts = 5
      $attempt = 0
      $success = $false

      while ($attempt -lt $maxAttempts -and -not $success) {
          try {
              $response = Invoke-RestMethod -Uri $url -Method Get -TimeoutSec 30
              if ($response) {
                  Write-Host "Production health check passed!"
                  $success = $true
              }
          } catch {
              Write-Host "Error calling production health endpoint: $($_.Exception.Message)"
          }

          if (-not $success) {
              Start-Sleep -Seconds 15
              $attempt++
          }
      }

      if (-not $success) {
          Write-Error "Production health check failed after $maxAttempts attempts"
          exit 1
      }

- task: AzureCLI@2
  displayName: 'Configure monitoring alerts'
  inputs:
    azureSubscription: 'MyAzureSubscription'
    scriptType: 'ps'
    scriptLocation: 'inlineScript'
    inlineScript: |
      # Create action group for alerts
      az monitor action-group create `
        --name "myapp-alerts" `
        --resource-group "${{ parameters.resourceGroup }}" `
        --short-name "MyAppAlert" `
        --email-receivers name="DevOps Team" email="devops@company.com"

      # Create availability alert
      az monitor metrics alert create `
        --name "myapp-availability-alert" `
        --resource-group "${{ parameters.resourceGroup }}" `
        --scopes "/subscriptions/$(az account show --query id -o tsv)/resourceGroups/${{ parameters.resourceGroup }}/providers/Microsoft.Web/sites/${{ parameters.webAppName }}" `
        --condition "avg Availability < 99" `
        --description "Alert when availability drops below 99%" `
        --evaluation-frequency 1m `
        --window-size 5m `
        --severity 2 `
        --action-groups "/subscriptions/$(az account show --query id -o tsv)/resourceGroups/${{ parameters.resourceGroup }}/providers/microsoft.insights/actionGroups/myapp-alerts"
Step 5: Variable Groups and Environments
Create Variable Groups
In Azure DevOps, create variable groups for each environment:
Development Variables:
Environment: Development
DatabaseConnectionString: (linked to Key Vault)
ApplicationInsights.ConnectionString: (from deployment output)
Staging Variables:
Environment: Staging
DatabaseConnectionString: (linked to Key Vault)
ApplicationInsights.ConnectionString: (from deployment output)
Production Variables:
Environment: Production
DatabaseConnectionString: (linked to Key Vault)
ApplicationInsights.ConnectionString: (from deployment output)
Configure Environments
Create environments in Azure DevOps with appropriate approvals and checks:
- Development: Auto-approval
- Staging: Auto-approval with branch protection (main only)
- Production: Manual approval required with 2-person approval policy
Step 6: Advanced Production Features
Blue/Green Deployment with Traffic Splitting
Add traffic splitting configuration:
- task: AzureAppServiceManage@0
  displayName: 'Configure traffic routing (10% to staging)'
  inputs:
    azureSubscription: 'MyAzureSubscription'
    Action: 'Swap Slots'
    WebAppName: '${{ parameters.webAppName }}'
    ResourceGroupName: '${{ parameters.resourceGroup }}'
    SourceSlot: 'staging'
    SwapWithProduction: false
    PreserveVnet: true
    RouteTrafficPercentage: 10

- task: PowerShell@2
  displayName: 'Monitor metrics during canary deployment'
  inputs:
    targetType: 'inline'
    script: |
      # Monitor for 10 minutes
      $endTime = (Get-Date).AddMinutes(10)

      while ((Get-Date) -lt $endTime) {
          # Check error rate, response time, etc.
          $errorRate = # Query Application Insights

          if ($errorRate -gt 0.05) {  # 5% error threshold
              Write-Error "High error rate detected: $errorRate"
              exit 1
          }

          Start-Sleep -Seconds 60
      }

- task: AzureAppServiceManage@0
  displayName: 'Complete swap to production'
  inputs:
    azureSubscription: 'MyAzureSubscription'
    Action: 'Swap Slots'
    WebAppName: '${{ parameters.webAppName }}'
    ResourceGroupName: '${{ parameters.resourceGroup }}'
    SourceSlot: 'staging'
    SwapWithProduction: true
Automated Rollback
Implement automated rollback capabilities:
- task: PowerShell@2
  displayName: 'Monitor post-deployment metrics'
  inputs:
    targetType: 'inline'
    script: |
      $monitoringDuration = 300  # 5 minutes
      $checkInterval = 30        # 30 seconds
      $endTime = (Get-Date).AddSeconds($monitoringDuration)

      while ((Get-Date) -lt $endTime) {
          try {
              # Check health endpoint
              $healthResponse = Invoke-RestMethod -Uri "https://${{ parameters.webAppName }}.azurewebsites.net/health" -TimeoutSec 10

              # Check Application Insights metrics
              $errorRate = # Query error rate from App Insights
              $responseTime = # Query average response time

              if ($errorRate -gt 0.05 -or $responseTime -gt 2000) {
                  Write-Error "Performance degradation detected. Initiating rollback..."

                  # Trigger rollback
                  az webapp deployment slot swap --name "${{ parameters.webAppName }}" --resource-group "${{ parameters.resourceGroup }}" --slot staging --target-slot production

                  exit 1
              }

              Write-Host "Metrics within acceptable range. Error rate: $errorRate, Response time: $responseTime ms"

          } catch {
              Write-Warning "Error checking metrics: $($_.Exception.Message)"
          }

          Start-Sleep -Seconds $checkInterval
      }

      Write-Host "Post-deployment monitoring completed successfully"
Database Migration Pipeline
Create a separate pipeline for database migrations:
# database-migration-pipeline.yml
trigger: none

parameters:
- name: environment
  displayName: Environment
  type: string
  default: staging
  values:
  - staging
  - production

variables:
  environment: ${{ parameters.environment }}

stages:
- stage: DatabaseMigration
  displayName: 'Database Migration - $(environment)'
  jobs:
  - job: Migration
    displayName: 'Run Database Migration'
    pool:
      vmImage: 'windows-latest'
    steps:
    - task: UseDotNet@2
      inputs:
        packageType: 'sdk'
        version: '6.0.x'

    - task: AzureKeyVault@2
      inputs:
        azureSubscription: 'MyAzureSubscription'
        KeyVaultName: 'kv-myapp-$(environment)'
        SecretsFilter: 'DatabaseConnectionString'

    - task: DotNetCoreCLI@2
      displayName: 'Run EF Migrations'
      inputs:
        command: 'custom'
        custom: 'ef'
        arguments: 'database update --connection "$(DatabaseConnectionString)" --project MyApp.Data --startup-project MyApp.Web'
      env:
        ConnectionStrings__DefaultConnection: '$(DatabaseConnectionString)'

    - task: PowerShell@2
      displayName: 'Verify Migration'
      inputs:
        targetType: 'inline'
        script: |
          # Run verification queries to ensure migration succeeded
          # This could include checking table structure, data integrity, etc.
Step 7: Monitoring and Observability
Application Insights Integration
Configure detailed monitoring:
// In Program.cs
builder.Services.AddApplicationInsightsTelemetry(options =>
{
    options.ConnectionString = builder.Configuration["ApplicationInsights:ConnectionString"];
});

builder.Services.AddSingleton<ITelemetryInitializer, CustomTelemetryInitializer>();

// Custom telemetry initializer
public class CustomTelemetryInitializer : ITelemetryInitializer
{
    public void Initialize(ITelemetry telemetry)
    {
        if (telemetry is RequestTelemetry requestTelemetry)
        {
            requestTelemetry.Properties["Environment"] = Environment.GetEnvironmentVariable("ASPNETCORE_ENVIRONMENT");
            requestTelemetry.Properties["Version"] = Assembly.GetExecutingAssembly().GetName().Version?.ToString();
        }
    }
}
Dashboard Creation
Create Azure Dashboard for monitoring:
{
  "properties": {
    "lenses": [
      {
        "order": 0,
        "parts": [
          {
            "position": { "x": 0, "y": 0, "rowSpan": 4, "colSpan": 6 },
            "metadata": {
              "inputs": [
                {
                  "name": "ComponentId",
                  "value": "/subscriptions/{subscription-id}/resourceGroups/rg-myapp-prod/providers/microsoft.insights/components/ai-myapp-prod"
                }
              ],
              "type": "Extension/AppInsightsExtension/PartType/AvailabilityNavButtonPart"
            }
          },
          {
            "position": { "x": 6, "y": 0, "rowSpan": 4, "colSpan": 6 },
            "metadata": {
              "inputs": [
                {
                  "name": "ComponentId",
                  "value": "/subscriptions/{subscription-id}/resourceGroups/rg-myapp-prod/providers/microsoft.insights/components/ai-myapp-prod"
                }
              ],
              "type": "Extension/AppInsightsExtension/PartType/PerformanceNavButtonPart"
            }
          }
        ]
      }
    ]
  }
}
Step 8: Security and Compliance
Secure Configuration Management
- task: AzureKeyVault@2
  displayName: 'Get secrets from Key Vault'
  inputs:
    azureSubscription: 'MyAzureSubscription'
    KeyVaultName: 'kv-myapp-$(environment)'
    SecretsFilter: |
      DatabaseConnectionString
      ApiKey
      JwtSecret
    RunAsPreJob: true

- task: FileTransform@1
  displayName: 'Transform configuration files'
  inputs:
    folderPath: '$(Pipeline.Workspace)/drop/app'
    fileType: 'json'
    targetFiles: '**/appsettings.json'
Compliance Scanning
Add compliance checks to your pipeline:
- task: ms-codeanalysis.vss-microsoft-security-code-analysis-devops.build-task-credscan.CredScan@2
  displayName: 'Run Credential Scanner'
  inputs:
    toolMajorVersion: 'V2'
    scanFolder: '$(Build.SourcesDirectory)'
    debugMode: false

- task: ms-codeanalysis.vss-microsoft-security-code-analysis-devops.build-task-binskim.BinSkim@3
  displayName: 'Run BinSkim'
  inputs:
    InputType: 'Basic'
    Function: 'analyze'
    AnalyzeTarget: '$(Build.ArtifactStagingDirectory)/**/*.dll;$(Build.ArtifactStagingDirectory)/**/*.exe'

- task: ms-codeanalysis.vss-microsoft-security-code-analysis-devops.build-task-postanalysis.PostAnalysis@1
  displayName: 'Post Analysis'
  inputs:
    AllTools: false
    BinSkim: true
    CredScan: true
    ToolLogsNotFoundAction: 'Standard'
Step 9: Performance Testing
Add performance testing stage:
- stage: PerformanceTesting
  displayName: 'Performance Testing'
  dependsOn: DeployStaging
  condition: and(succeeded(), eq(variables['Build.SourceBranch'], 'refs/heads/main'))
  jobs:
  - job: LoadTest
    displayName: 'Run Load Tests'
    pool:
      vmImage: 'ubuntu-latest'
    steps:
    - task: AzureLoadTest@1
      displayName: 'Azure Load Testing'
      inputs:
        azureSubscription: 'MyAzureSubscription'
        loadTestConfigFile: 'loadtest/config.yaml'
        loadTestResource: 'loadtest-myapp'
        resourceGroup: 'rg-myapp-shared'
        env: |
          [
            {
              "name": "webapp-url",
              "value": "https://app-myapp-staging.azurewebsites.net"
            }
          ]

    - task: PublishTestResults@2
      displayName: 'Publish load test results'
      inputs:
        testResultsFormat: 'JUnit'
        testResultsFiles: '$(System.DefaultWorkingDirectory)/**/*loadtest-results.xml'
        failTaskOnFailedTests: true
Step 10: Disaster Recovery and Backup
Automated Backup Configuration
- task: AzureCLI@2
  displayName: 'Configure backup policy'
  inputs:
    azureSubscription: 'MyAzureSubscription'
    scriptType: 'bash'
    scriptLocation: 'inlineScript'
    inlineScript: |
      # Create storage account for backups
      az storage account create \
        --name "stmyappbackup$(environment)" \
        --resource-group "$(resourceGroup)" \
        --location "East US" \
        --sku "Standard_LRS"

      # Configure app service backup
      az webapp config backup update \
        --resource-group "$(resourceGroup)" \
        --webapp-name "$(webAppName)" \
        --container-url "$(az storage account show-connection-string --name stmyappbackup$(environment) --resource-group $(resourceGroup) --query connectionString -o tsv)" \
        --frequency 24 \
        --retain-one true \
        --retention-period-in-days 30
Conclusion
This comprehensive Azure DevOps pipeline provides enterprise-grade capabilities including:
- Infrastructure as Code with Bicep templates
- Multi-environment deployments with appropriate gates
- Zero-downtime deployments using slot swaps
- Automated testing at multiple stages
- Security scanning and compliance checks
- Performance testing integration
- Monitoring and alerting setup
- Automated rollback capabilities
- Disaster recovery configurations
The pipeline ensures high availability, security, and maintainability while providing the flexibility to adapt to changing requirements. Regular monitoring and continuous improvement of the pipeline based on operational feedback will help maintain its effectiveness in production environments.
Key benefits of this approach include reduced deployment risk, faster time-to-market, improved application quality, and enhanced operational visibility across the entire deployment lifecycle.
How to Deploy a Node.js App to Azure App Service with CI/CD
Option A: Code-Based Deployment (Recommended for Most Users)
If you don’t need a custom runtime or container, Azure’s built-in code deployment option is the fastest and easiest way to host production-ready Node.js applications. Azure provides a managed environment with runtime support for Node.js, and you can automate everything using Azure DevOps.
This option is ideal for most production use cases that:
- Use standard versions of Node.js (or Python, .NET, PHP)
- Don’t require custom OS packages or NGINX proxies
- Want quick setup and managed scaling
This section covers everything you need to deploy your Node.js app using Azure’s built-in runtime and set it up for CI/CD in Azure DevOps.
Step 0: Prerequisites and Permissions
Before starting, make sure you have the following:
- Azure Subscription with Contributor access
- Azure CLI installed and authenticated (
az login) - Azure DevOps Organization & Project
- Code repository in Azure Repos or GitHub (we’ll use Azure Repos)
- A user with the following roles:
- Contributor on the Azure resource group
- Project Administrator or Build Administrator in Azure DevOps (to create pipelines and service connections)
Step 1: Create an Azure Resource Group
az group create --name prod-rg --location eastusStep 2: Choose Your Deployment Model
There are two main ways to deploy to Azure App Service:
- Code-based: Azure manages the runtime (Node.js, Python, etc.)
- Docker-based: You provide a custom Docker image
Option A: Code-Based App Service Plan
az appservice plan create \
  --name prod-app-plan \
  --resource-group prod-rg \
  --sku P1V2 \
  --is-linux
az appservice plan create: Command to create a new App Service Plan (defines compute resources)--name prod-app-plan: The name of the service plan to create--resource-group prod-rg: The name of the resource group where the plan will reside--sku P1V2: The pricing tier (Premium V2, small instance). Includes autoscaling, staging slots, etc.--is-linux: Specifies the operating system for the app as Linux (required for Node.js apps)
Create Web App with Built-In Node Runtime
az webapp create \
  --name my-prod-node-app \
  --resource-group prod-rg \
  --plan prod-app-plan \
  --runtime "NODE|18-lts"
az webapp create: Creates the actual web app that will host your code--name my-prod-node-app: The globally unique name of your app (will be part of the public URL)--resource-group prod-rg: Assigns the app to the specified resource group--plan prod-app-plan: Binds the app to the previously created compute plan--runtime "NODE|18-lts": Specifies the Node.js runtime version (Node 18, LTS channel)
Option B: Docker-Based App Service Plan
az appservice plan create \
  --name prod-docker-plan \
  --resource-group prod-rg \
  --sku P1V2 \
--is-linux- Same as Option A — this creates a Linux-based Premium plan
- You can reuse this compute plan for one or more container-based apps
Create Web App Using Custom Docker Image
az webapp create \
  --name my-docker-app \
  --resource-group prod-rg \
  --plan prod-docker-plan \
  --deployment-container-image-name myregistry.azurecr.io/myapp:latest
--name my-docker-app: A unique name for your app--resource-group prod-rg: Associates this web app with your resource group--plan prod-docker-plan: Assigns the app to your App Service Plan--deployment-container-image-name: Specifies the full path to your Docker image (from ACR or Docker Hub)
Use this if you’re building a containerized app and want full control of the runtime environment. Make sure your image is accessible in Azure Container Registry or Docker Hub.
Step 3: Prepare Your Azure DevOps Project
- Navigate to https://dev.azure.com
- Create a new Project (e.g.,
ProdWebApp) - Go to Repos and push your Node.js code:
git remote add origin https://dev.azure.com/<org>/<project>/_git/my-prod-node-app
git push -u origin main
Step 4: Create a Service Connection
- In DevOps, go to Project Settings > Service connections
- Click New service connection > Azure Resource Manager
- Choose Service principal (automatic)
- Select the correct subscription and resource group
- Name it something like
AzureProdConnection
Step 5: Create the CI/CD Pipeline
Add the following to your repository root as .azure-pipelines.yml.
Code-Based YAML Example
trigger:
  branches:
    include:
      - main

pool:
  vmImage: 'ubuntu-latest'

stages:
- stage: Build
  jobs:
  - job: BuildApp
    steps:
    - task: NodeTool@0
      inputs:
        versionSpec: '18.x'

    - script: |
        npm install
        npm run build
      displayName: 'Install and Build'

    - task: ArchiveFiles@2
      inputs:
        rootFolderOrFile: '$(System.DefaultWorkingDirectory)'
        archiveFile: '$(Build.ArtifactStagingDirectory)/app.zip'
        includeRootFolder: false

    - task: PublishBuildArtifacts@1
      inputs:
        PathtoPublish: '$(Build.ArtifactStagingDirectory)'
        ArtifactName: 'drop'

- stage: Deploy
  dependsOn: Build
  jobs:
  - deployment: DeployWebApp
    environment: 'production'
    strategy:
      runOnce:
        deploy:
          steps:
          - task: AzureWebApp@1
            inputs:
              azureSubscription: 'AzureProdConnection'
              appName: 'my-prod-node-app'
              package: '$(Pipeline.Workspace)/drop/app.zip'
Docker-Based YAML Example
trigger:
  branches:
    include:
      - main

pool:
  vmImage: 'ubuntu-latest'

stages:
- stage: Deploy
  jobs:
  - deployment: DeployContainer
    environment: 'production'
    strategy:
      runOnce:
        deploy:
          steps:
          - task: AzureWebAppContainer@1
            inputs:
              azureSubscription: 'AzureProdConnection'
              appName: 'my-docker-app'
              containers: 'myregistry.azurecr.io/myapp:latest'
Step 6: Configure Pipeline and Approvals
- Go to Pipelines > Pipelines > New
- Select Azure Repos Git, choose your repo, and point to the YAML file
- Click Run Pipeline
To add manual approvals:
- Go to Pipelines > Environments
- Create a new environment named
production - Link the deploy stage to this environment in your YAML:
environment: 'production'- Enable approval and checks for production safety
Step 7: Store Secrets (Optional but Recommended)
- Go to Pipelines > Library
- Create a new Variable Group (e.g.,
ProdSecrets) - Add variables like
DB_PASSWORD,API_KEY, and mark them as secret - Reference them in pipeline YAML:
variables:
  - group: 'ProdSecrets'
Troubleshooting Tips
| Problem | Solution |
|---|---|
| Resource group not found | Make sure you created it with az group create |
| Runtime version not supported | Run az webapp list-runtimes --os linux to see current options |
| Pipeline can’t deploy | Check if the service connection has Contributor role on the resource group |
| Build fails | Make sure you have a valid package.json and build script |
Summary
By the end of this process, you will have:
- A production-grade Node.js app running on Azure App Service
- A scalable App Service Plan using Linux and Premium V2 resources
- A secure CI/CD pipeline that automatically builds and deploys from Azure Repos
- Manual approval gates and secrets management for enhanced safety
- The option to deploy using either Azure-managed runtimes or fully custom Docker containers
This setup is ideal for fast-moving
How to Deploy a Custom Rocky Linux Image in Azure with cloud-init
Need a clean, hardened Rocky Linux image in Azure — ready to go with your tools and configs? Here’s how to use Packer to build a Rocky image and then deploy it with cloud-init using Azure CLI.
Step 0: Install Azure CLI
Before deploying anything, make sure you have Azure CLI installed.
Linux/macOS:
curl -sL https://aka.ms/InstallAzureCLIDeb | sudo bashWindows:
Download and install from https://aka.ms/installazurecli
Login:
az loginThis opens a browser window for authentication. Once done, you’re ready to deploy.
Step 1: Build a Custom Image with Packer
Create a Packer template with Azure as the target and make sure cloud-init is installed during provisioning.
Packer Template Example (rocky-azure.pkr.hcl):
source "azure-arm" "rocky" {
  client_id       = var.client_id
  client_secret   = var.client_secret
  tenant_id       = var.tenant_id
  subscription_id = var.subscription_id

  managed_image_resource_group_name = "packer-images"
  managed_image_name                = "rocky-image"
  location                          = "East US"
  os_type                           = "Linux"
  image_publisher                   = "OpenLogic"
  image_offer                       = "CentOS"
  image_sku                         = "8_2"
  vm_size                           = "Standard_B1s"
  build_resource_group_name         = "packer-temp"
}

build {
  sources = ["source.azure-arm.rocky"]

  provisioner "shell" {
    inline = [
      "dnf install -y cloud-init",
      "systemctl enable cloud-init"
    ]
  }
}
Variables File (variables.pkrvars.hcl):
client_id       = "xxxxxxxx-xxxx-xxxx-xxxx-xxxxxxxxxxxx"
client_secret   = "your-secret"
tenant_id       = "your-tenant-id"
subscription_id = "your-subscription-id"
Build the Image:
packer init .
packer build -var-file=variables.pkrvars.hcl .
Step 2: Prepare a Cloud-init Script
This will run the first time the VM boots and set things up.
cloud-init.yaml:
#cloud-config
hostname: rocky-demo
users:
  - name: devops
    sudo: ALL=(ALL) NOPASSWD:ALL
    groups: users, admin
    shell: /bin/bash
    ssh_authorized_keys:
      - ssh-rsa AAAA...your_key_here...

runcmd:
  - yum update -y
  - echo 'Cloud-init completed!' > /etc/motd
Step 3: Deploy the VM in Azure
Use the Azure CLI to deploy a VM from the managed image and inject the cloud-init file.
az vm create \
  --resource-group my-rg \
  --name rocky-vm \
  --image /subscriptions/<SUB_ID>/resourceGroups/packer-images/providers/Microsoft.Compute/images/rocky-image \
  --admin-username azureuser \
  --generate-ssh-keys \
  --custom-data cloud-init.yaml
Step 4: Verify Cloud-init Ran
ssh azureuser@<public-ip>
cat /etc/motd
You should see:
Cloud-init completed!Recap
- Install Azure CLI and authenticate with
az login - Packer creates a reusable Rocky image with
cloud-initpreinstalled - Cloud-init configures the VM at first boot using a YAML script
- Azure CLI deploys the VM and injects custom setup
By combining Packer and cloud-init, you ensure your Azure VMs are fast, consistent, and ready from the moment they boot.
Automate Rocky Linux Image Creation in Azure Using Packer
Spinning up clean, custom Rocky Linux VMs in Azure doesn’t have to involve manual configuration or portal clicks. With HashiCorp Packer, you can create, configure, and publish VM images to your Azure subscription automatically.
What You’ll Need
- Packer installed
- Azure CLI (
az login) - Azure subscription & resource group
- Azure Service Principal credentials
Step 1: Install Azure CLI
You need the Azure CLI to authenticate and manage resources.
On Linux/macOS:
curl -sL https://aka.ms/InstallAzureCLIDeb | sudo bashOn Windows:
Download and install from https://aka.ms/installazurecli
Step 2: Login to Azure
az loginThis will open a browser window for you to authenticate your account.
Step 3: Set the Default Subscription (if you have more than one)
az account set --subscription "SUBSCRIPTION_NAME_OR_ID"Step 4: Create a Resource Group for Images
az group create --name packer-images --location eastusStep 5: Create a Service Principal for Packer
az ad sp create-for-rbac \
  --role="Contributor" \
  --scopes="/subscriptions/<your-subscription-id>" \
  --name "packer-service-principal"
This will return the client_id, client_secret, tenant_id, and subscription_id needed for your variables file.
Step 6: Write the Packer Template (rocky-azure.pkr.hcl)
variable "client_id" {}
variable "client_secret" {}
variable "tenant_id" {}
variable "subscription_id" {}

source "azure-arm" "rocky" {
  client_id       = var.client_id
  client_secret   = var.client_secret
  tenant_id       = var.tenant_id
  subscription_id = var.subscription_id

  managed_image_resource_group_name = "packer-images"
  managed_image_name                = "rocky-image"

  os_type             = "Linux"
  image_publisher     = "OpenLogic"
  image_offer         = "CentOS"
  image_sku           = "8_2"
  location            = "East US"
  vm_size             = "Standard_B1s"

  capture_container_name    = "images"
  capture_name_prefix       = "rocky-linux"
  build_resource_group_name = "packer-temp"
}

build {
  sources = ["source.azure-arm.rocky"]

  provisioner "shell" {
    inline = [
      "sudo dnf update -y",
      "sudo dnf install epel-release -y"
    ]
  }
}
Step 7: Create a Variables File (variables.pkrvars.hcl)
client_id       = "xxxxxxxx-xxxx-xxxx-xxxx-xxxxxxxxxxxx"
client_secret   = "your-secret"
tenant_id       = "your-tenant-id"
subscription_id = "your-subscription-id"
Step 8: Run the Build
packer init .
packer build -var-file=variables.pkrvars.hcl .
Result
Your new custom Rocky Linux image will appear under your Azure resource group inside the Images section. From there, you can deploy it via the Azure Portal, CLI, Terraform, or ARM templates.
This process makes your infrastructure repeatable, versioned, and cloud-native. Use it to standardize dev environments or bake in security hardening from the start.
Automating Rocky Linux VM Creation with Packer + VirtualBox
If you’ve ever needed to spin up a clean, minimal Linux VM for testing or local automation — and got tired of clicking through the VirtualBox GUI — this guide is for you.
We’ll walk through how to use HashiCorp Packer and VirtualBox to automatically create a Rocky Linux 8.10 image, ready to boot and use — no Vagrant, no fluff.
What You’ll Need
- Packer installed
- VirtualBox installed
- Rocky Linux 8.10 ISO link (we use minimal)
- Basic understanding of Linux + VirtualBox
Project Structure
packer-rocky/
├── http/
│   └── ks.cfg       # Kickstart file for unattended install
├── rocky.pkr.hcl    # Main Packer config
Step 1: Create the Kickstart File (http/ks.cfg)
install
cdrom
lang en_US.UTF-8
keyboard us
network --bootproto=dhcp
rootpw packer
firewall --disabled
selinux --permissive
timezone UTC
bootloader --location=mbr
text
skipx
zerombr

# Partition disk
clearpart --all --initlabel
part /boot --fstype="xfs" --size=1024
part pv.01 --fstype="lvmpv" --grow
volgroup vg0 pv.01
logvol / --vgname=vg0 --fstype="xfs" --size=10240 --name=root
logvol swap --vgname=vg0 --size=4096 --name=swap

reboot

%packages --ignoremissing
@core
@base
%end

%post
# Post-install steps can be added here
%end
Step 2: Create the Packer HCL Template (rocky.pkr.hcl)
packer {
required_plugins {
virtualbox = {
version = ">= 1.0.5"
source = "github.com/hashicorp/virtualbox"
}
}
}
source "virtualbox-iso" "rocky" {
iso_url = "https://download.rockylinux.org/pub/rocky/8/isos/x86_64/Rocky-8.10-x86_64-minimal.iso"
iso_checksum = "2c735d3b0de921bd671a0e2d08461e3593ac84f64cdaef32e3ed56ba01f74f4b"
guest_os_type = "RedHat_64"
memory = 2048
cpus = 2
disk_size = 40000
vm_name = "rocky-8"
headless = false
guest_additions_mode = "disable"
boot_command = [" inst.text inst.ks=http://{{ .HTTPIP }}:{{ .HTTPPort }}/ks.cfg"]
http_directory = "http"
ssh_username = "root"
ssh_password = "packer"
ssh_timeout = "20m"
shutdown_command = "shutdown -P now"
vboxmanage = [
["modifyvm", "{{.Name}}", "--vram", "32"],
["modifyvm", "{{.Name}}", "--vrde", "off"],
["modifyvm", "{{.Name}}", "--ioapic", "off"],
["modifyvm", "{{.Name}}", "--pae", "off"],
["modifyvm", "{{.Name}}", "--nested-hw-virt", "on"]
]
}
build {
sources = ["source.virtualbox-iso.rocky"]
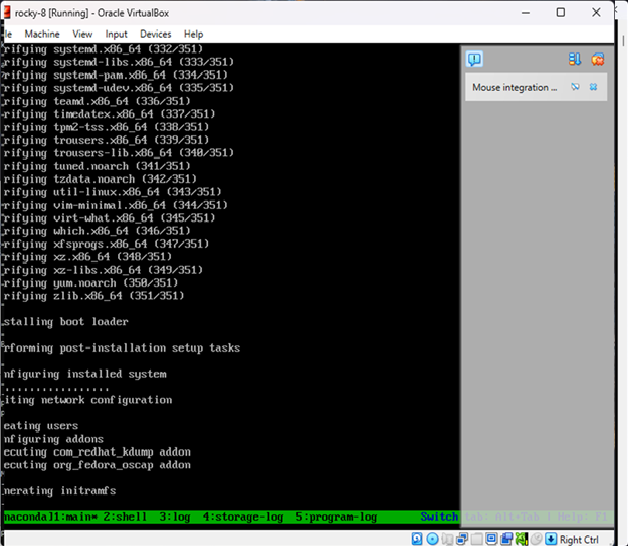
}Step 3: Run the Build
cd packer-rocky
packer init .
packer build .
Packer will:
- Download and boot the ISO in VirtualBox
- Serve the ks.cfg file over HTTP
- Automatically install Rocky Linux
- Power off the machine once complete
Result
You now have a fully installed Rocky Linux 8.10 image in VirtualBox — no manual setup required.