Category: Setup your SAN using FreeNAS
How to setup your own cloud SAN storage at home using FreeNAS and a VM
How to setup your own Cloud SAN storage at home using FREENAS and a VM
So, I am writing this blog post for others who want to understand how SAN and NAS storage systems work. I had a colleague of mine suggest that I should setup my own NAS at home. I decided that it was a great idea. This tutorial will teach you how to setup a NAS using virtual machines for the purposes of testing and learning.
It will help you understand the fundamentals of what is involved in setting up a NAS and how they work. There are commercial applications such as NETAPP that provide far more complexity in terms of functionality, however the principles are pretty much the same, and relatively easy to pick up on variations should you need to learn them on the fly in a job.
- So one of the key benefits of setting up a NAS in VM is it allows you setup a sort of home based storage cloud solution
- You may add multiple USB storage devices where you will be able to create volumes of various file systems types, essentially giving you the cloud type solution.
- This will also allow various devices you have to mount the storage volumes
- At the moment VirtualBox allows up to 2 terabytes , I’m sure this will increase as future revisions come to pass.
Phase 1
Create a new virtualbox VM for freeNAS
- Download freeNAS
https://www.nicktailor.com/files/ FreeNAS-8.3.0-RELEASE-x86.iso
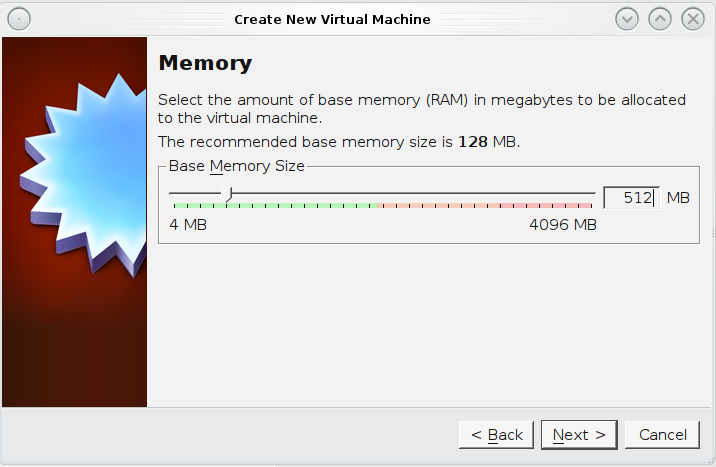
- Create a new VM in virtual box with the following configurations
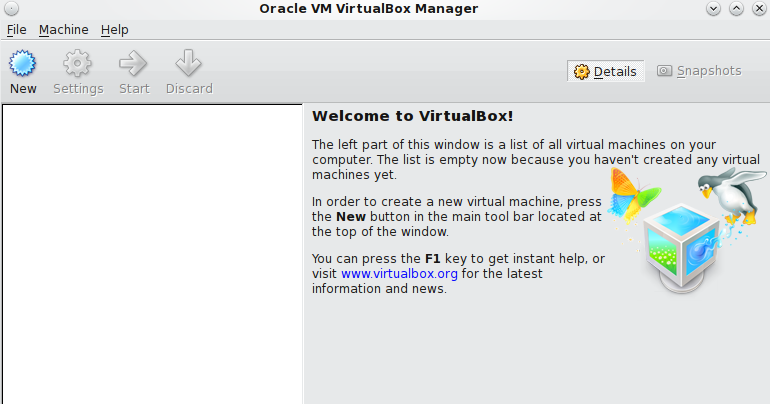
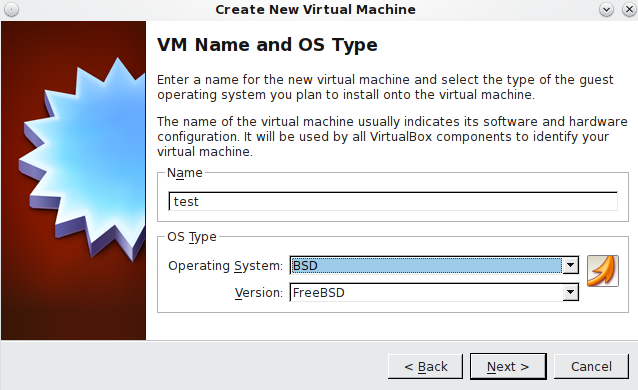
- Ensure that you have over 10GB of HDspace and at least 512mb ram for you VM (otherwise your volume creations will fail)
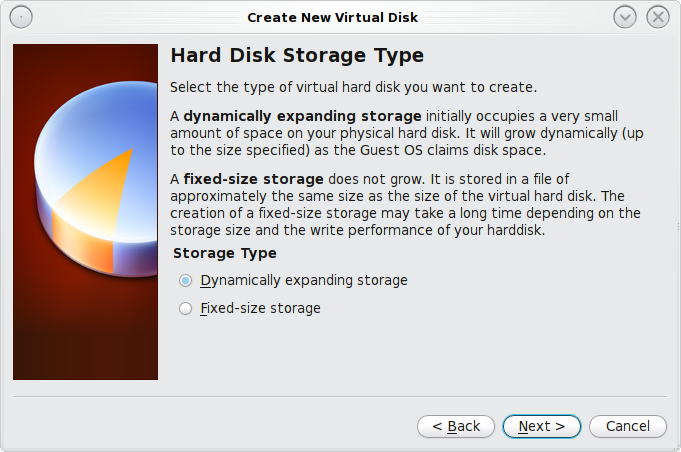
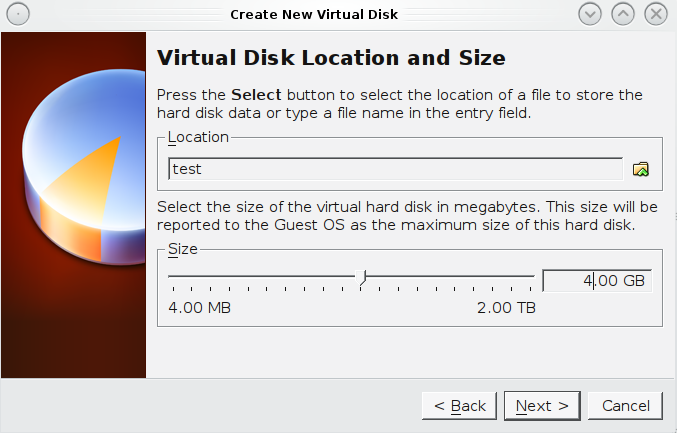
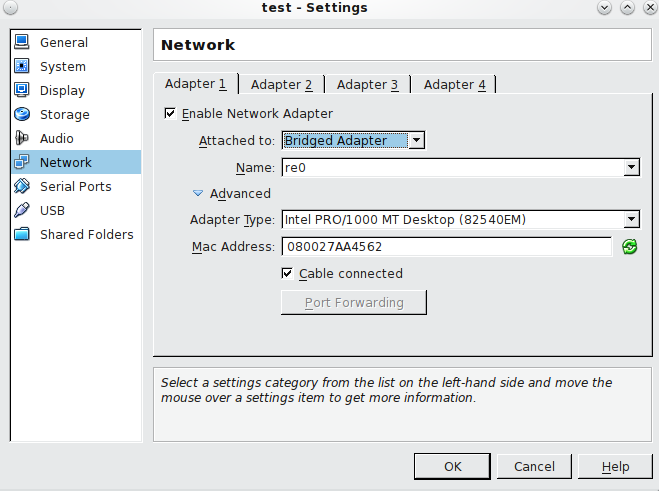
- Network Configuration
i. Nic 1 (NAT)
ii. Nic 2 (Bridged Adapter, use wireless if its supported)
- On the settings tab you should enable USB Controller, you will need to install an additional packages for Virtualbox to enable this feature as it doesn’t come out of the box. The advantage of this is will allow you add multiple USB devices and use them as storage. Download and install the Oracle VM VirtualBox Extension Pack that matches your version of VirtualBox. The extension pack enables USB support.
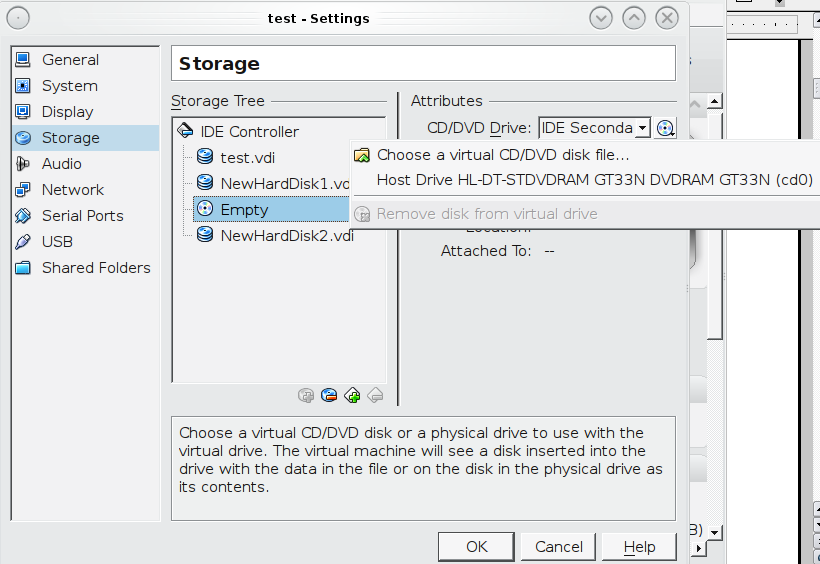
- Next you want to click on the Storage tab under the IDE controller there should be a EMPTY and a icon of a CD, on the far right of that you should see Attributes “CD/DVD Drive” and the very far right of that a CD, click on that and find the FreeNAS iso you downloaded, click okay
- Now click the okay and go back to start the VM
Phase 2 Configuring FreeNAS
- Once freeNAS is installed you will get a configuration screen. The primary interface you should leave alone, as this most like dhcp’d already.
- You should be be able to ping externally from the freeNAS VM, if you need to look at your network configuration.
- Typically the primary interface will use a non-routable address 10.0.2.10 which is being NAT’d externally
- So if your home network is like most people you’re probably using a dhcp pool in 192.168.1.1-100 addresses. So you want to configure the second nic with within your home network pool (eg. 192.168.1.138/255.255.255.0) address and a netmask.
- You will not need to set a default gateway, since the primary interface is already using a gateway
- Once you have done this go to the command prompt on your host machine, so this is no longer in the VM, its on the physical machine that runs Virtualbox and see if you can ping the address you just assigned in FreeNAS. If you can’t ping the FreeNAS Ip you assigned try restarting the VM.
- Next you will want to ensure that your router of firewall allows port 80 on the ip address you assigned to freeNAS.
Phase 3 setting up ISCSI SAN with freeNAS
Note- any client Machine you want to connect to the iscsi SAN/NAS must have a iscsi controller, so if you are using a VM ensure that you have added the iscsi controller under the settings of your vm.
- So go to your browser and go to the webGUI
- Open a browser and login to FreeNAS 8.2.
- Navigate to Storage > Active Volumes:
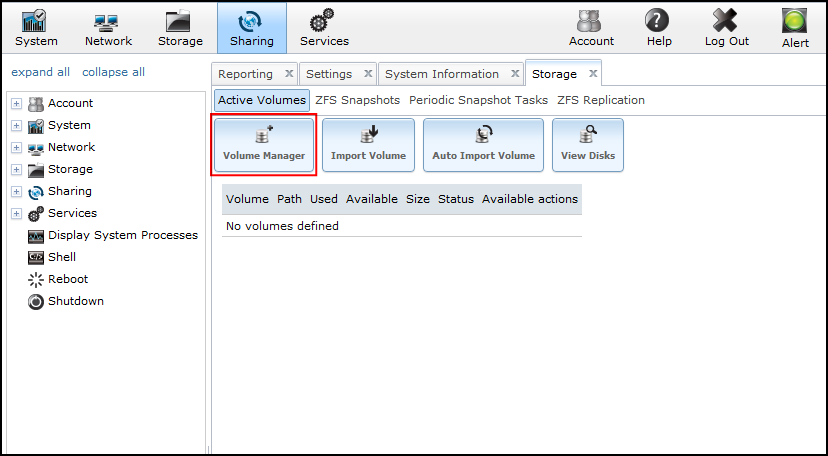
- Click Volume Manager.
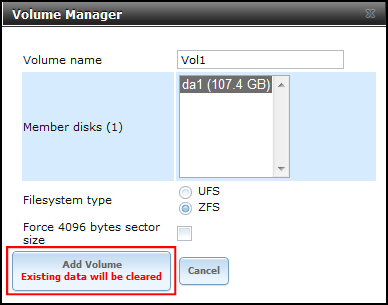
- Enter a Volume Name, select disk(s), select Filesystem type (ZFS has some neat features), then click Add Volume:
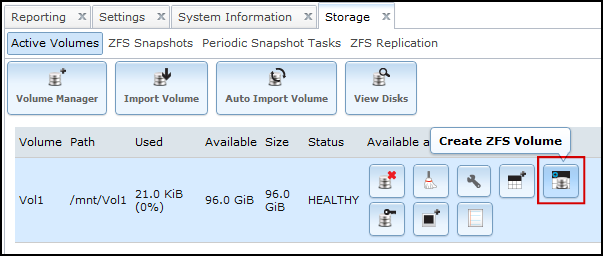
- Click the Create ZFS Volume button:
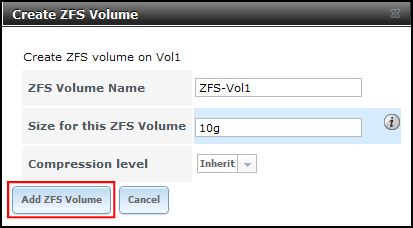
- Enter a ZFS Volume Name, specify the volume size, then click Add ZFS Volume:
- Navigate to Services > Core, and turn on iSCSI:
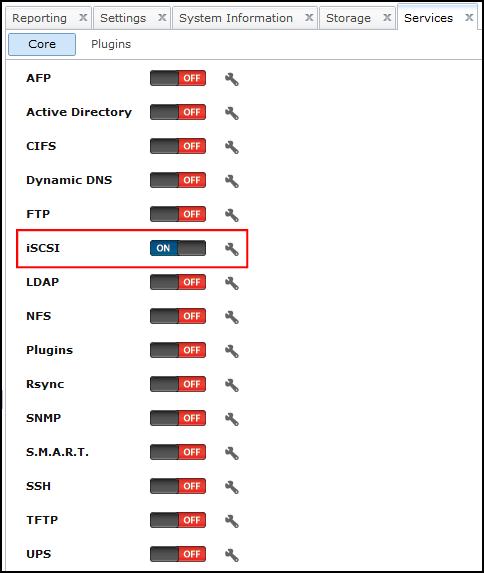
- Click the wrench icon next to iSCSI.
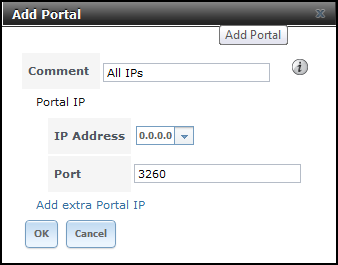
- Navigate to iSCSI > Portals, click Add Portal. Select 0.0.0.0 as the IP Address (this means it will listen on all IPs). Click OK:
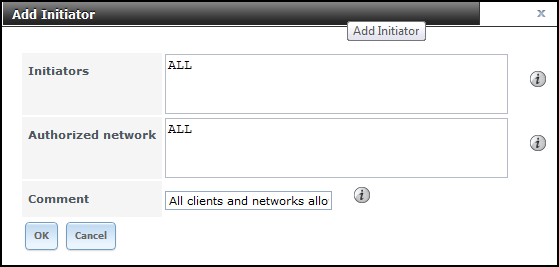
- Navigate to iSCSI > Initiators, click Add Initiator. Leave ALL in both fields to allow all client connections from any network:
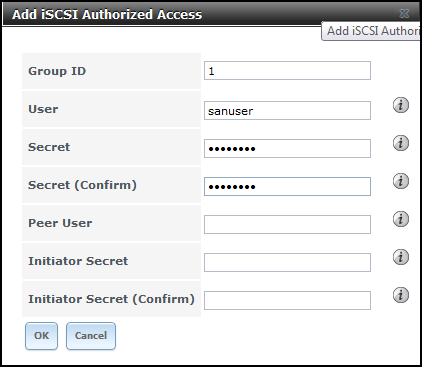
- Navigate to iSCSI > Authorized Access, click Add iSCSI Authorized Access. Enter a User andSecret:
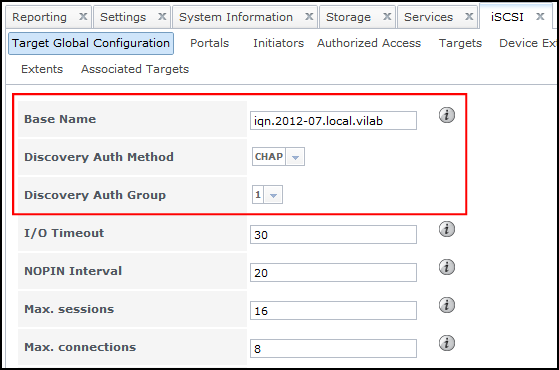
Note: If you dont want create a user for your home SAN, just because it makes life easier, then skip the user Access stuff and under the Target Global Configuration just select
Discovery Auth method :Auto
Discovery Auth Group : None
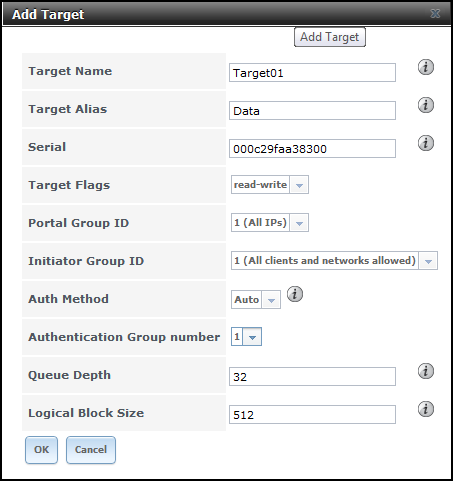
- Navigate to iSCSI > Target, click Add Target. Enter a Target Name and Alias. Select thePortal and InitiatorGroup IDs, and Authentication Group number:
- Navigate to iSCSI > Device Extents, click Add Extent. Enter an Extent Name and select aVolume:
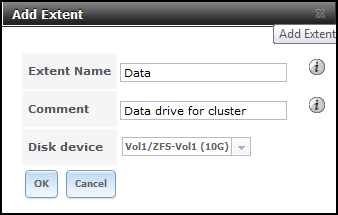
- Navigate to iSCSI > Associated Targets, click Add Extent to Target. Select a Target andExtent to map together:
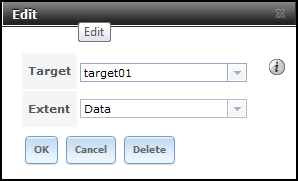
- Navigate to iSCSI > Target Global Configuration. Customise your Base Name, select CHAPfor Discovery Auth Method and select your Discovery Auth Group. Leave other settings unless you know what you’re doing. Scroll to bottom of page to Save:
- All done. Now you need to connect to the iSCSI SAN using an iSCSI Initiator.
- If you get any connection problems, try restarting the iSCSI service here:

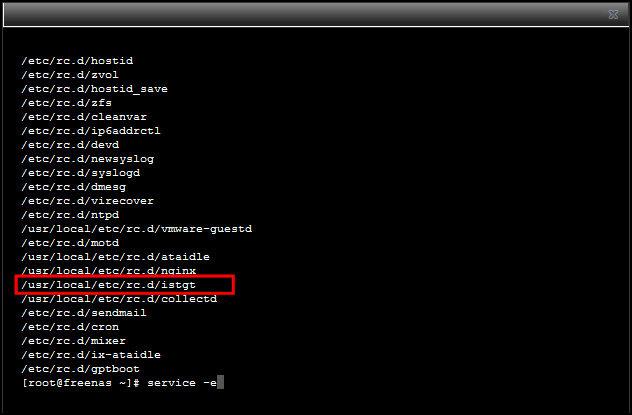
- If you don’t trust the GUI and want to confirm the service has definitely started, you can runservice -e at the shell prompt, and look for istgt:
Cheers Hope this helped you understand how it all works email nick@nicktailor.com if you have questions
