
Author: admin
How to move off san boot to local disk with HP servers
How to move off san boot to local disk
===========================
1. add the disks to the server
next do a rescan-scsi-bus.sh to see if the new disks show up
2. Setup the Raid controler f8 (hp)
3. Boot off of system rescue cd
4. find the new drive, use fdisk -l
5. copy partition over using dd and reboot to see new parition table
Examples:
- dd if=/dev/mapper/3600508b4000618d90000e0000b8f0000 of=/dev/sda bs=1M
or - dd if=/dev/sdar of=/dev/cciss/c0d0 bs=1M
reboot unpresent the SAN’s from virtual connect or whatever storage interface your using.
You need to have the boot from san volumes disabled in VCEM
6. make new swap using cfdisk and then run
- mkswap /dev/cciss/c0d0p9 (This controller0 drive0 Parititon 9)
- The size of the swap partition will vary, I used 32000M when i created it in cfdisk, you are free to use fdisk to do this also.
7. now you need to mount / to a directory, so make a empty directory
- mkdir /mnt/root
and mount it, examples below
mount /dev/sda6 /mnt/root or mount /dev/cciss/c0d0p6 /mnt/root
9. fix the fstab (cfdisk works great for this if your system rescue disk)
- vi /mnt/root/etc/fstab
- change /dev/mapper/mpath0p* to cciss/c0d0*
- comment out the swap volume
- add new swap (/dev/cciss/c0d0p9)
10. next fix vi /mnt/root/etc/multipath.conf
- uncomment: devnode “^cciss!c[0-9]d[0-9]*”
- for EMC add:
device {
vendor “EMC”
product “Invista”
product_blacklist “LUNZ”
getuid_callout “/sbin/scsi_id -g -u -s /block/%n”
features “0”
hardware_handler “0”
path_selector “round-robin 0”
path_grouping_policy multibus
rr_weight uniform
no_path_retry 5
rr_min_io 1000
path_checker tur
}
11. next mount the boot parition
Examples
- mount /dev/sda1 /mnt/root/boot
or - mount /dev/cciss/c0d0p1 /mnt/root/boot
12. edit grub.conf
- vi /mnt/root/boot/grub.conf
- change /dev/mapper/mpath0p* to /dev/sda*
or - change /dev/mapper/mpath0p* to /dev/cciss/c0d0
13. edit device.map
- vi /mnt/root/boot/device.map
- change /dev/mapper/mpath0 to /dev/sda
or - change /dev/mapper/mpath0 to /dev/cciss/c0d0
14. fix the initrd
- zcat /mnt/root/boot/initrd-2.6.18-3……. | cpio -i -d
- edit the file ‘init’
- change mkrootdev line to /dev/cciss/c0d0p6 (this is the is / partition)
- change resume line to /dev/cciss/c0d0p9 (this is the new swap partition)
15. Make a backup of the new partition
- mv /mnt/root/boot/initrd-2.6.18-…. /mnt/root/boot/initrd-2.6.18-……backup
16. recompress the new initrd
- find . | cpio -o -H newc |gzip -9 > /mnt/root/boot/initrd-2.6.18-348.2.1.el5.img
17. upon reboot, change the boot order in the bios settings to use the hp smart array controller
18. You may need to create a new inird using the redhat linux distro if the initrd doesnt boot.
- chroot to /mnt/sysimage for /
- then go to the boot parition and
- mkinitrd -f -v initrd-2.6.18-53.1.4.el5.img 2.6.18-53.1.4.el5
19. reboot
How to Upgrade and Downgrade Packages with RHN Satellite 5.0
RHN Satellite Package upgrade and downgrade processes
Listing packages installed or available for upgrading on a host.
- Click on systems
- Next click on the target hostname
- Now click on the software tab
- · If you click on list/remove Installed packages this will show you the current listed packages for the target host, you can also search by the specific package in the search field above the listed packages
- · If you click on upgrade packages, this will only list the current available packages the host system is currently subscribed to.
Note: just because you don’t see newer packages available does not mean they are not out there.
Package Search on all available channels
- There are two ways you can do this
- Method 1 – Click on Channels at the very top, then package search, next type in the package name
- · Once you have found the package, click on the package name, and it will take you to a details screen, on that screen it will have available from: in that section it will list out the channels that are subscribed to satellite that have the package you are looking for available from.
- Method 2 – This is the way I like to do it – Click on systems, then software tab, and then install new packages
- · Next search for the package you wish to install, this will the latest available package from all channels available, and if you click on the package it will show the available channels for that specified package.
Upgrading packages
- Click on systems, select the host, then software tab, and then upgrade
- Search for the packages you wish to upgrade and select them by checking the box to to the left of it
Note: if you are going to do select all, I would recommend against this, as if you select this button, even its not listed on the page it will literally select all the packages available. So select them individually is the way to go.
- Once completed check boxing scroll down to the bottom right and select upgrade packages, it will go to another confirmation screen, click on confirm.
- This will then be queued.
- If you click on Events, you should see it there and shortly within 5 min window it should disappear, if it does not then something is wrong, and you need to get a hold of satellite admin to investigate.
Downgrading packages
- Click on systems, select the host, then software tab, and then profiles
- Select the stored profile of the date/time that Under “Compare to Stored Profile” and hit compare.
- You should see a list of packages that it is now going to synch back to, select sync package bottom right.
- You should see it go the events page, after about 5 mins it should no longer be listed in events, which means the server picked up the process and should begin downgrading shortly.
How to patch using RHN Satellite 5.0
Create a roll back tag
Troubleshooting Guide
Errata does not appear to be counting down in systems group
type cat
If it isn’t set, the Satellite will try to use the local repos, and not the channels on the Satellite server
Trying 10.20.0.8…
Connected to kam1opapp99.connex.bclc.com.
Escape character is ‘^]’.
[root@kam1odapp19<dev>:~]# mount
/dev/mapper/vg_local-root on / type ext3 (rw)
proc on /proc type proc (rw)
sysfs on /sys type sysfs (rw)
devpts on /dev/pts type devpts (rw,gid=5,mode=620)
/dev/mapper/vg_local-usr on /usr type ext3 (rw,nodev)
/dev/mapper/vg_local-tmp on /tmp type ext3 (rw,noexec,nosuid,nodev)
/dev/mapper/vg_local-home on /home type ext3 (rw,nodev)
(this mean you the partition is read only and yum can not write updates to the /usr directory)
• If this still fails then escalate to a Senior Linux System Administrator..hahaha, JUST JOKES 😛
(result will look something like this)
[Linux-bzImage, setup=0x1400, size=0x15f464]
(Result –should look like below)
Checking if “/boot/grub/stage1” exists… yes
Checking if “/boot/grub/stage2” exists… yes
Checking if “/boot/grub/e2fs_stage1_5” exists… yes
Running “embed /boot/grub/e2fs_stage1_5 (hd0)”… failed (this is not fatal)
Running “embed /boot/grub/e2fs_stage1_5 (hd0,2)”… failed (this is not fatal)
Running “install /boot/grub/stage1 (hd0) /boot/grub/stage2 p /boot/grub/menu.lst “… succeeded
HAHAH…JUST JOKES 😛
Give root password for maintenance (or type Control-D to continue)
kernel /vmlinuz-2.6.18-348.12.1.el5PAE ro root=LABEL=/
kernel /vmlinuz-2.6.18-348.12.1.el5PAE ro root=LABEL=/ init=/bin/sh
RHN Satellite Package upgrade and downgrade processes
Listing packages installed or available for upgrading on a host.
Note: just because you don’t see newer packages available does not mean they are not out there.
Package Search on all available channels
Upgrading packages
Note: if you are going to do select all, I would recommend against this, as if you select this button, even its not listed on the page it will literally select all the packages available. So select them individually is the way to go.
Downgrading packages
How to upgrade mysql 5.1 to 5.6 with WHM doing master-slave
How to upgrade MYSQL in a production environment with WHM
Okay, so if you have a master slave database setup with large innodb and myisam, you probably want to upgrade to mysql 5.6. The performance tweaks make a difference especially with utilizing multicores.
Most of the time Cpanel is really good at click upgrade and it works, however with mysql if you’re running a more complex setup, then simply clicking upgrade in cpanel for mysql isn’t going to do the trick. I’ve outlined the process below to help anyone else trying to do this.
- Making a backup of the database using Percona and mysqldump
- The first thing you need to do is make a backup of everything, since we have large innodb and myisam db’s, using mysqldump can be slow.
- Using percona this will backup everything
i. Innobackupex /directory you want everything to backed up to (this will be uncompressed backup. (See my blog on multithreaded backup and restores using percona for more details on how to use Percona Backup)
ii. Next you need to make a mysqldump of all your databases
- Mysqldump –all-databases > alldatabases.sql (old school)
- I do it a bit differently. I have a script that makes full dump of all the databases and creates separate sql files for each db in case I need to import a specific database after that fact.
http://nicktailor.com/files/mysqldumpbackup.sh (Here is the script edit according to your needs)
2. Now you need to upgrade mysql, so log into WHM and run the mysql upgrade in the mysql section of whm. If your running a db server and disabled apache, renable it in WHM temporarily, because WHM will be recompiling php and easyapache with the new mysql modules, once its done you can disable it.
- If your mysql upgrade fails check your permissions on mysql or you can run the upgrade from command line forced.
/usr/local/cpanel/scripts/mysqlup –force
And after that run
/usr/local/cpanel/scripts/easyapache
3. Since WHM upgrades /var/lib/mysql regardless if you specified another directory for your data we’re going to have to do a little bit of extra work, while were doing this were going to shrink ibdata1 file to fix any innodb corruption and save you a ton of space.
- Find your mysql data directory if its different from /var/lib/mysql, if it’s the same then you don’t need to do these steps.
i. Delete everything inside the data directory
ii. Copy everything from /var/lib/mysql to mysql datadirectory
cp –ra /var/lib/mysql /datadirectory
iii. Try to start mysql, if you get an error saying myqsl cant create a pid, its probably due to your my.cnf, some setting no longer work with mysql 5.6, easiest way to figure out is just comment stuff out until it works. I will provide a sample one that worked for me. Also its easier to start up in safe mode to avoid all the granty permissions simply uncomment the #skip-grant-tables in the my.cnf file
http://www.nicktailor.com/files/my.cnf.sample (this sample has the performance tweaks enabled it)
iv. Once mysql is started, now ya want to fix up the innodb while you got a chance, if you weren’t using /var/lib/mysql as your data directory then the upgrade will have already created new ibdata1, ib_logfile0 & ib_logfile1 files. If however this is not the case, simply rename those files and restart mysql and mysql will create brand spanking new ones
v. Now we need to restore everything, now I have SSD drives and if you have large DB’s you should only be using SSD’s anyway. You need to do a mysqldump back to mysql using the all-databases.sql file you created earlier.
- Mysql –u root –p<password> < all-databases.sql (best to run this in a screen session on linux as it will take awhile and you don’t want to loose your connection during this)
vi. Once the dump is complete you now need to run mysql_upgrade to upgrade all the databases and tables that didn’t get upgraded to the new version, followed by a mysql-check
- Mysql_upgrade –u root –p<password>
- mysqlcheck –all-databases –check-upgrade –auto-repair
Now you should be able to set grant permissions and things, if you miss the mysql_upgrade step, some of your sites may work and some may not, in addition you will probably be unable to set grant permission in mysql, you’ll get a connection error most likely.
4. If you have a slave db, then you can continue reading. So the next piece is fixing our slave now. Thanks to percona we can do this quick. You will notice that your ibdata1 file is tiny now and clean, so the backup will be super fast.
- You need to back-up full backup using percona
i. Innobackupex /directoryyouwanttobackupto
- Now you need to copy the uncompressed backup to your slave server, you can either scp or rsync, whatever works for you. I have gige switch so I sync over
i. rsync -rva –numeric-ids –progress . root@192.168.0.20:/backupdirectory (this is just a sample)
i. Stop mysql
a. /etc/init.d/mysql stop
ii. Delete the data directory on the slave
b. rm -f /mysqldatadirectory/*
iii. Do a full percona restore
c. Innobackupex –copy-back /backupdirectory
5. Once mysql is restored change your permissions on mysql files to mysql:mysql, edit your my.cnf and startup mysql and you should be good to go. You will need to fix replication, read my mysql failover setup post on how do that if you’re not sure.
chown -R mysql:mysql /mysqldatadirectory
How to check what processes are using your swap
Here is a little script that will show you what processes are using your swap
http://www.nicktailor.com/files/swapusage
vi swapusage && chmod +x swapusage
copy paste below & save
./swapusage (to run)
#!/bin/bash
# find-out-what-is-using-your-swap.sh
# — Get current swap usage for all running processes output
# — rev.0.1, 2011-05-27, Erik Ljungstrom – initial version
SCRIPT_NAME=`basename $0`;
SORT=”kb”; # {pid|kB|name} as first parameter, [default: kb]
[ “$1” != “” ] && { SORT=”$1″; }
[ ! -x `which mktemp` ] && { echo “ERROR: mktemp is not available!”; exit; }
MKTEMP=`which mktemp`;
TMP=`${MKTEMP} -d`;
[ ! -d “${TMP}” ] && { echo “ERROR: unable to create temp dir!”; exit; }
>${TMP}/${SCRIPT_NAME}.pid;
>${TMP}/${SCRIPT_NAME}.kb;
>${TMP}/${SCRIPT_NAME}.name;
SUM=0;
OVERALL=0;
echo “${OVERALL}” > ${TMP}/${SCRIPT_NAME}.overal;
for DIR in `find /proc/ -maxdepth 1 -type d -regex “^/proc/[0-9]+”`;
do
PID=`echo $DIR | cut -d / -f 3`
PROGNAME=`ps -p $PID -o comm –no-headers`
for SWAP in `grep Swap $DIR/smaps 2>/dev/null| awk ‘{ print $2 }’`
do
let SUM=$SUM+$SWAP
done
if (( $SUM > 0 ));
then
echo -n “.”;
echo -e “${PID}\t${SUM}\t${PROGNAME}” >> ${TMP}/${SCRIPT_NAME}.pid;
echo -e “${SUM}\t${PID}\t${PROGNAME}” >> ${TMP}/${SCRIPT_NAME}.kb;
echo -e “${PROGNAME}\t${SUM}\t${PID}” >> ${TMP}/${SCRIPT_NAME}.name;
fi
let OVERALL=$OVERALL+$SUM
SUM=0
done
echo “${OVERALL}” > ${TMP}/${SCRIPT_NAME}.overal;
echo;
echo “Overall swap used: ${OVERALL} kB”;
echo “========================================”;
case “${SORT}” in
name )
echo -e “name\tkB\tpid”;
echo “========================================”;
cat ${TMP}/${SCRIPT_NAME}.name|sort -r;
;;
kb )
echo -e “kB\tpid\tname”;
echo “========================================”;
cat ${TMP}/${SCRIPT_NAME}.kb|sort -rh;
;;
pid | * )
echo -e “pid\tkB\tname”;
echo “========================================”;
cat ${TMP}/${SCRIPT_NAME}.pid|sort -rh;
;;
esac
rm -fR “${TMP}/”;
#!/bin/bash
# find-out-what-is-using-your-swap.sh
# — Get current swap usage for all running processes
# —
# — rev.0.3, 2012-09-03, Jan Smid – alignment and intendation, sorting
# — rev.0.2, 2012-08-09, Mikko Rantalainen – pipe the output to “sort -nk3″ to get sorted output
# — rev.0.1, 2011-05-27, Erik Ljungstrom – initial version
SCRIPT_NAME=`basename $0`;
SORT=”kb”; # {pid|kB|name} as first parameter, [default: kb]
[ “$1” != “” ] && { SORT=”$1″; }
[ ! -x `which mktemp` ] && { echo “ERROR: mktemp is not available!”; exit; }
MKTEMP=`which mktemp`;
TMP=`${MKTEMP} -d`;
[ ! -d “${TMP}” ] && { echo “ERROR: unable to create temp dir!”; exit; }
>${TMP}/${SCRIPT_NAME}.pid;
>${TMP}/${SCRIPT_NAME}.kb;
>${TMP}/${SCRIPT_NAME}.name;
SUM=0;
OVERALL=0;
echo “${OVERALL}” > ${TMP}/${SCRIPT_NAME}.overal;
for DIR in `find /proc/ -maxdepth 1 -type d -regex “^/proc/[0-9]+”`;
do
PID=`echo $DIR | cut -d / -f 3`
PROGNAME=`ps -p $PID -o comm –no-headers`
for SWAP in `grep Swap $DIR/smaps 2>/dev/null| awk ‘{ print $2 }’`
do
let SUM=$SUM+$SWAP
done
if (( $SUM > 0 ));
then
echo -n “.”;
echo -e “${PID}\t${SUM}\t${PROGNAME}” >> ${TMP}/${SCRIPT_NAME}.pid;
echo -e “${SUM}\t${PID}\t${PROGNAME}” >> ${TMP}/${SCRIPT_NAME}.kb;
echo -e “${PROGNAME}\t${SUM}\t${PID}” >> ${TMP}/${SCRIPT_NAME}.name;
fi
let OVERALL=$OVERALL+$SUM
SUM=0
done
echo “${OVERALL}” > ${TMP}/${SCRIPT_NAME}.overal;
echo;
echo “Overall swap used: ${OVERALL} kB”;
echo “========================================”;
case “${SORT}” in
name )
echo -e “name\tkB\tpid”;
echo “========================================”;
cat ${TMP}/${SCRIPT_NAME}.name|sort -r;
;;
kb )
echo -e “kB\tpid\tname”;
echo “========================================”;
cat ${TMP}/${SCRIPT_NAME}.kb|sort -rh;
;;
pid | * )
echo -e “pid\tkB\tname”;
echo “========================================”;
cat ${TMP}/${SCRIPT_NAME}.pid|sort -rh;
;;
esac
rm -fR “${TMP}/”;
#!/bin/bash
# find-out-what-is-using-your-swap.sh
# — Get current swap usage for all running processes
# —
SCRIPT_NAME=`basename $0`;
SORT=”kb”; # {pid|kB|name} as first parameter, [default: kb]
[ “$1” != “” ] && { SORT=”$1″; }
[ ! -x `which mktemp` ] && { echo “ERROR: mktemp is not available!”; exit; }
MKTEMP=`which mktemp`;
TMP=`${MKTEMP} -d`;
[ ! -d “${TMP}” ] && { echo “ERROR: unable to create temp dir!”; exit; }
>${TMP}/${SCRIPT_NAME}.pid;
>${TMP}/${SCRIPT_NAME}.kb;
>${TMP}/${SCRIPT_NAME}.name;
SUM=0;
OVERALL=0;
echo “${OVERALL}” > ${TMP}/${SCRIPT_NAME}.overal;
for DIR in `find /proc/ -maxdepth 1 -type d -regex “^/proc/[0-9]+”`;
do
PID=`echo $DIR | cut -d / -f 3`
PROGNAME=`ps -p $PID -o comm –no-headers`
for SWAP in `grep Swap $DIR/smaps 2>/dev/null| awk ‘{ print $2 }’`
do
let SUM=$SUM+$SWAP
done
if (( $SUM > 0 ));
then
echo -n “.”;
echo -e “${PID}\t${SUM}\t${PROGNAME}” >> ${TMP}/${SCRIPT_NAME}.pid;
echo -e “${SUM}\t${PID}\t${PROGNAME}” >> ${TMP}/${SCRIPT_NAME}.kb;
echo -e “${PROGNAME}\t${SUM}\t${PID}” >> ${TMP}/${SCRIPT_NAME}.name;
fi
let OVERALL=$OVERALL+$SUM
SUM=0
done
echo “${OVERALL}” > ${TMP}/${SCRIPT_NAME}.overal;
echo;
echo “Overall swap used: ${OVERALL} kB”;
echo “========================================”;
case “${SORT}” in
name )
echo -e “name\tkB\tpid”;
echo “========================================”;
cat ${TMP}/${SCRIPT_NAME}.name|sort -r;
;;
kb )
echo -e “kB\tpid\tname”;
echo “========================================”;
cat ${TMP}/${SCRIPT_NAME}.kb|sort -rh;
;;
pid | * )
echo -e “pid\tkB\tname”;
echo “========================================”;
cat ${TMP}/${SCRIPT_NAME}.pid|sort -rh;
;;
esac
rm -fR “${TMP}/”;
How to pass a “password” to su as a variable in a script
How to pass a “password” to su as a variable in script and execute tasks to an array of hosts
Some of you may work for organizations that do access control for linux servers. In which case they do not use ssh keys for root, and are still doing the unthinkable allowing the use of password authentication.
So this means you have to log into a server and the “su –“ to root before you can execute commands, and if you have an array of servers this could be tedious and time consuming. I was told by everyone that you can’t pass a “password” as a variable in script to su, as it’s not allowed.
Guess what…that’s a lie, because I’m going to show you how to do it securely.
- So you need to install something called expect on all your servers. This tool is used for interactive testing of scripts. It makes the script pass human typing where needed. You can pass variables to this and use it as a wrapper inside another script.
- “Yum install expect” on debian “apt-get install expect”
- Now what you want to do is log into your server as the user not root, and inside the home directory you want to setup the following to scripts
- Create a file called gotroot
- Vi gotroot, add the following below and save.
The script below is a wrapper script, that you will use inside another bash script later in this tutorial.
Usage would be
./gotroot <user> <host><userpass><rootpass>
These arguments will then get passed to the remote host and it will execute the send commands below in our case “ls –al”, and then once its done it will exit and log out of the server and return you to the host you started from. This script does not account for ssh fingerprinting, so you will need to ensure you fingerprint your user to each server before using this script. I will add fingerprinting in future, just got lazy.
What I like to do is..I will write a bash script that it going to do a bunch tasks, scp it over all the servers as my user, then comment out the ls –al section and uncomment the section where you can tell to run the bash script. This will then log in to the server and su to root, execute your bash script, exit and log out.
========================
#!/usr/bin/expect -f
set mypassword [lindex $argv 2]
set mypassword2 [lindex $argv 3]
set user [lindex $argv 0]
set host [lindex $argv 1]
spawn ssh -tq $user@$host
########################################################
#this section is only needed if you are NOT using ssh keys
#expect “Password:”
#send “$mypassword\r”
#expect “$ “
#########################################################
send “su -\r”
expect “Password:”
send “$mypassword2\r”
expect “$ “
#this will execute command on the remote host
send “ls -al\r”
expect “$ “
#this will execute script you want to run on remote host
#send “/home/nicktailor/script.pl\r”
#expect “$ “
#this command will exit the remote host
send “exit\r”
send “exit\r”
interact
==============================================
How to wrap this script so it will do any array of hosts within bash.
- Create a file called host
- Vi hosts and the following below in it.
- Also created a file called logs.txt “touch logs.txt”
This script will all you to use the above script as a wrapper and it will go and execute the command you want from got root to each host in the servers variable listed below.
In addition you it will prompt you the user name and root pass, and will not show he passwords you enter, it will prompt you the same way if you were to do “su –“. It will then take those credentials and use it for each host securely, the passwords will not show up in logs or history anywhere, as some security departments would have issues with that.
So you simply type “./hosts”
It will prompt you for whatever it requires to continue. Just be sure that you add the array of hosts you want to execute the tasks on, and that you have setup a ssh fingerprint as your user first. Expect scripts are extremely easy to learn, once you play with this.
=======================================
#!/bin/bash
#########################
#some colour constants #
#########################
CLR_txtblk=’\e[0;30m’ # Black – Regular
CLR_txtred=’\e[0;31m’ # Red
CLR_txtgrn=’\e[0;32m’ # Green
CLR_txtylw=’\e[0;33m’ # Yellow
CLR_txtblu=’\e[0;34m’ # Blue
CLR_txtpur=’\e[0;35m’ # Purple
CLR_txtcyn=’\e[0;36m’ # Cyan
CLR_txtwht=’\e[0;37m’ # White
CLR_bldblk=’\e[1;30m’ # Black – Bold
CLR_bldred=’\e[1;31m’ # Red
CLR_bldgrn=’\e[1;32m’ # Green
CLR_bldylw=’\e[1;33m’ # Yellow
CLR_bldblu=’\e[1;34m’ # Blue
CLR_bldpur=’\e[1;35m’ # Purple
CLR_bldcyn=’\e[1;36m’ # Cyan
CLR_bldwht=’\e[1;37m’ # White
CLR_unkblk=’\e[4;30m’ # Black – Underline
CLR_undred=’\e[4;31m’ # Red
CLR_undgrn=’\e[4;32m’ # Green
CLR_undylw=’\e[4;33m’ # Yellow
CLR_undblu=’\e[4;34m’ # Blue
CLR_undpur=’\e[4;35m’ # Purple
CLR_undcyn=’\e[4;36m’ # Cyan
CLR_undwht=’\e[4;37m’ # White
CLR_bakblk=’\e[40m’ # Black – Background
CLR_bakred=’\e[41m’ # Red
CLR_bakgrn=’\e[42m’ # Green
CLR_bakylw=’\e[43m’ # Yellow
CLR_bakblu=’\e[44m’ # Blue
CLR_bakpur=’\e[45m’ # Purple
CLR_bakcyn=’\e[46m’ # Cyan
CLR_bakwht=’\e[47m’ # White
CLR_txtrst=’\e[0m’ # Text Reset
#
#########################
SERVERS=”host1 host2 host3”
#echo -e “${CLR_bldgrn}Enter Servers (space seperated)${CLR_txtrst}”
#read -p “servers: ” SERVERS
echo -e “${CLR_bldgrn}Enter User${CLR_txtrst}”
read -p “user: ” USERNAME
echo -e “${CLR_bldgrn}Enter Password${CLR_txtrst}”
read -p “password: ” -s USERPW
echo
echo -e “${CLR_bldgrn}Enter Root Password${CLR_txtrst}”
read -p “password: ” -s ROOTPW
echo
for machine in $SERVERS; do
~/gotroot ${USERNAME} ${machine} ${USERPW} ${ROOTPW} 2>&1 | tee -a logs.txt
done
======================================
Hope you enjoyed this tutorial and if you have any questions email nick@nicktailor.com
How to do multi-threaded backups and restores for mysql
How to do multi-threaded backups and restores for mysql
So there are probably a lot of people out there who have the standard master-slave mysql database servers running with InnoDB and MyISAM Databases.
This not usually a problem unless you have high amount of traffic going to your databases using InnoDB, since mysql does not do multithreaded dumps or restores, this can be problematic if your replication is broken to the point where you need to do a full restore.
Now if your database was say 15gigs in size, consisting of Innodb and myisam db’s in a production environment this would be brutal, as you would need to lock the tables on the primary while your restoring to the slave. Since mysql does not do a multithreaded restores, this could take 12 hours or more, keep in mind this is dependent on hardware. To give you an idea the servers we had when we ran into this issue, to help you gauge your problem.
Xeon quad core, sata 1 T drives, 18 gigs of ram (Master and Slave)
Fortunately, there is a solution 🙂
There is a free application called xtrabackup by Percona which does multithreaded backup and restores of myisam and innodb combined. In this blog I will be explaining how to set it up, and what I did to minimize downtime for the businesses.
What you should consider doing
Since drive I/O is a factor with high traffic Database servers which can seriously impede performace significantly. We built new servers same specs but with SSD drives this time.
Xeon quad core, (sata3) 1T, (SSD) 120G 18 gigs of ram
Now this is not necessary, however if database traffic is high you should consider SSD or even fiber channel drives if your setup supports it.
Xtrabackup is free unless you use mysql enterprise, then its $5000/server to license it. Honestly using mysql enterprise in my opinion is just stupid, is exactly the same except you get support, the same support you could get online or irc on any forum which is probably better, why pay for something you don’t need to.
Install and setup
Note: This will need to be installed on both master and slave database servers, as this process will replace the mysqldump and restore method you use.
- rpm -Uhv http://www.percona.com/downloads/percona-release/percona-release-0.0-1.x86_64.rpm
- Yum install percona-xtrabackup.x86_64 (Master & Slave both servers)
Create backup
Note: There are number of ways you can do this. You can have it output to a /tmp directory while its doing the backup process, or you can have it output to stdout and compress to a directory. I will show you how to do both ways.
- Since innobackupex, which is the tool with xtrabackup we are going to use, looks at the /etc/my.cnf file for the data directory for mysql, we do not have to define a lot in our command string. For this example we do not setup a mysql password, however if you did you simply add –user <user> -pass <pass> to the string.
This process took 5 minutes on a 15gig Database with Xeon quad core, (sata3) 1T, (SSD) 120G 18Gram
2. Innobackupex <outputdirectory>
Eg. Innobackupex /test (this command will create another directory inside this one with a time stamp, it’s a fullback of all databases innodb and myisam uncompressed.)
3. innobackupex –stream=tar ./ | gzip – > /test/test.tar.gz (This command will do the same as the above except will output to stdout and compress the fullbackup into the tar file
Note: you also need to use the -i option to untar it eg. tar -ixvf test.tar.gz, ensure mysql is stopped on any slave before restoring, and dont forget to chown -R mysql:mysql the files after you restore the data to the data directory using the innobackupex –copy-back command.
Note: I have experienced issues with getting replication to start doing a full backup and restore on to a slave with innodb and myisam, using the innobackupex stream compression to gzip, after untarring for whatever reason the innodb log files had some corruption, which caused the slave to stop replication upon immediate connection of the master.
if the stream compression doesnt work do a uncompressed backup as shown above, and then rsync the data from your master to the slave via a gige switch if possible (ie. rsync -rva –numeric-ids <source> <destination>:/)
Our 15gig DB compressed to 3.4gigs
- Now copy tar file or directory to that innobackupex created to the slave server via scp
Scp * user@host: <-(edit accordingly)
Doing a Restore
Note: The beauty of this restore is it will be a multi-threaded restore utilizing multiple cores instead of just one, since our server data directory is now sitting on SSD, disk I/O will be almost nill, increasing performance significantly, and reducing load.
- On your primary database server log into mysql and lock the tables
- Mysql> FLUSH TABLES WITH READ LOCK;
- Now on your slave: To do a restore of all the databases its pretty easy.
- innobackupex –copy-back /test/2013-02-03_17-21-52/ (update the path to where ever the innobackupex files are.)
This took 3 mins to restore a 15gig DB with innodb and myisam for us on
Xeon quad core, (sata3) 1T, (SSD) 120G 18 gigs of ram
Setting up the backup crons
- Now if you were using mysqldump as part of your mysql backup process then you will need to change it to use the following.
- Create a directory on the slave called mysqldumps
- Create a file called backups.sh and save it.
- Add the following to it.
#!/bin/bash
innobackupex –stream=tar ./ | gzip – > /mysqldumps/innobackup-$(date +”%F”)
Note: that our backups are being stored on our sata3 drive and data directory resides on the SSD
- Now now add this to your crontab as root, again change the cron to run however often you need to run.
- 0 11,23 * * * /fullpath/ backups.sh
Setting up diskspacewatch for the SSD drive.
- Since the SSD drive is 120G, we need to setup alert to monitor to watch the space threshold. If you not have the resources to implement a tool to specifically to monitor diskspace, then you can write a script that watches the diskspace and send out an email alert in the event the threshold is reached.
- Run a df –h on your server find the partition you want it to watch edit (df /disk2) on the script to which ever partition you want it to watch, threshold is defined by ( if [ $usep -ge 80 ]; then)
- Create a file called diskspacewatch, add and save below
#!/bin/sh
df /disk2 | grep -vE ‘^Filesystem|tmpfs|cdrom’ | awk ‘{ print $5 ” ” $1 }’ | while read output;
do
echo $output
usep=$(echo $output | awk ‘{ print $1}’ | cut -d’%’ -f1 )
partition=$(echo $output | awk ‘{ print $2 }’ )
if [ $usep -ge 80 ]; then
echo “SSD Disk on slave database server Running out of space!! \”$partition
($usep%)\” on $(hostname) as on $(date)” |
mail -s “Alert: Almost out of disk space $usep%” nick@nicktailor.com
fi
done
- Now you want to setup a cron that runs this script every 1 hour, or however long you want
- 0 * * * * /path/diskspacewatch
That’s my tutorial on a mysql multithreaded backup and restore setup. If you have questions email nick@nicktailor.com
How to add a remote management ip to a bridged openbsd firewall
Adding Management IP to Open BSD Bridged Firewall
I am writing this because sometimes people set things up without setting up a remote management ip on servers and decide to do it later, only to find that now that firewall is running in a production environment and become more critical than it was originally suppose to be.
1. Ensure that you chosen an IP that is configured to the correct vlan
2. Edit /etc/hostname.rl0
Note: On a bridged firewall there will be usually two interfaces one will be the internal interface and the other will be the external interface. If you cat /etc/pf.conf you should see which is the external interface defined, this is the file you will be editing to add the remote management ip.
less /etc/hostname.rl0
up
inet 192.168.1.35 255.255.255.0
or
inet 192.168.1.35/24 (this one seems to work better in my experience)
up
3. Edit /etc/mygate (This is where you configure the gateway the management ip will be using.)
less /etc/mygate
192.168.1.1
4. Edit /etc/rc.conf
less /etc/rc.conf (the sshd_flags should look like the illustrated below)
…
sshd_flags=”” # for normal use: “”
5. Edit /etc/ssh/sshd_config
less /etc/ssh/sshd_config (Ensure that you allow root login or keys if you are using keys)
…
PermitRootLogin yes
6. You will also need to ensure that the firewall rules on pf.conf allow the traffic to come in on the interface and port 22 for ssh for tcp and udp
vi /etc/pf.conf
add something like the example below.
Example
pass in log quick on $external_interface proto tcp from $allowed_hosts to 192.168.1.35 port 22 keep state
pass in log quick on $external_interface proto udp from any to 192.168.1.35
6. Reboot Server.
In a Production Environment you probably want to avoid a reboot of the firewall, you can follow the steps below to help you achieve this.
Adding Management IP without Rebooting server
1. Check to see which interface is the external_interface in /etc/pf.conf.
In this case we will assume it is rl0:
2. Run these from the command line. This will set the IP/route on-the-fly, not requiring a reboot.
ifconfig rl0 inet <ip address> <netmask>
route add default <gateway>
or you can use
route add default gw 192.168.1.254 eth0
or
ip route add default via <gateway>
Note: if you make a mistake by adding the wrong gateway and bring everything down, you can delete the gateway on the fly as well, by using something similar to the example below
————————————————————————————
How to delete the gateway on the fly if you make an error
Example
ip route delete default
————————————————————————————–
3. Add this to /etc/hostname.rl0
vi /etc/hostname.rl0 add line: inet <ip address> netmask <netmask>
4. Add your gateway.
vi /etc/mygate add line: <gateway>
5. Modify the SSH configuraiton.
vi /etc/ssh/sshd_config Set to allow root and password logins
6. Run SSH.
/usr/sbin/sshd
7. Do not forget to update the firewall rules in /etc/pf.conf to allow traffic on the external interface to come in on the port 22
Example
pass in log quick on $external_interface proto tcp from $allowed_hosts to 192.168.1.35 port 22 keep state
pass in log quick on $external_interface proto udp from any to 192.168.1.35
8. You should now be able to test the connection with a telnet command from outside and see if you can connect to ssh remotely
telnet 192.168.1.35 22
Cheers
Hope this has helped you email nick@nicktailor.com if you have questions
How to setup your own cloud SAN storage at home using FreeNAS and a VM
How to setup your own Cloud SAN storage at home using FREENAS and a VM
So, I am writing this blog post for others who want to understand how SAN and NAS storage systems work. I had a colleague of mine suggest that I should setup my own NAS at home. I decided that it was a great idea. This tutorial will teach you how to setup a NAS using virtual machines for the purposes of testing and learning.
It will help you understand the fundamentals of what is involved in setting up a NAS and how they work. There are commercial applications such as NETAPP that provide far more complexity in terms of functionality, however the principles are pretty much the same, and relatively easy to pick up on variations should you need to learn them on the fly in a job.
- So one of the key benefits of setting up a NAS in VM is it allows you setup a sort of home based storage cloud solution
- You may add multiple USB storage devices where you will be able to create volumes of various file systems types, essentially giving you the cloud type solution.
- This will also allow various devices you have to mount the storage volumes
- At the moment VirtualBox allows up to 2 terabytes , I’m sure this will increase as future revisions come to pass.
Phase 1
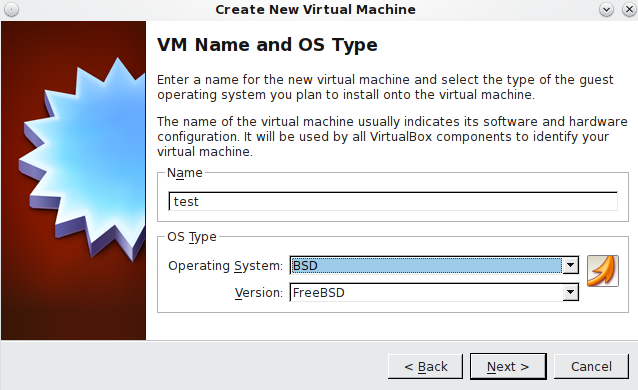
Create a new virtualbox VM for freeNAS
- Download freeNAS
http://www.nicktailor.com/files/ FreeNAS-8.3.0-RELEASE-x86.iso
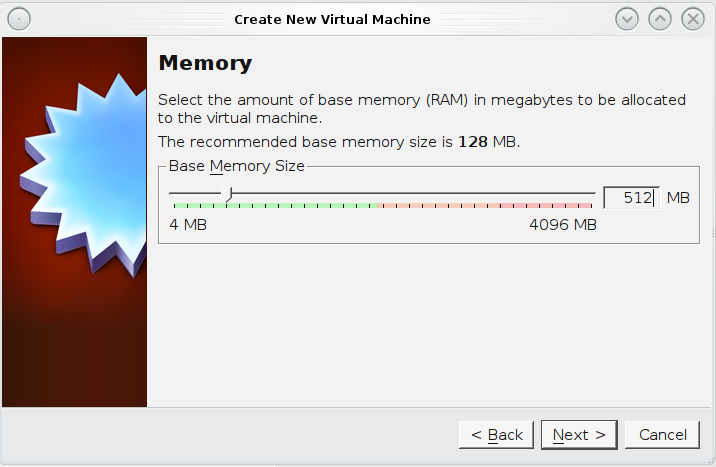
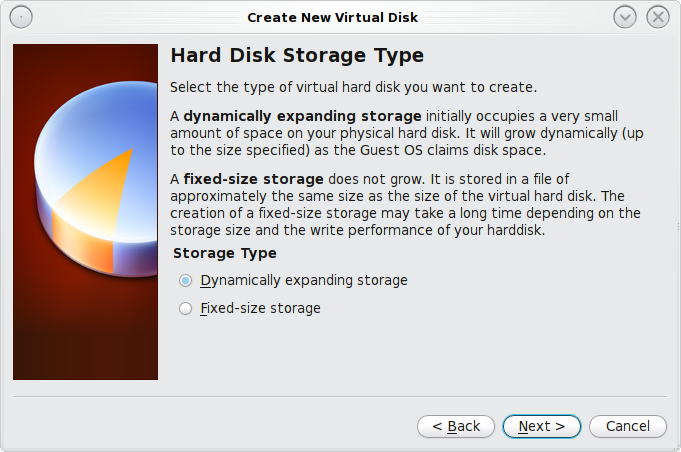
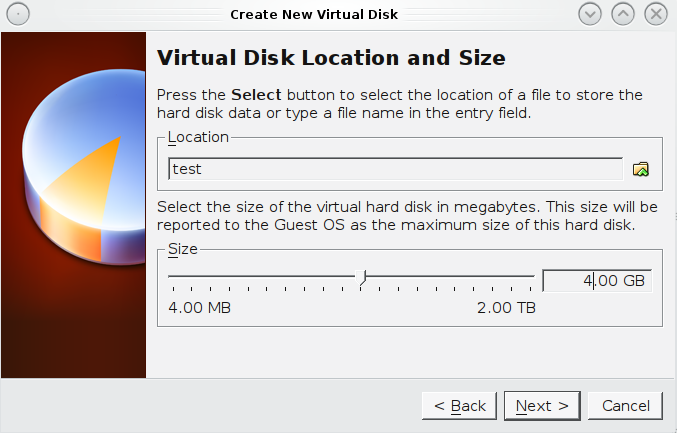
- Create a new VM in virtual box with the following configurations
- Ensure that you have over 10GB of HDspace and at least 512mb ram for you VM (otherwise your volume creations will fail)
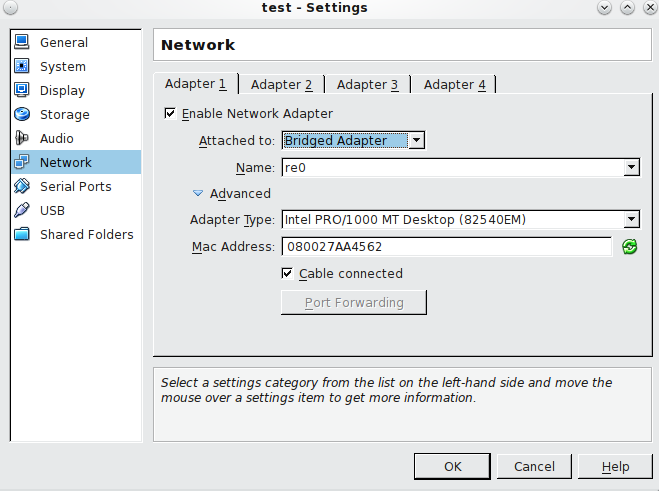
- Network Configuration
i. Nic 1 (NAT)
ii. Nic 2 (Bridged Adapter, use wireless if its supported)
- On the settings tab you should enable USB Controller, you will need to install an additional packages for Virtualbox to enable this feature as it doesn’t come out of the box. The advantage of this is will allow you add multiple USB devices and use them as storage. Download and install the Oracle VM VirtualBox Extension Pack that matches your version of VirtualBox. The extension pack enables USB support.
- Next you want to click on the Storage tab under the IDE controller there should be a EMPTY and a icon of a CD, on the far right of that you should see Attributes “CD/DVD Drive” and the very far right of that a CD, click on that and find the FreeNAS iso you downloaded, click okay
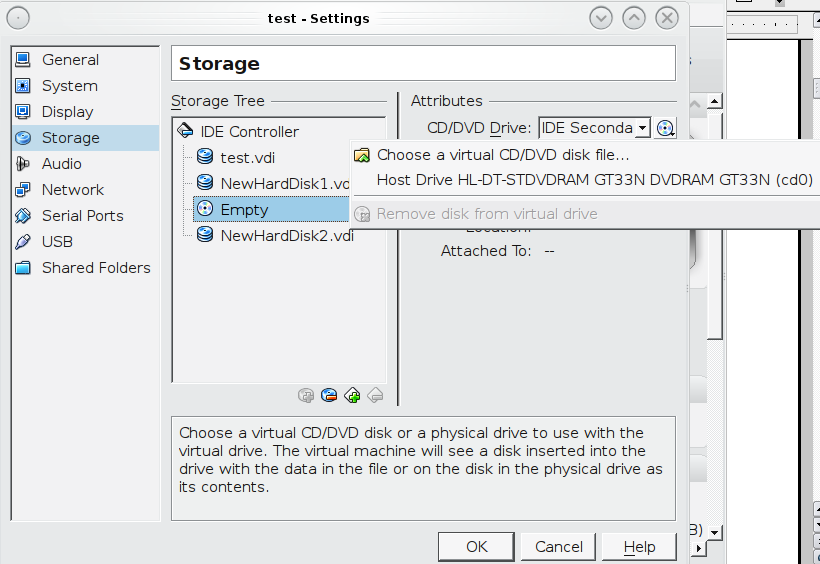
- Now click the okay and go back to start the VM
Phase 2 Configuring FreeNAS
- Once freeNAS is installed you will get a configuration screen. The primary interface you should leave alone, as this most like dhcp’d already.
- You should be be able to ping externally from the freeNAS VM, if you need to look at your network configuration.
- Typically the primary interface will use a non-routable address 10.0.2.10 which is being NAT’d externally
- So if your home network is like most people you’re probably using a dhcp pool in 192.168.1.1-100 addresses. So you want to configure the second nic with within your home network pool (eg. 192.168.1.138/255.255.255.0) address and a netmask.
- You will not need to set a default gateway, since the primary interface is already using a gateway
- Once you have done this go to the command prompt on your host machine, so this is no longer in the VM, its on the physical machine that runs Virtualbox and see if you can ping the address you just assigned in FreeNAS. If you can’t ping the FreeNAS Ip you assigned try restarting the VM.
- Next you will want to ensure that your router of firewall allows port 80 on the ip address you assigned to freeNAS.
Phase 3 setting up ISCSI SAN with freeNAS
Note- any client Machine you want to connect to the iscsi SAN/NAS must have a iscsi controller, so if you are using a VM ensure that you have added the iscsi controller under the settings of your vm.
- So go to your browser and go to the webGUI
- Open a browser and login to FreeNAS 8.2.
- Navigate to Storage > Active Volumes:

- Click Volume Manager.
- Enter a Volume Name, select disk(s), select Filesystem type (ZFS has some neat features), then click Add Volume:

- Click the Create ZFS Volume button:

- Enter a ZFS Volume Name, specify the volume size, then click Add ZFS Volume:

- Navigate to Services > Core, and turn on iSCSI:

- Click the wrench icon next to iSCSI.
- Navigate to iSCSI > Portals, click Add Portal. Select 0.0.0.0 as the IP Address (this means it will listen on all IPs). Click OK:

- Navigate to iSCSI > Initiators, click Add Initiator. Leave ALL in both fields to allow all client connections from any network:

- Navigate to iSCSI > Authorized Access, click Add iSCSI Authorized Access. Enter a User andSecret:
Note: If you dont want create a user for your home SAN, just because it makes life easier, then skip the user Access stuff and under the Target Global Configuration just select
Discovery Auth method :Auto
Discovery Auth Group : None

- Navigate to iSCSI > Target, click Add Target. Enter a Target Name and Alias. Select thePortal and InitiatorGroup IDs, and Authentication Group number:

- Navigate to iSCSI > Device Extents, click Add Extent. Enter an Extent Name and select aVolume:

- Navigate to iSCSI > Associated Targets, click Add Extent to Target. Select a Target andExtent to map together:

- Navigate to iSCSI > Target Global Configuration. Customise your Base Name, select CHAPfor Discovery Auth Method and select your Discovery Auth Group. Leave other settings unless you know what you’re doing. Scroll to bottom of page to Save:

- All done. Now you need to connect to the iSCSI SAN using an iSCSI Initiator.
- If you get any connection problems, try restarting the iSCSI service here:
- If you don’t trust the GUI and want to confirm the service has definitely started, you can runservice -e at the shell prompt, and look for istgt:

Cheers Hope this helped you understand how it all works email nick@nicktailor.com if you have questions
How to setup grub on a USB stick
How to setup grub manually
- What to do when you have a grub error, you can simply reinstall grub.
- In this tutorial I will explain how to achieve this.
- You will learn how to setup a grub disk and install grub
Before we start: How Grub Calls Stuff
This is the only odd thing in grub: It doesn’t call the disks as we are used to. But don’t worry, is not as weird as with devfs (/dev/boo/lun/foo/bar/../../disk/stuff/…/…/and/so/on).
It’s only a bit different:
- Grub uses brackets to declare a device
- The /dev/ part is not used
- device numbers and partitions are defined with numbers starting from 0
This example will show you how it works (It’s easier to understand as it is to explain):
Linux standard GRUB
———————————–
/dev/hda1 (hd0,0)
/dev/hda2 (hd0,1)
/dev/hdd1 (hd3,0)
Even Easier : a=0 b=1 c=2 d=3 and the partition is N-1
NEXT STEP
- Put your USB disk into working linux computer (don’t mount it). On my computer it is typically recognized as /dev/sda. If your USB stick is recognized differently (and/or your hard disk is /dev/sda) then you must replace all the instances below of /dev/sda with whatever your actual USB stick is being recognized. This is, well, kinda important.
- Create a single partition. I typically do this with:
- fdisk /dev/sda
Feel free to create a FAT32 partition if you want to use this stick on different machines with different operating systems (including Windows).
- Mount the partition you just created:
- sudo mount /dev/sda1 /mnt
- sudo grub-install –no-floppy –root-directory=/mnt /dev/sda
- Install GRUB:
Note – make not of “–root-directory=/mnt” <- (this should match the directory you mounted your usb stick)
Also if you get an error that says you need to use blocklists, you can add –force to the above Install grub line.
- sudo grub-install –no-floppy –force –root-directory=/mnt /dev/sda
That should of create a /mnt/boot/grub directory.
- Now comes the hard part. You need a grub configuration that will make sense for the server you are booting.
If you are using grub1…
Hopefully you have a copy of the menu.lst file from the server. In that case, simply copy it to /mnt/boot/grub/ and you are ready to go. Otherwise, you’ll need to craft one. Below is a sample.
# uncomment these lines if you want to send grub to a serial console
#serial –unit=0 –speed=115200 –word=8 –parity=no –stop=1
#terminal serial
default 0
timeout 5
color cyan/blue white/blue
# simple setup
title Debian GNU/Linux, kernel 2.6.26-2-686
root (hd0,5)
kernel /boot/vmlinuz-2.6.26-2-686 root=/dev/hda6 ro
initrd /boot/initrd.img-2.6.26-2-686
# here’s a more complicated one
title Debian GNU/Linux, kernel 2.6.26-2-vserver-amd64
root (hd0,0)
kernel /vmlinuz-2.6.26-2-vserver-amd64 root=/dev/mapper/vg_pianeta0-root \
ro console=ttyS0,115200n8 cryptopts=target=md1_crypt,source=/dev/md1 \
cryptopts=target=md2_crypt,source=/dev/md2,lvm=vg_pianeta0-root
initrd /initrd.img-2.6.26-2-vserver-amd64
If you are using grub2…
grub-mkconfig -o /mnt/boot/grub/grub.cfg
Then edit. You might want something like:
serial –unit=0 –speed=115200 –word=8 –parity=no –stop=1 terminalinput serial terminaloutput serial insmod raid insmod mdraid insmod part_gpt set default=0 set timeout=5
menuentry “Debian GNU/Linux, with Linux 2.6.32-trunk-vserver-amd64” –class debian –class gnu-linux –class gnu –class os { set root='(hd0,1)’ search –no-floppy –fs-uuid –set 7682a24c-b06f-456b-b3d4-bcb7294d81e2 echo Loading Linux 2.6.32-trunk-vserver-amd64 … linux /vmlinuz-2.6.32-trunk-vserver-amd64 root=/dev/mapper/vg_chicken0-root ro quiet echo Loading initial ramdisk … initrd /initrd.img-2.6.32-trunk-vserver-amd64 }
- Put the USB stick into the target computer, configure it to boot from the USB stick via bios, and then you should see the GRUB menu come up.
- It’s possible that your computer will just boot with your menu.lst file. In that case – congrats! See the last step below to figure out how to ensure it can boot without your USB stick. On the other hand, if it fails, you’ll need to experimentally figure out which disk has which partitions and which kernels. Fortunately grub supports tab completion which makes this job easier:
- When the grub menu comes up, pick from the menu list the most likely candidate and press ‘e’ for edit.
- You should see the various lines from the stanzas for the list item you picked (i.e. a root, kernel, and initrd stanza). You may use the up/down arrows to select a line. If that doesn’t work, look for hints on the screen for how to get around. Going left and right on a given line may require Ctl-b and Ctl-f for back and forward. You also may need to use the delete key (not backspace) to delete characters
- Select a line, delete the characters from the end of the line, and then try tab completion with various options. For example, on the root line try typing simply:
root (
- And then tab. You should be presented with the available disks (numbered 0 and up). Try typing one of the disks and hitting tab and you should be presented with the available partitions. Continue this process until you find the one that seems right.
- When you are done and you have successfully booted, you can ensure that boots will work without the usb key by installing grub on all available disks:
- grub-install /dev/sda
grub-install /dev/sdb
If you have questions email nick@nicktailor.com